Windows Server on Rumble Cloud
Important: It is your responsibility to ensure all licensing requirements are met.
- Rumble Cloud does not provide any licensing for Microsoft products
- You must contact your license provider and ensure you can install Microsoft Software on public clouds prior to this installation
Required Software
- Windows Server 2022 or 2025 ISO image to install Windows Server
-
Windows VirtIO drivers available in the following locations:
-
Cloudbase-Init software available in the following locations:
Step 1: Upload the Install Media
The installation media needs to be created in your OpenStack project prior to starting this process. It must have certain metadata attached to it in order to install successfully.
Installation Methods
Terraform method:
locals {
  virtio_drivers_iso      = "https://fedorapeople.org/groups/virt/virtio-win/direct-downloads/stable-virtio/virtio-win.iso"
  windows_server_2022_iso = "https://software-static.download.prss.microsoft.com/sg/download/888969d5-f34g-4e03-ac9d-1f9786c66749/SERVER_EVAL_x64FRE_en-us.iso"
  windows_server_2025_iso = "https://software-static.download.prss.microsoft.com/dbazure/888969d5-f34g-4e03-ac9d-1f9786c66749/26100.1742.240906-0331.ge_release_svc_refresh_SERVER_EVAL_x64FRE_en-us.iso"
}

resource "openstack_images_image_v2" "virtio_drivers" {
  name             = "windows-virtio-drivers.iso"
  image_source_url = local.virtio_drivers_iso
  web_download     = true
  visibility       = "private"
  container_format = "bare"
  disk_format      = "iso"

  properties = {
    description         = "Windows Server VirtIO Drivers"
    hw_qemu_guest_agent = "no"
    os_distro           = "windows"
    os_version          = "VirtIO"
    usage_type          = "Windows Drivers"
  }
}

resource "openstack_images_image_v2" "windows_2022" {
  name             = "windows-server-2022.iso"
  image_source_url = local.windows_server_2022_iso
  web_download     = true
  visibility       = "private"
  container_format = "bare"
  disk_format      = "iso"

  properties = {
    description         = "Windows Server 2022 Installation Media"
    hw_qemu_guest_agent = "no"
    os_admin_user       = "administrator"
    os_distro           = "windows"
    os_version          = "2022"
    usage_type          = "common"
  }
}

resource "openstack_images_image_v2" "windows_2025" {
  name             = "windows-server-2025.iso"
  image_source_url = local.windows_server_2025_iso
  web_download     = true
  visibility       = "private"
  container_format = "bare"
  disk_format      = "iso"

  properties = {
    description         = "Windows Server 2025 Installation Media"
    hw_qemu_guest_agent = "no"
    os_admin_user       = "administrator"
    os_distro           = "windows"
    os_version          = "2025"
    usage_type          = "common"
  }
}
OpenStack command line:
#!/usr/bin/env bash

openstack image import \
  --uri "https://software-static.download.prss.microsoft.com/sg/download/888969d5-f34g-4e03-ac9d-1f9786c66749/SERVER_EVAL_x64FRE_en-us.iso" \
  --method "web-download" \
  --disk-format iso \
  --container-format bare \
  --private \
  --import \
  --min-disk 6 \
  --min-ram 16000 \
  --progress \
  windows-server-2022.iso

openstack image import \
  --uri "https://software-static.download.prss.microsoft.com/dbazure/888969d5-f34g-4e03-ac9d-1f9786c66749/26100.1742.240906-0331.ge_release_svc_refresh_SERVER_EVAL_x64FRE_en-us.iso" \
  --method "web-download" \
  --disk-format iso \
  --container-format bare \
  --private \
  --import \
  --min-disk 6 \
  --min-ram 16000 \
  --progress \
  windows-server-2022.iso

openstack image import \
  --uri "https://fedorapeople.org/groups/virt/virtio-win/direct-downloads/stable-virtio/virtio-win.iso" \
  --method "web-download" \
  --disk-format iso \
  --container-format bare \
  --private \
  --import \
  --min-disk 6 \
  --min-ram 16000 \
  --progress \
  windows-virtio-drivers.iso
Step 2: Creating the Golden Master VM
You will now need to create a “Golden Master” virtual machine image. This is the image you will use to create virtual machines and all steps must be taken to create an OpenStack compatible virtual machine.
The most correct way to perform this is via Terraform, since the command line version requires the Nova command line utility, which does not function in Rumble Cloud for users.
Please replace all placeholders with identifiers relevant to your environment and cloud project.
data "openstack_compute_flavor_v2" "m2a-xlarge" {
  name = "m2a.xlarge"
}

data "openstack_networking_network_v2" "public" {
  name = "PublicEphemeral"
}

resource "openstack_compute_keypair_v2" "administrator" {
  name = "build_windows_server"
}

resource "openstack_blockstorage_volume_v3" "windows_installer" {
  name        = "win_server.iso"
  description = "Windows Server installation media."
  size        = 6
  image_id    = "<PLACEHOLDER>"
}

resource "openstack_blockstorage_volume_v3" "windows_virtio" {
  name        = "virtio_drivers.iso"
  description = "Windows Server driver disk."
  size        = 1
  image_id    = "<PLACEHOLDER>"
}

resource "openstack_blockstorage_volume_v3" "golden_master" {
  name        = "windows_server_golden_master"
  description = "Windows Server build disk."
  size        = 64
}

resource "openstack_compute_instance_v2" "golden_master" {
  name            = "build_windows_server_2025_${random_string.generation.id}"
  flavor_id       = data.openstack_compute_flavor_v2.m2a-xlarge.id
  key_pair        = openstack_compute_keypair_v2.administrator.name
  security_groups = [<PLACEHOLDER>]

  block_device {
    boot_index            = 0
    uuid                  = openstack_blockstorage_volume_v3.windows_installer.id
    delete_on_termination = true
    destination_type      = "volume"
    source_type           = "volume"
    disk_bus              = "ide"
    device_type           = "cdrom"
  }

  block_device {
    boot_index            = 1
    uuid                  = openstack_blockstorage_volume_v3.windows_virtio.id
    delete_on_termination = true
    destination_type      = "volume"
    source_type           = "volume"
    disk_bus              = "ide"
    device_type           = "cdrom"
  }

  block_device {
    boot_index            = 2
    uuid                  = openstack_blockstorage_volume_v3.golden_master.id
    delete_on_termination = true
    destination_type      = "volume"
    source_type           = "volume"
  }

  network {
    name = data.openstack_networking_network_v2.public.name
  }

  lifecycle {
    ignore_changes = [power_state]
  }
}
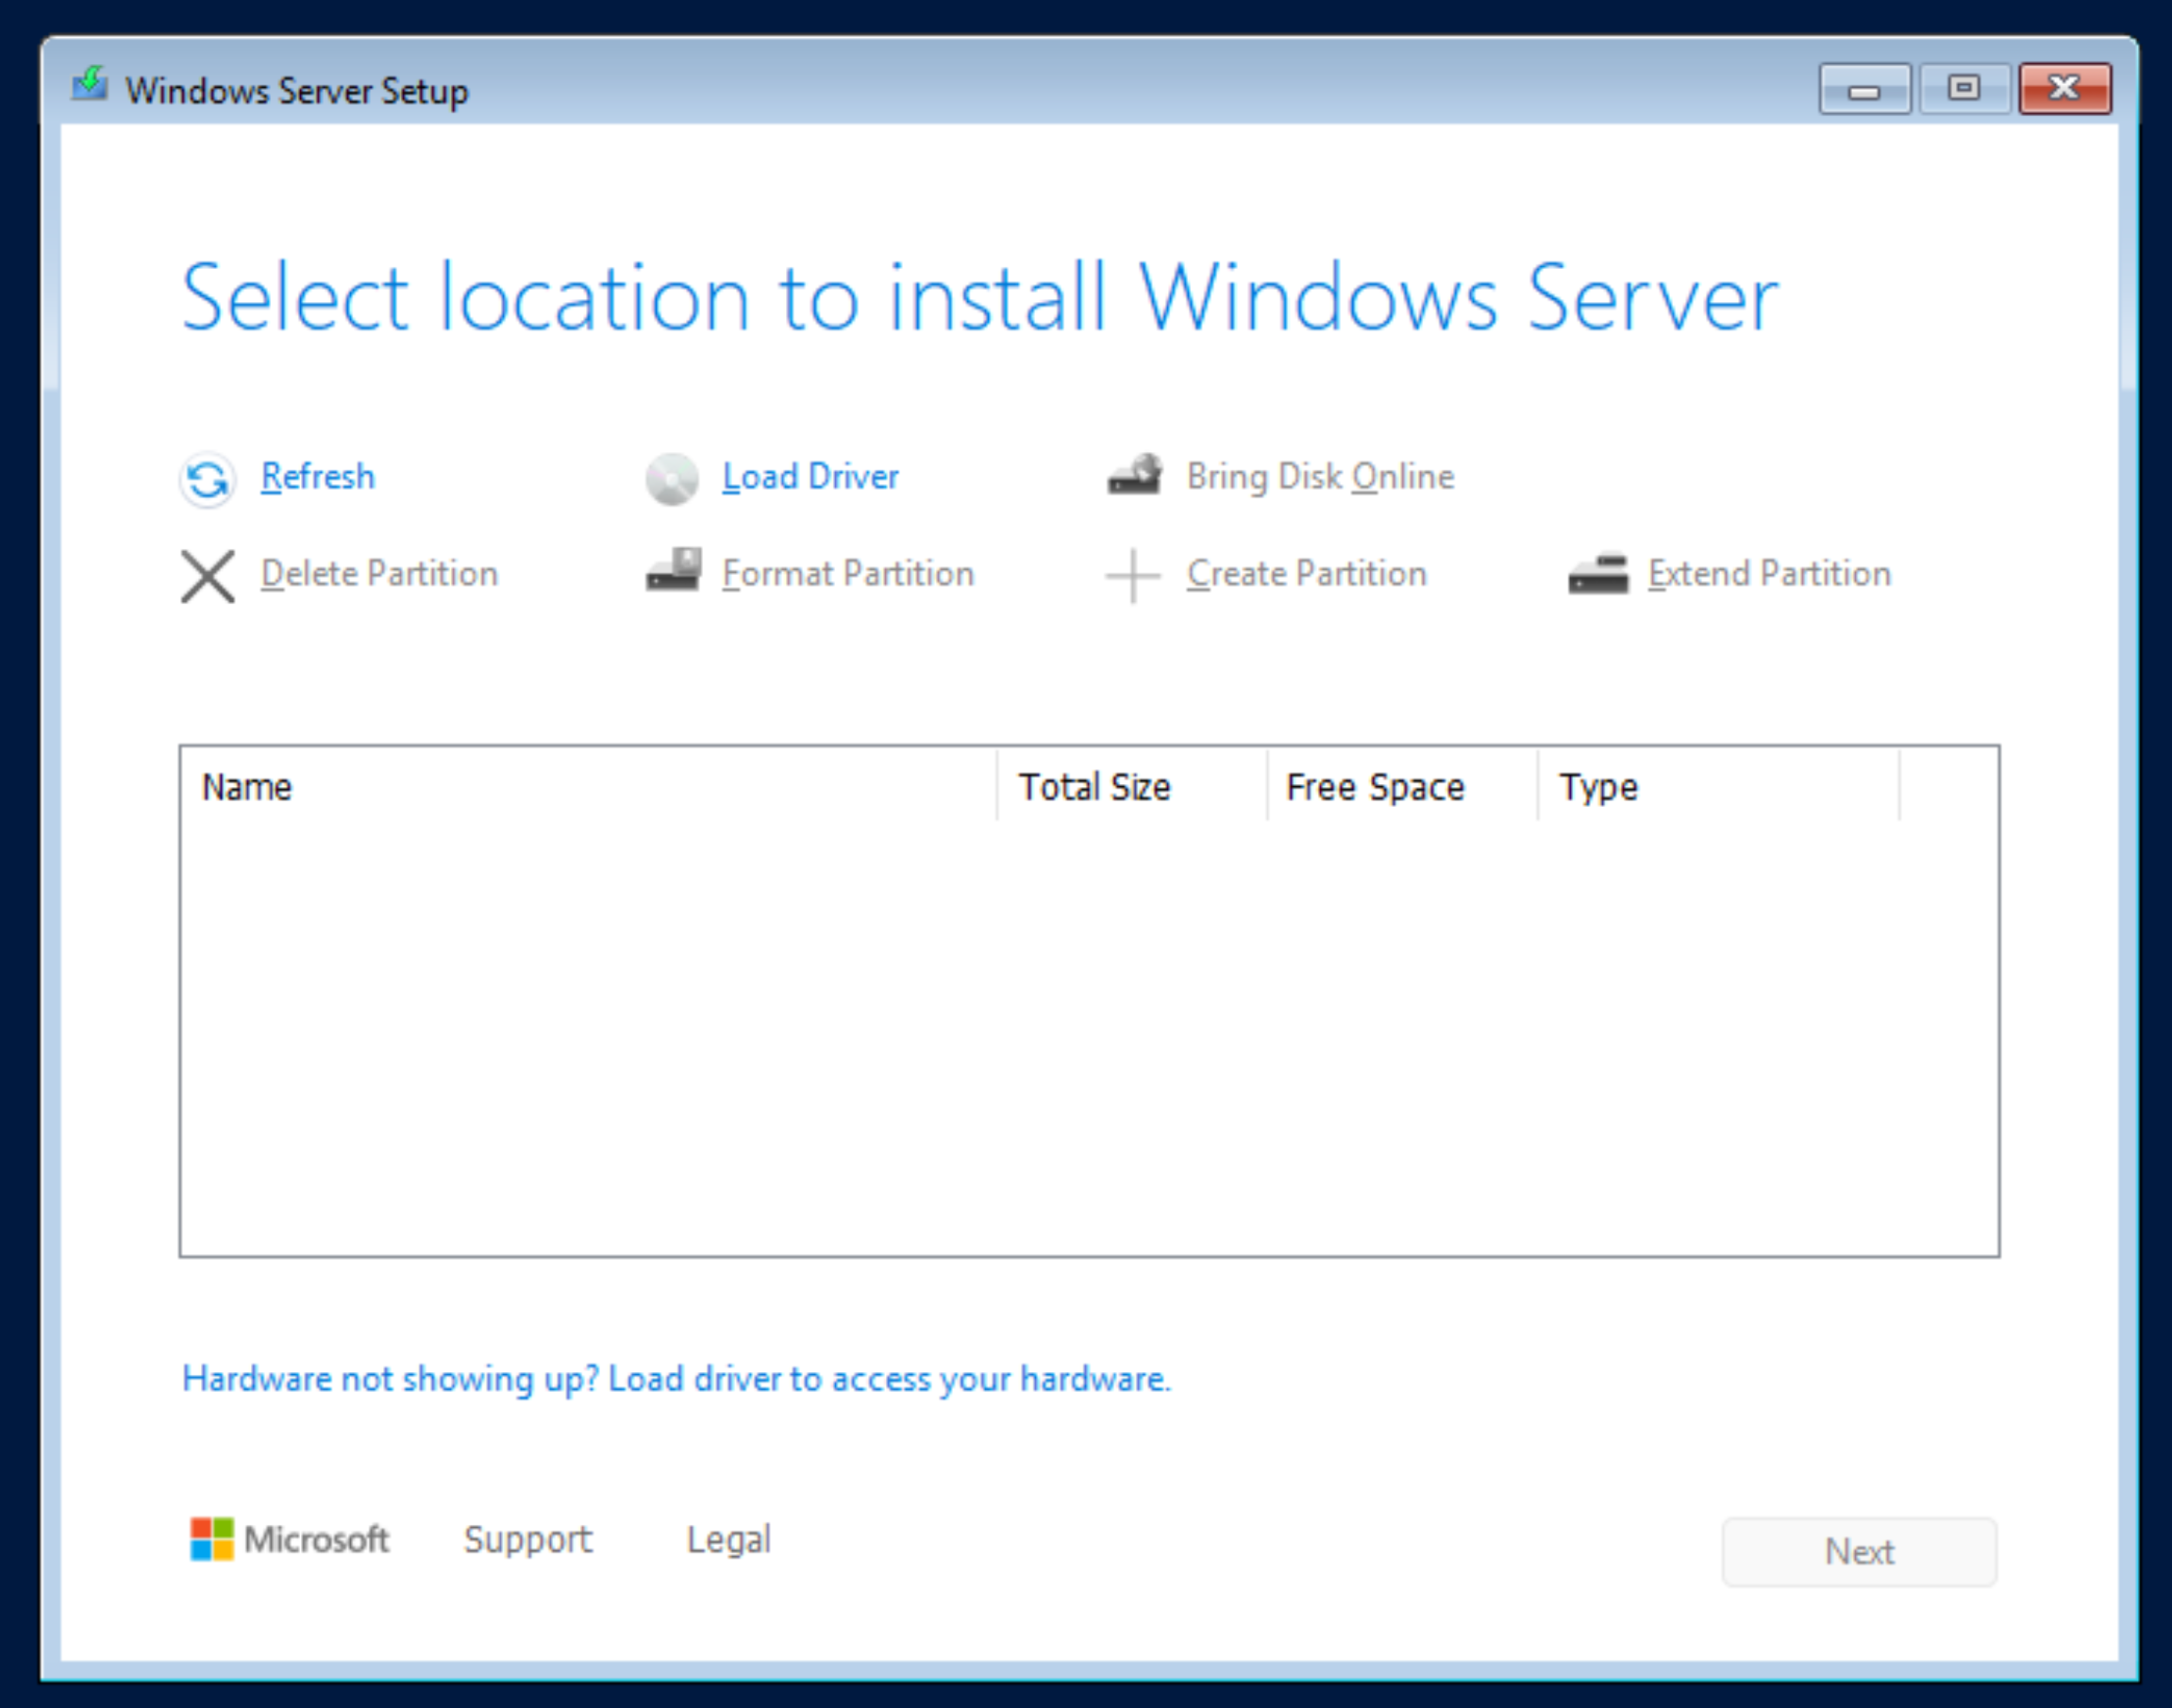
Step 3: Installing Windows
Once the instance is booted and running, you can use the console in the Skyline GUI for Rumble Cloud to access the server.
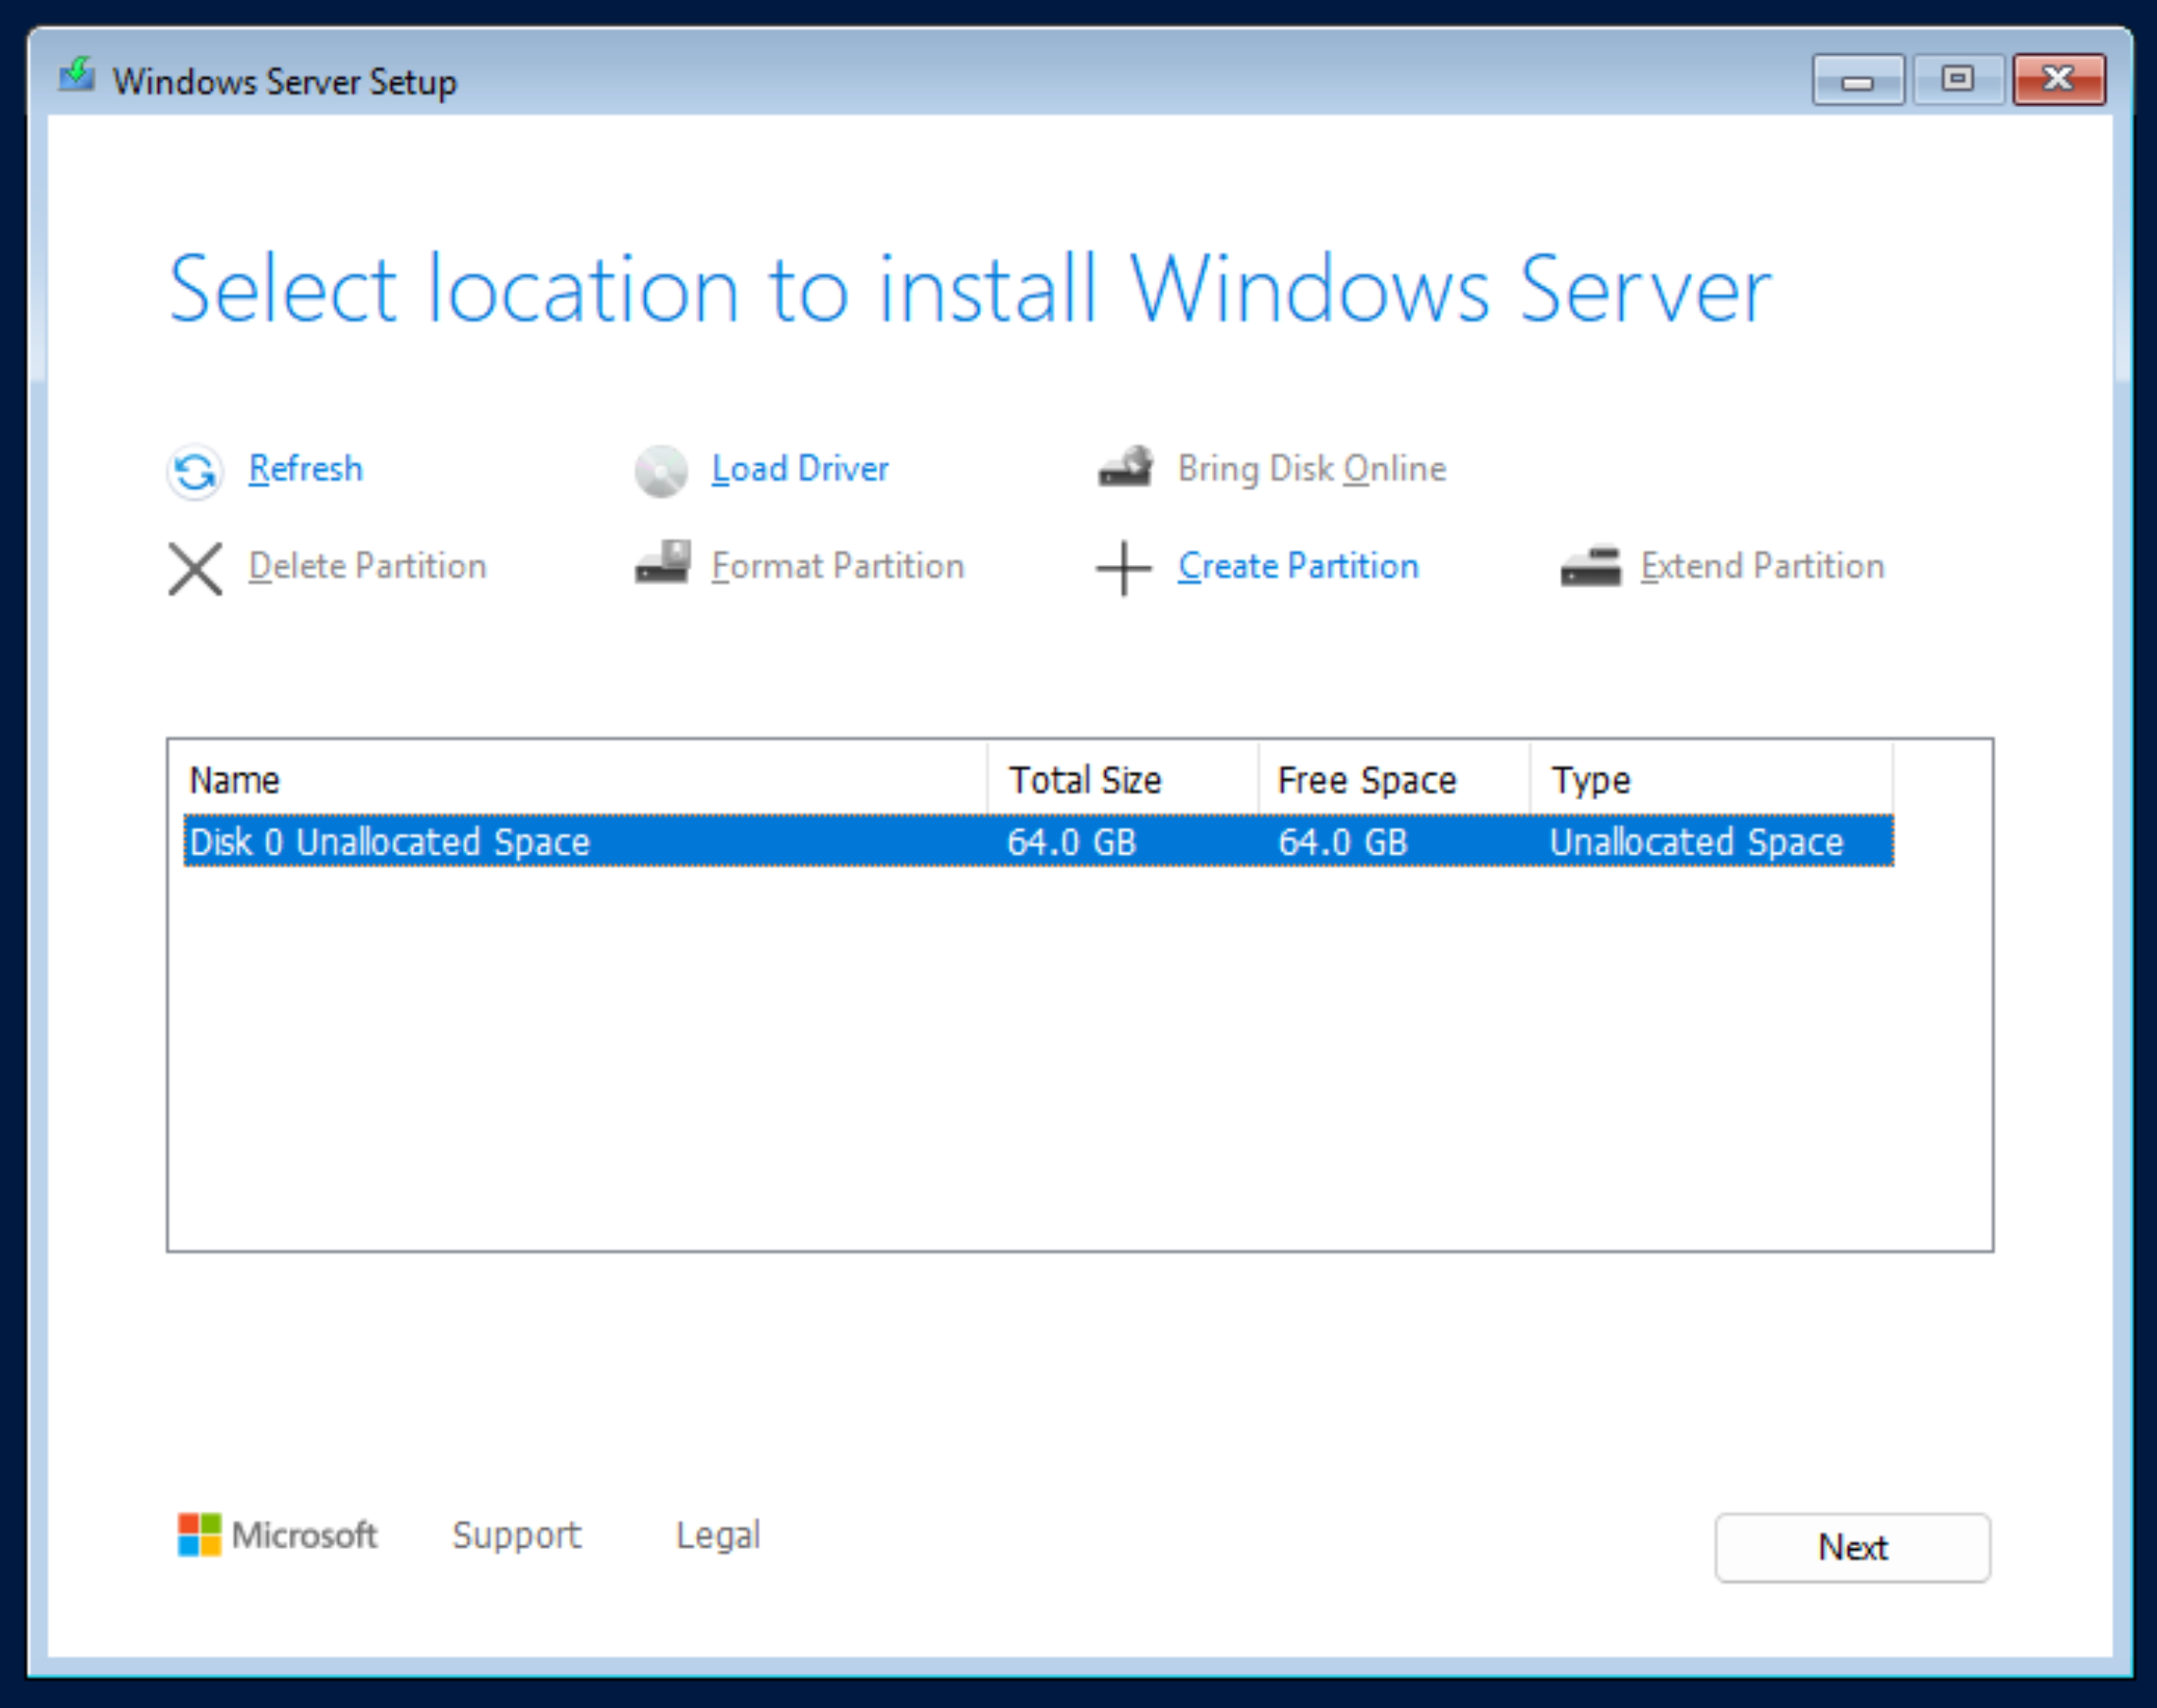
You will want to install the server as per normal, until you reach the disk selection page, which will be blank.
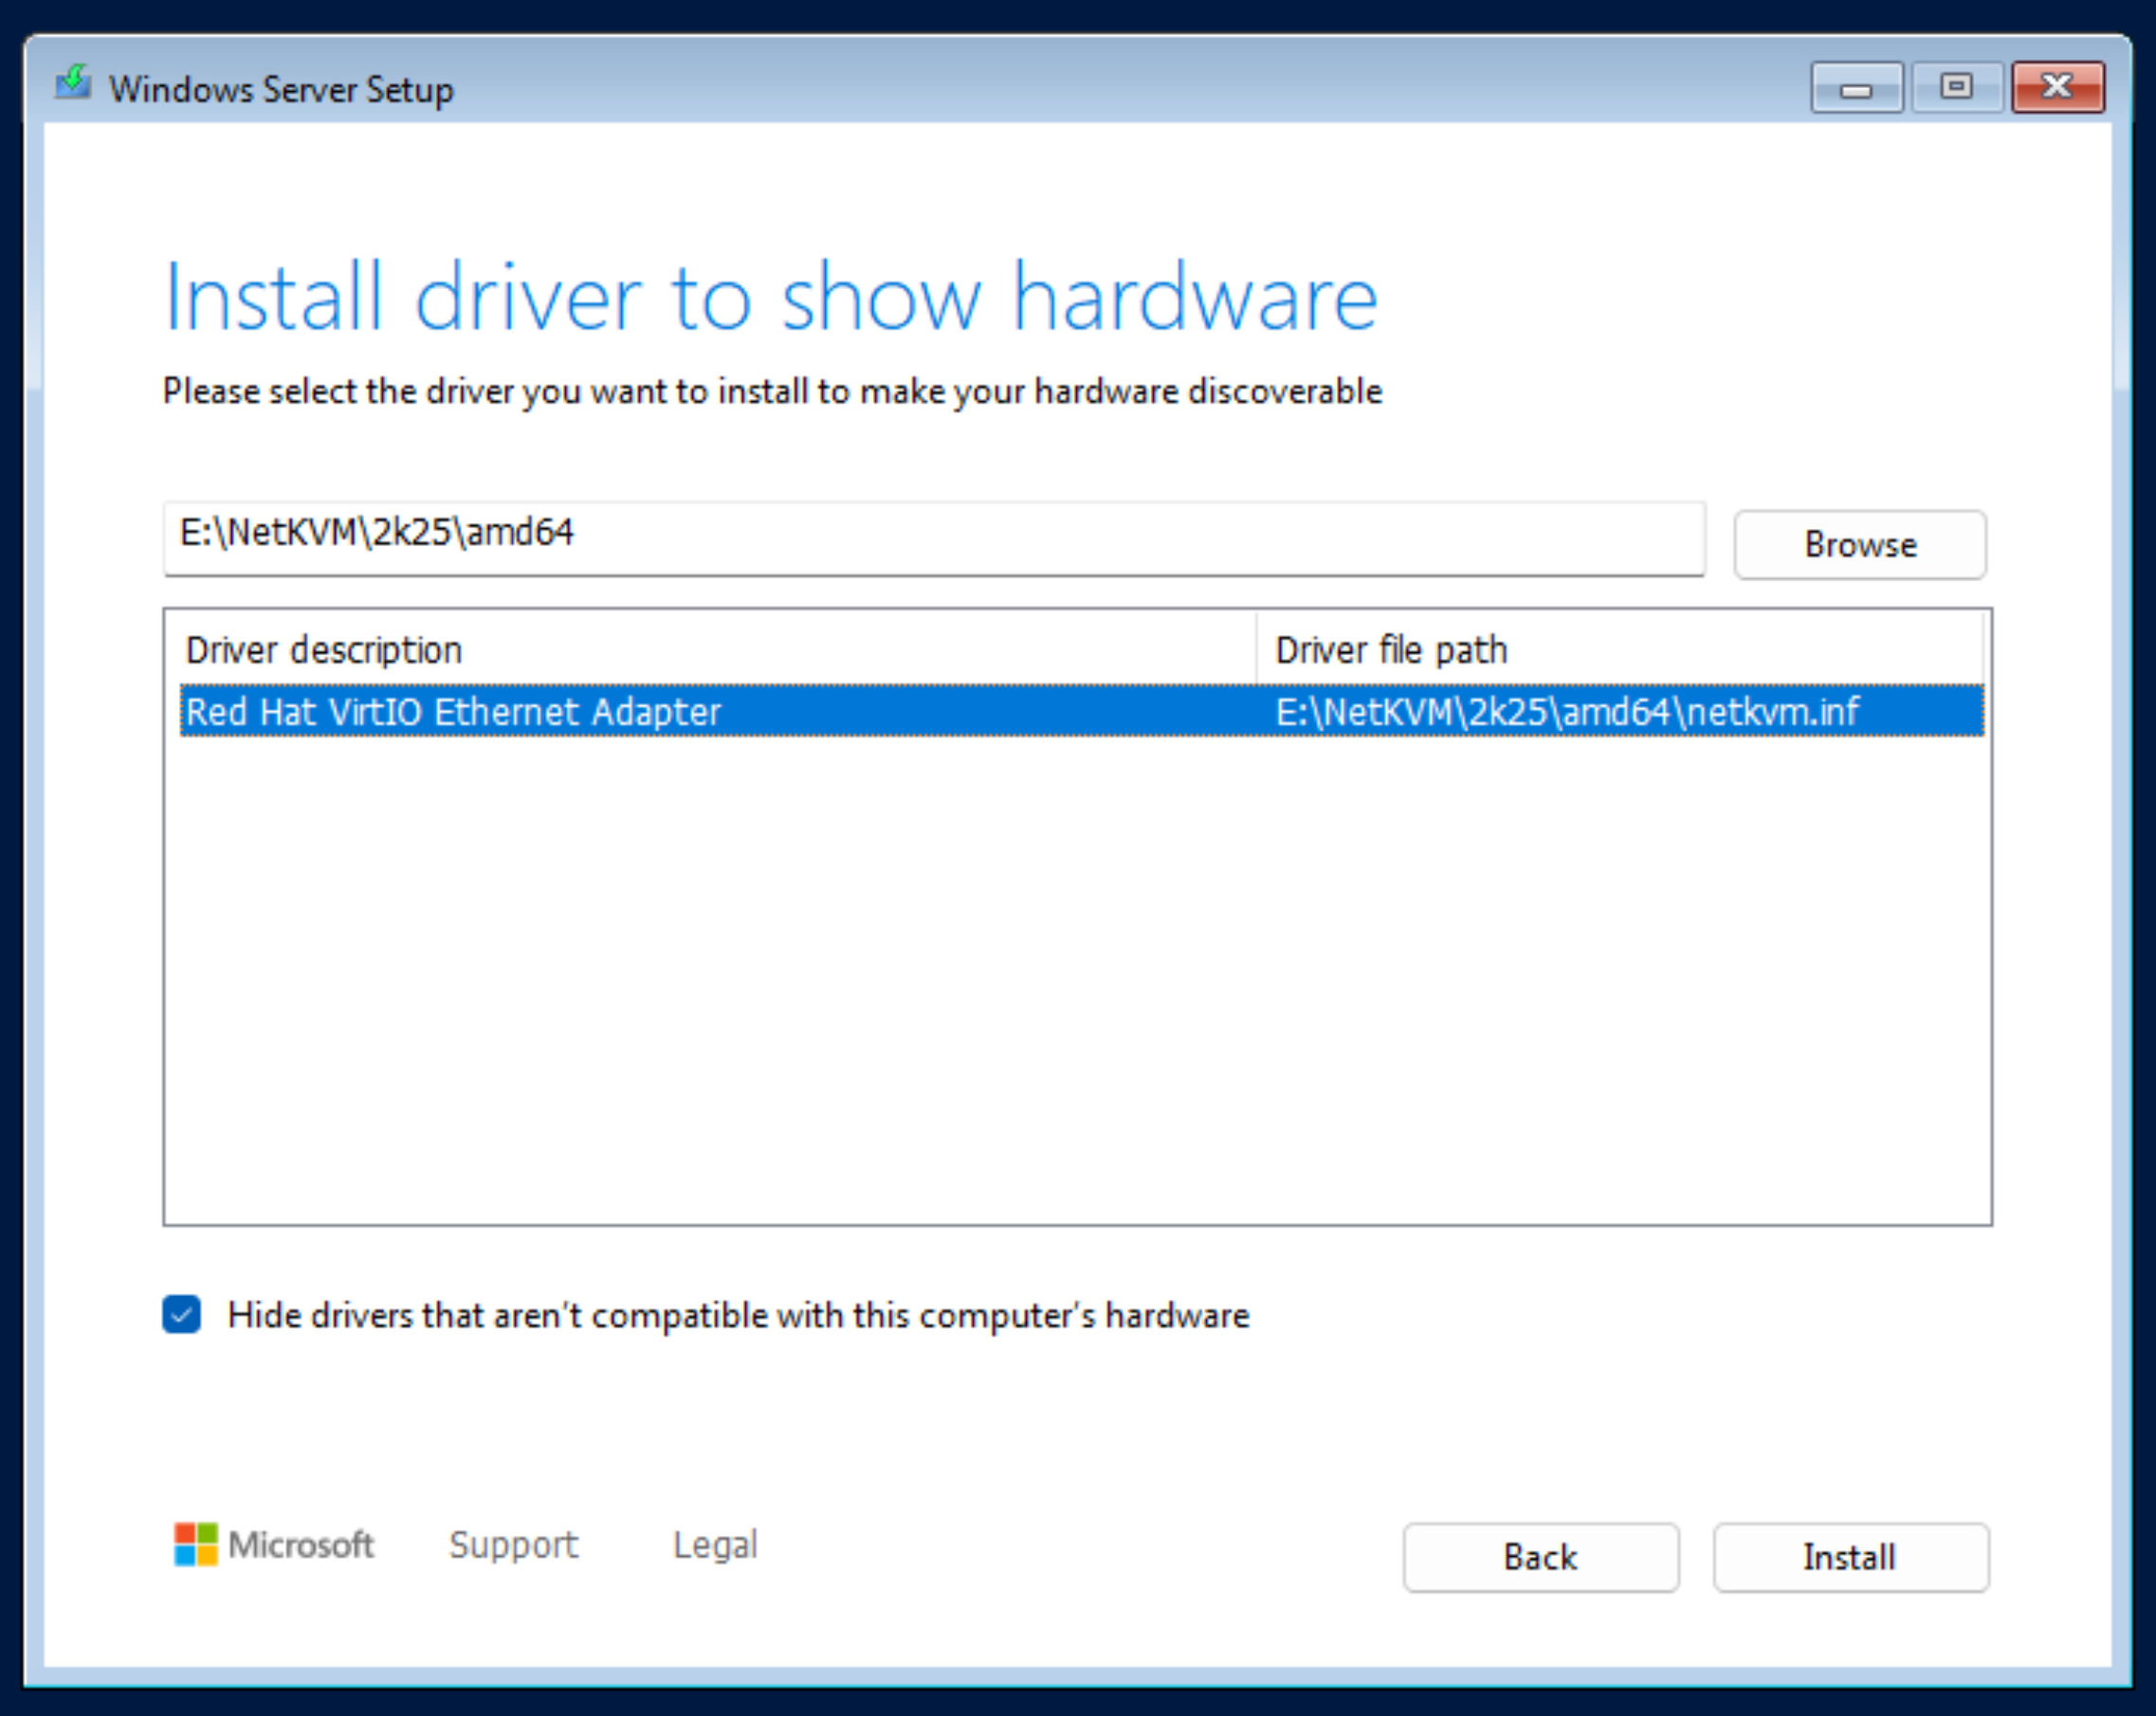
Install Network Drivers First
You will want to use the “Load Driver” button in the installer and navigate to the VirtIO driver disk you provided the virtual machine.
From here you will first want to install the driver from the CDROM:\Drivers\NetKVM\2k25\amd64 directory. This will allow your VM to utilize the metadata server provided by Rumble Cloud on subsequent boots.
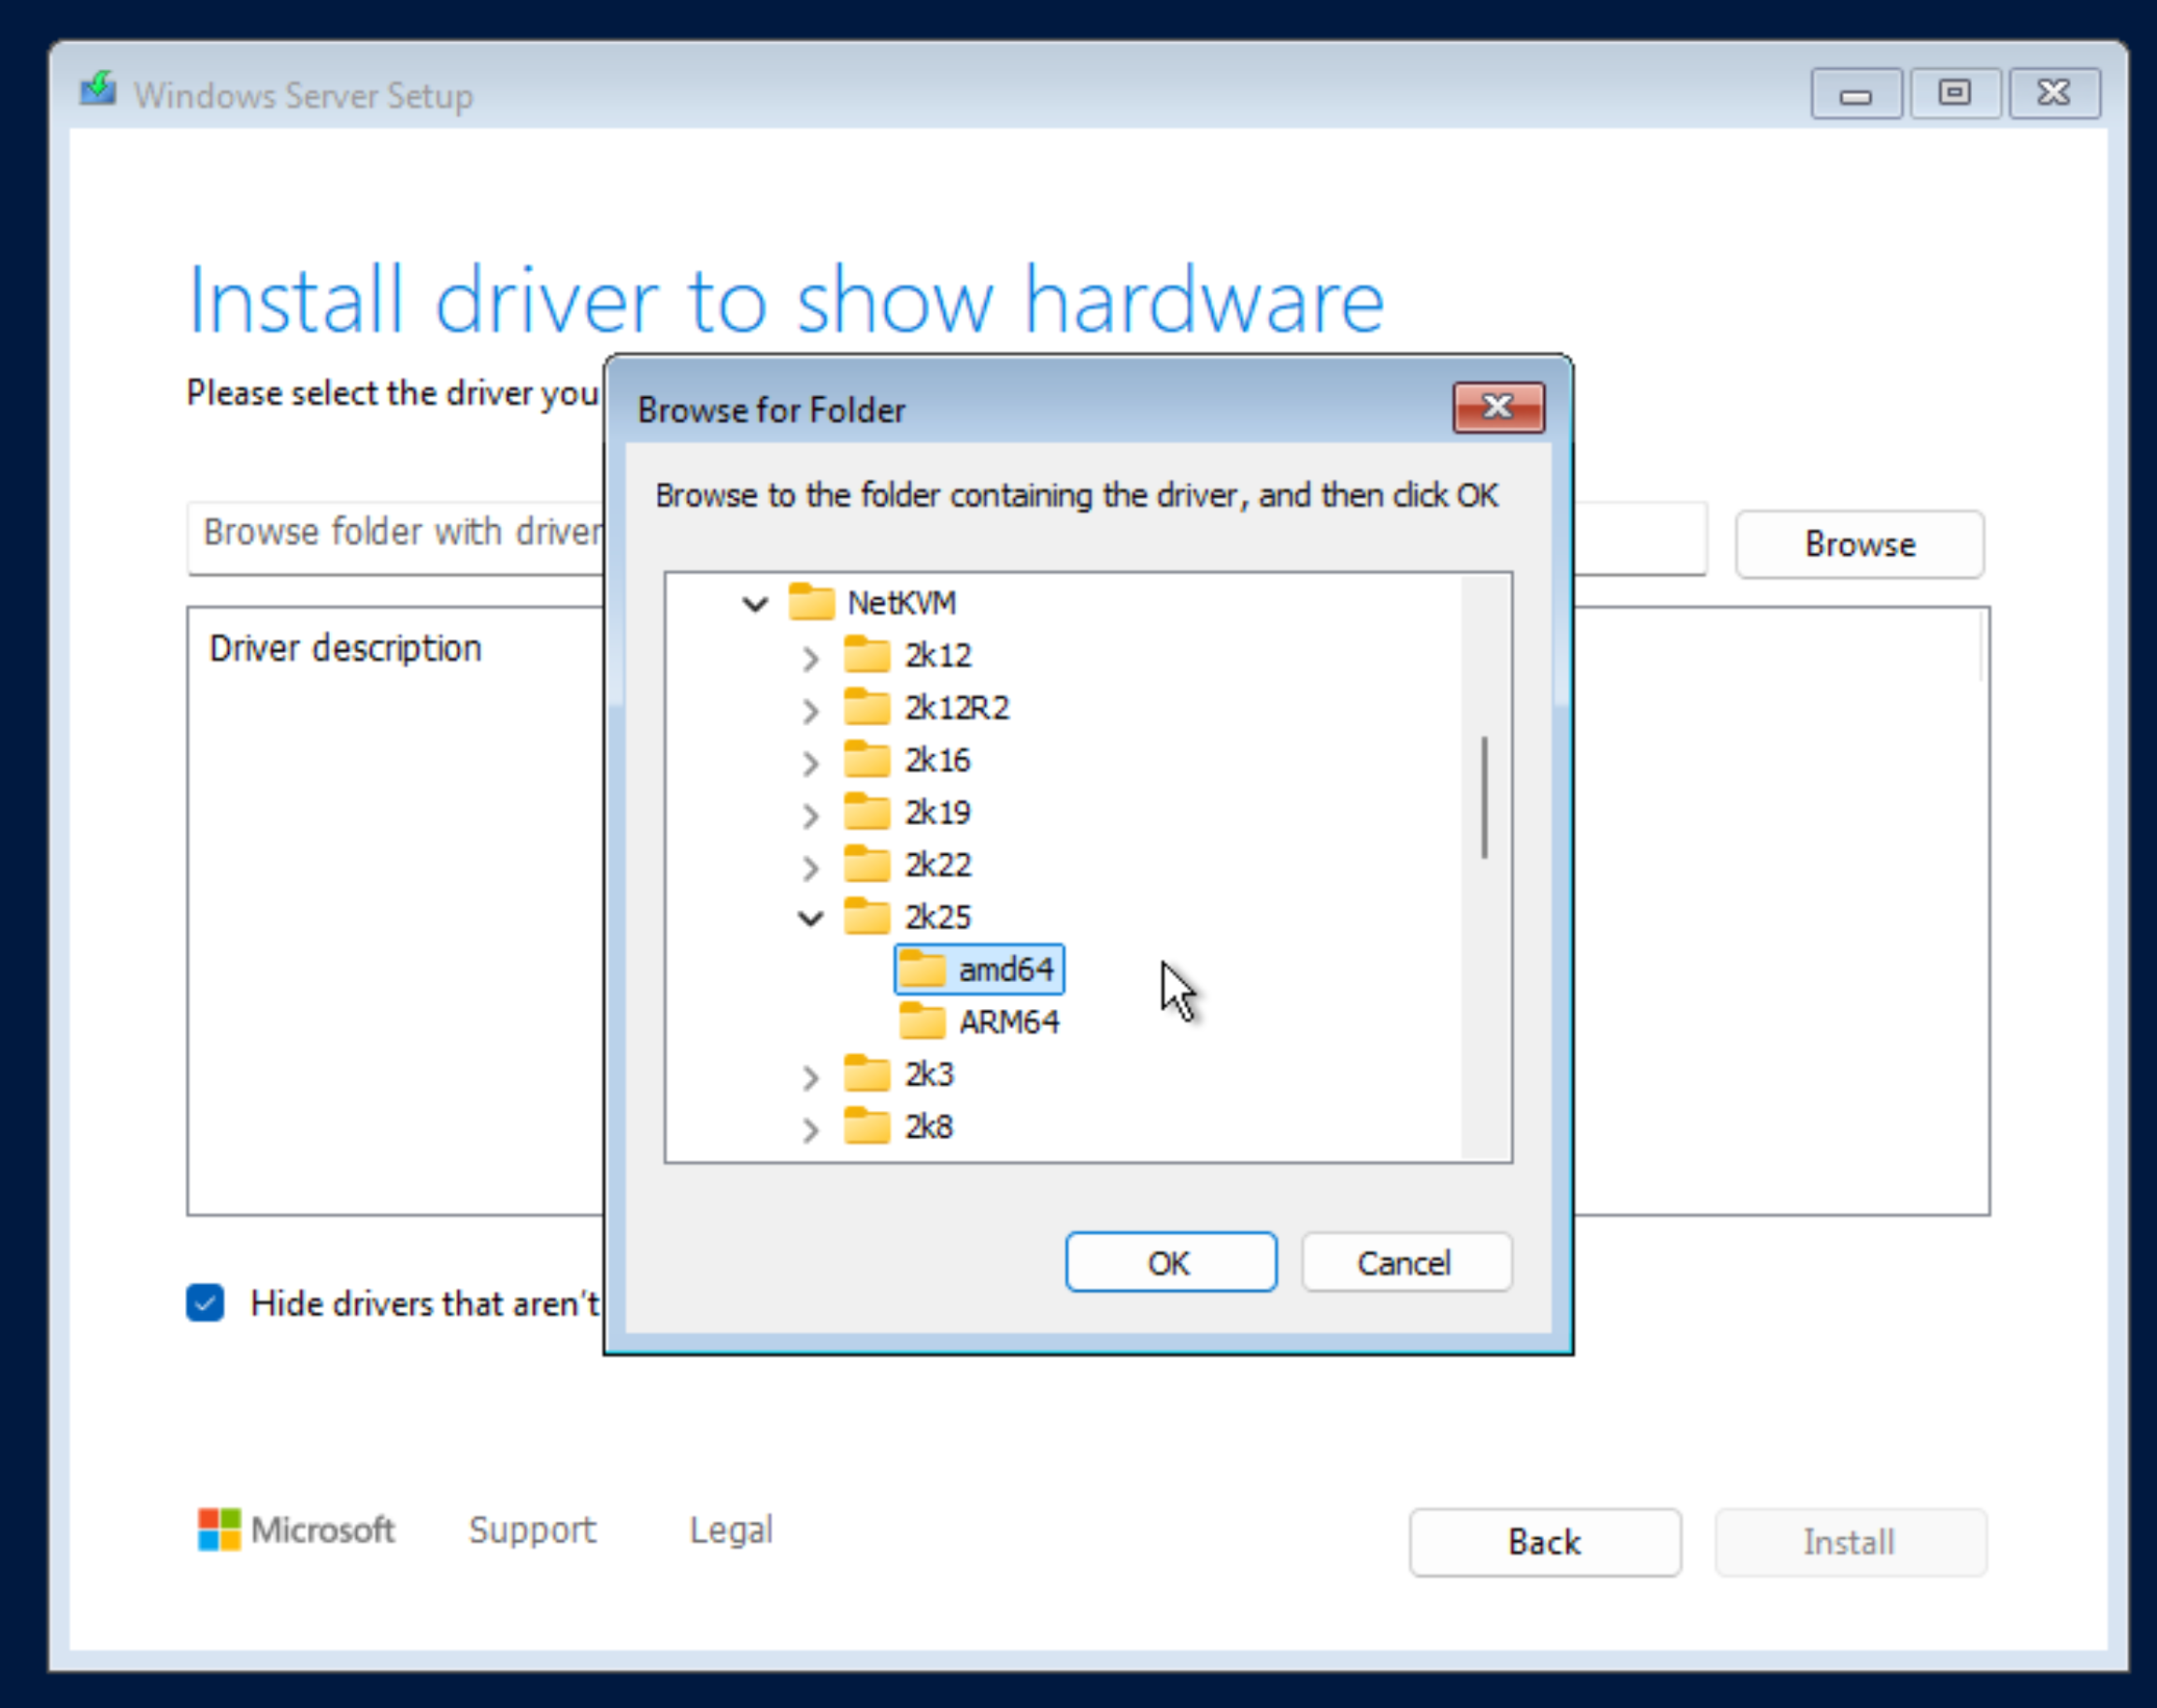
Upon selecting the folder and clicking “OK” you will be presented with the available drivers, please install the network driver.
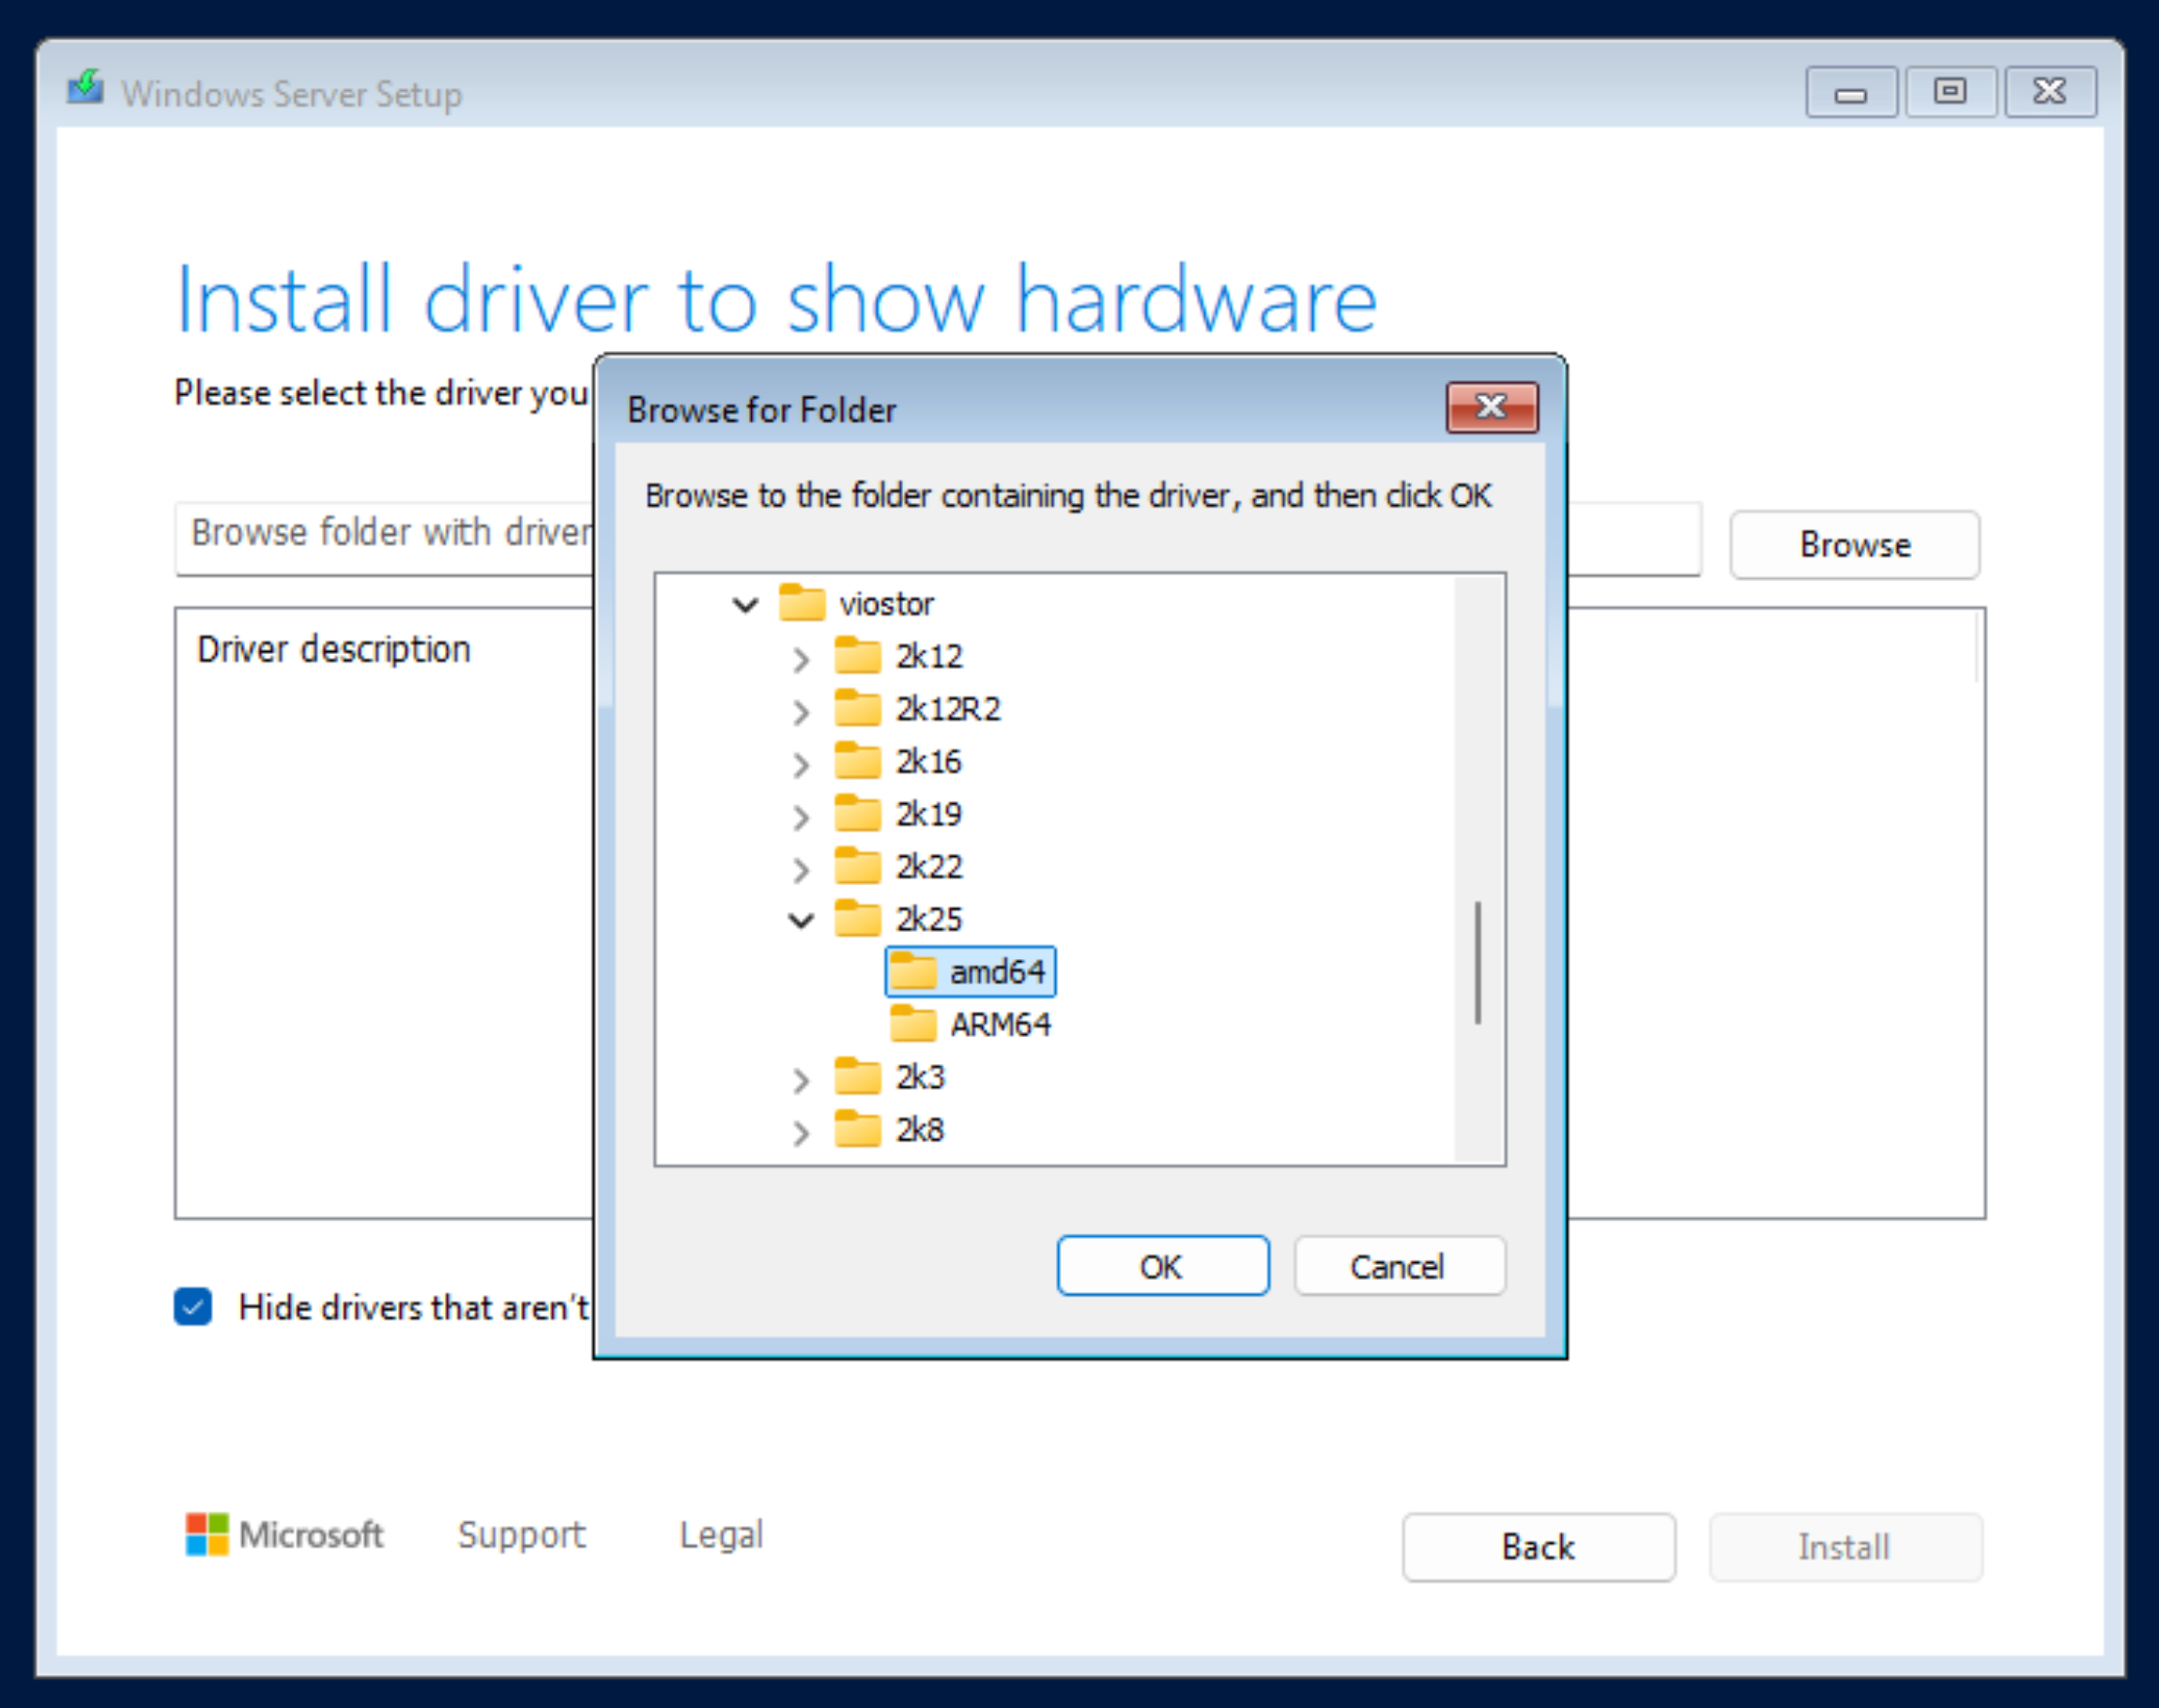
Install the VirtIO SCSI Driver
Next you will want to install the VirtIO SCSI driver to the system. This driver will allow you to select the disk for installation.
This driver is located at CDROM:\Drivers\viostor\2k25\amd64.
Select your Disk for Installation
Upon installation of these drivers, your system will now have a disk available for usage. Please select that disk and begin the installation.
Step 4: Preparing the Operating System Drivers
After the installation we must install additional drivers to ensure both the highest performance level and greatest stability of a Windows Virtual Machine on Rumble Cloud.
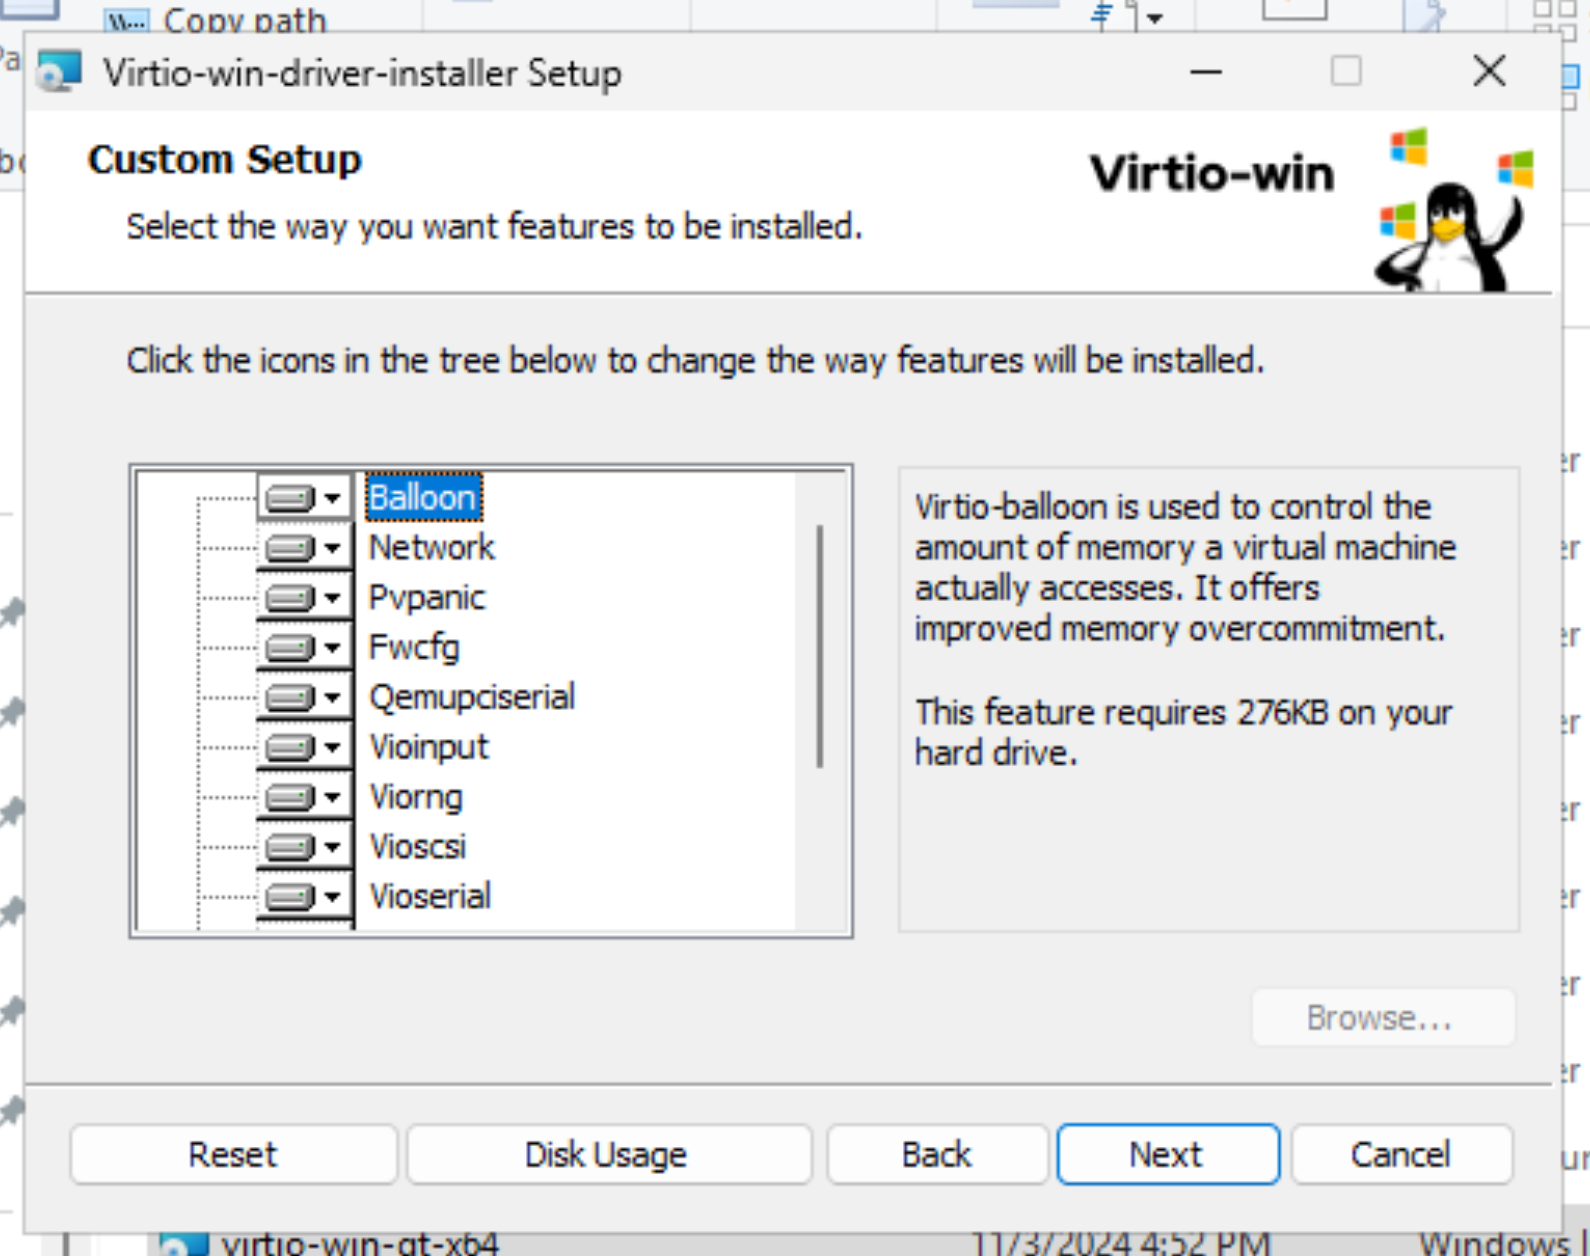
First Boot Driver Install
Once the system is booted and you are able to reach the desktop, you will now need to install the remainder of the VirtIO drivers. At the root of the CD-ROM, there is an installer for this and the installer is named virtio-win-gt-x64.msi.
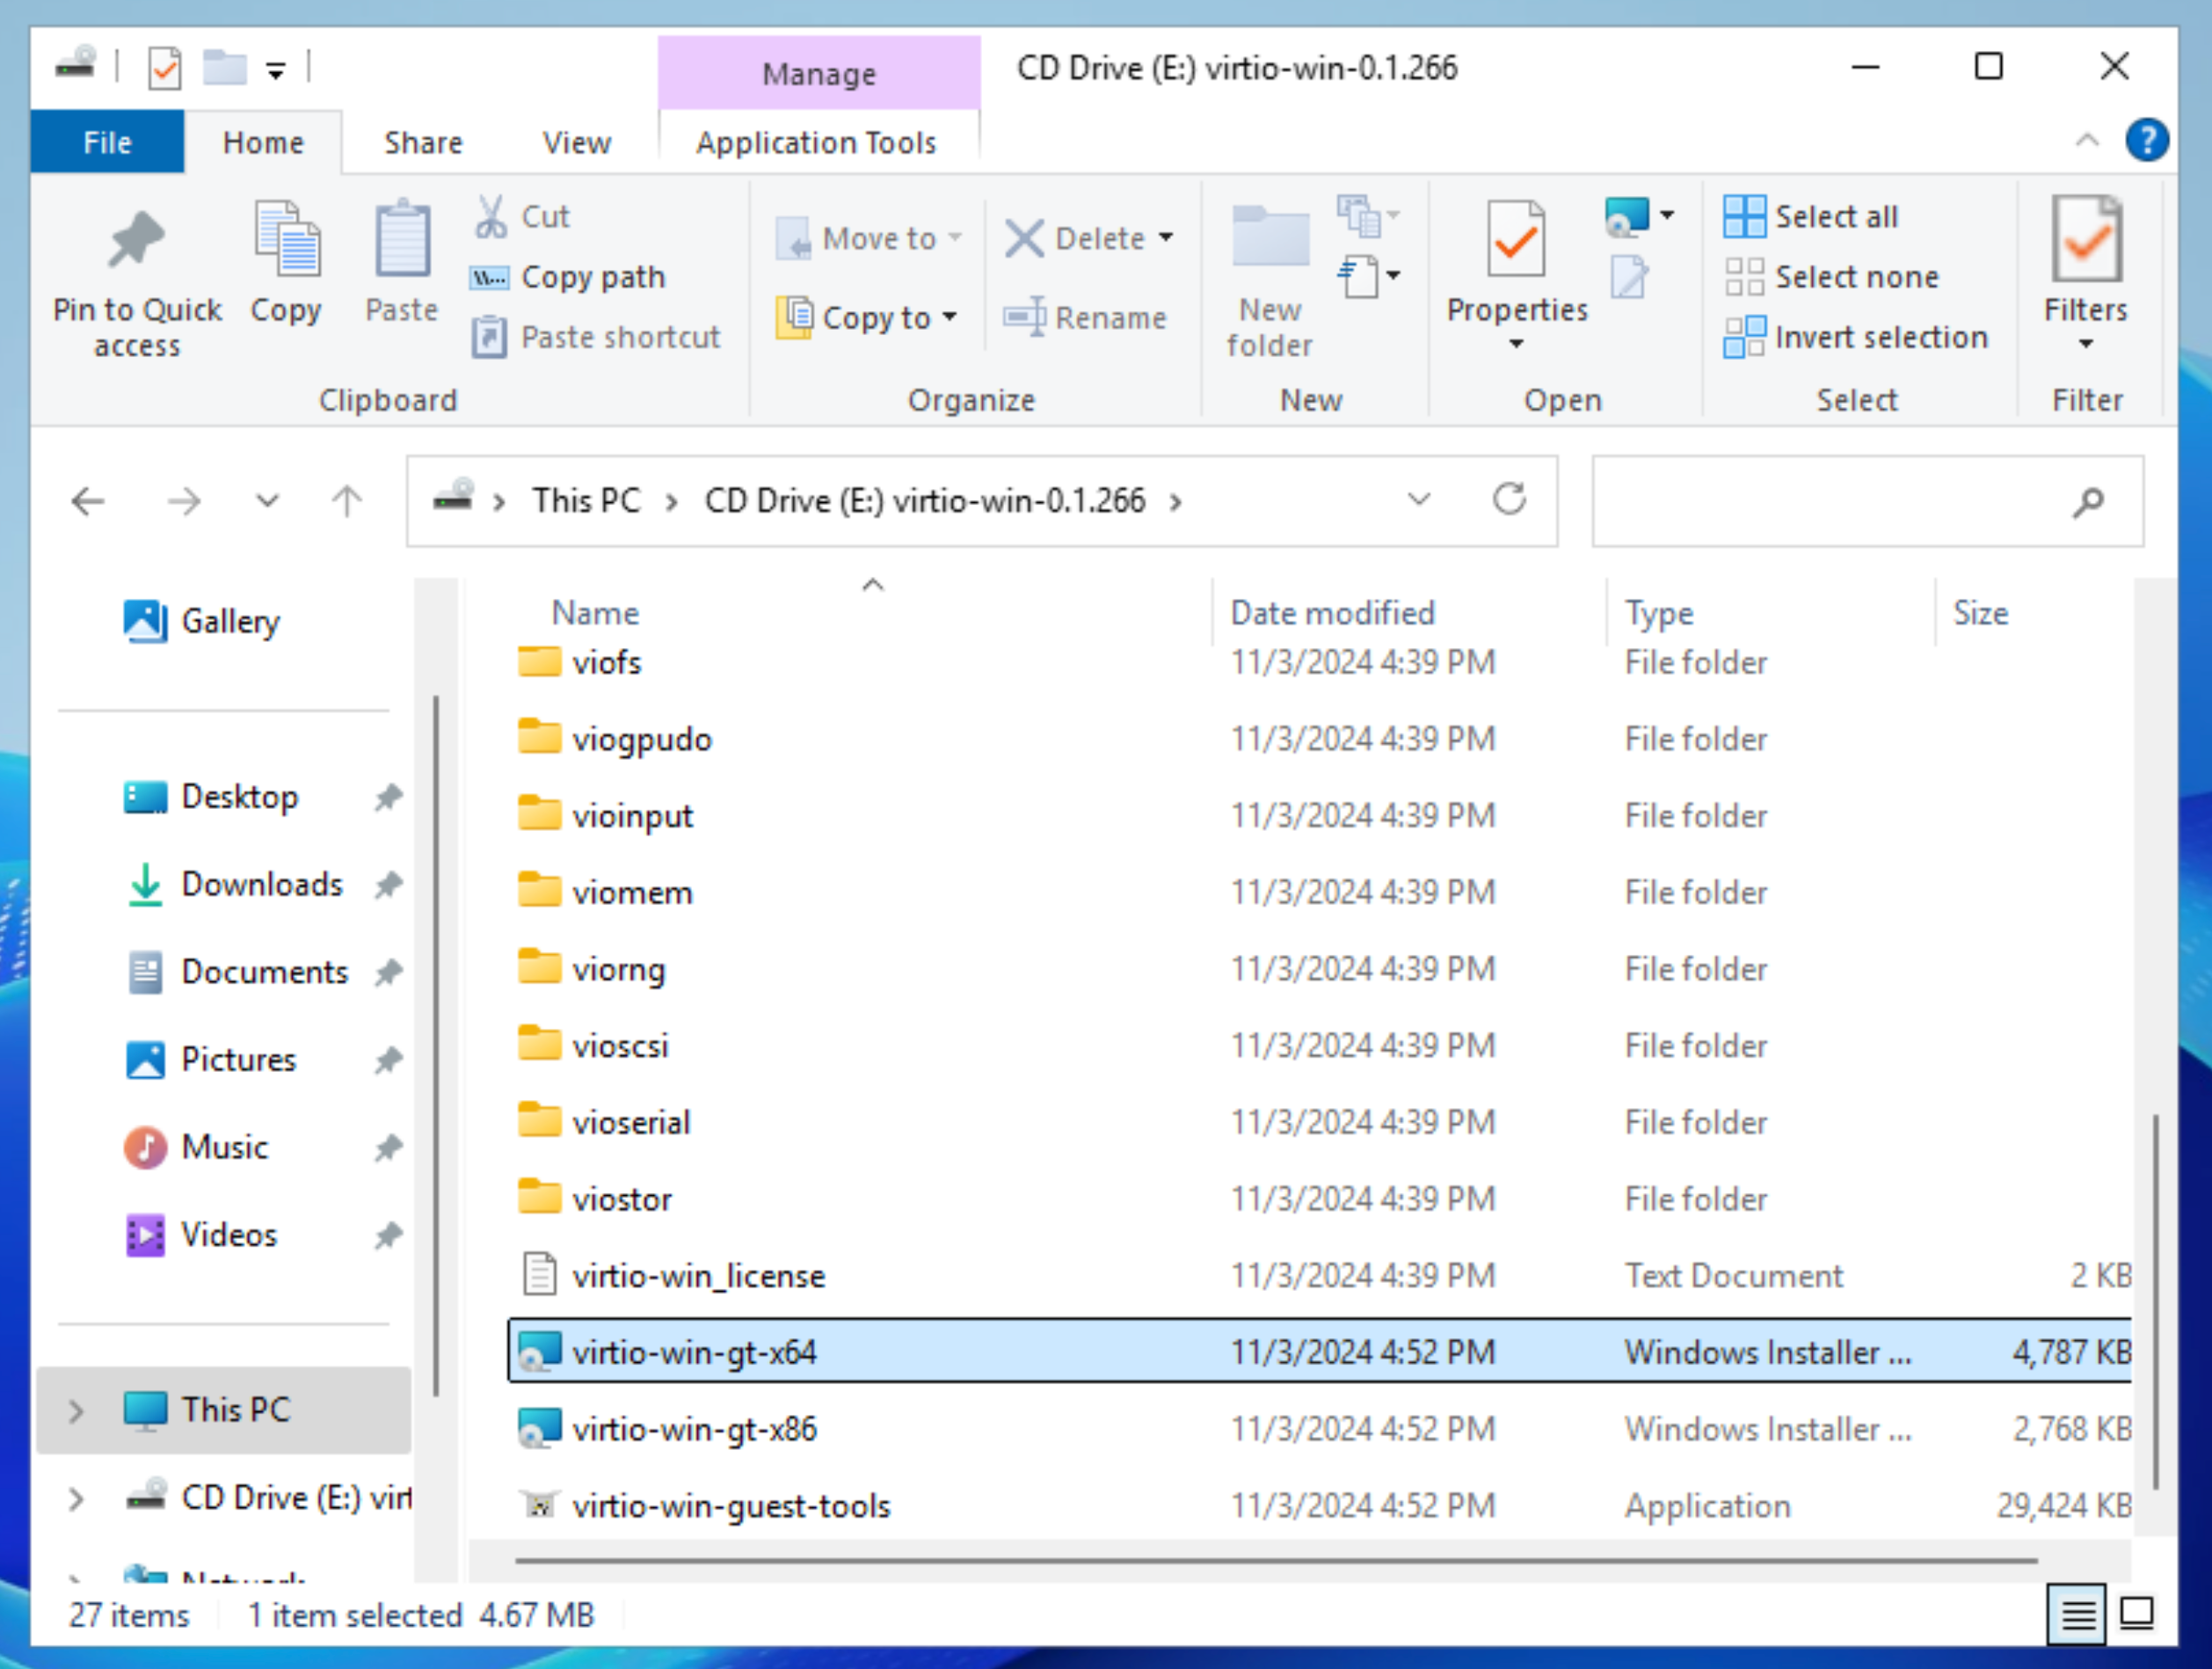
When installing this driver package, you will want to install all of the components available:
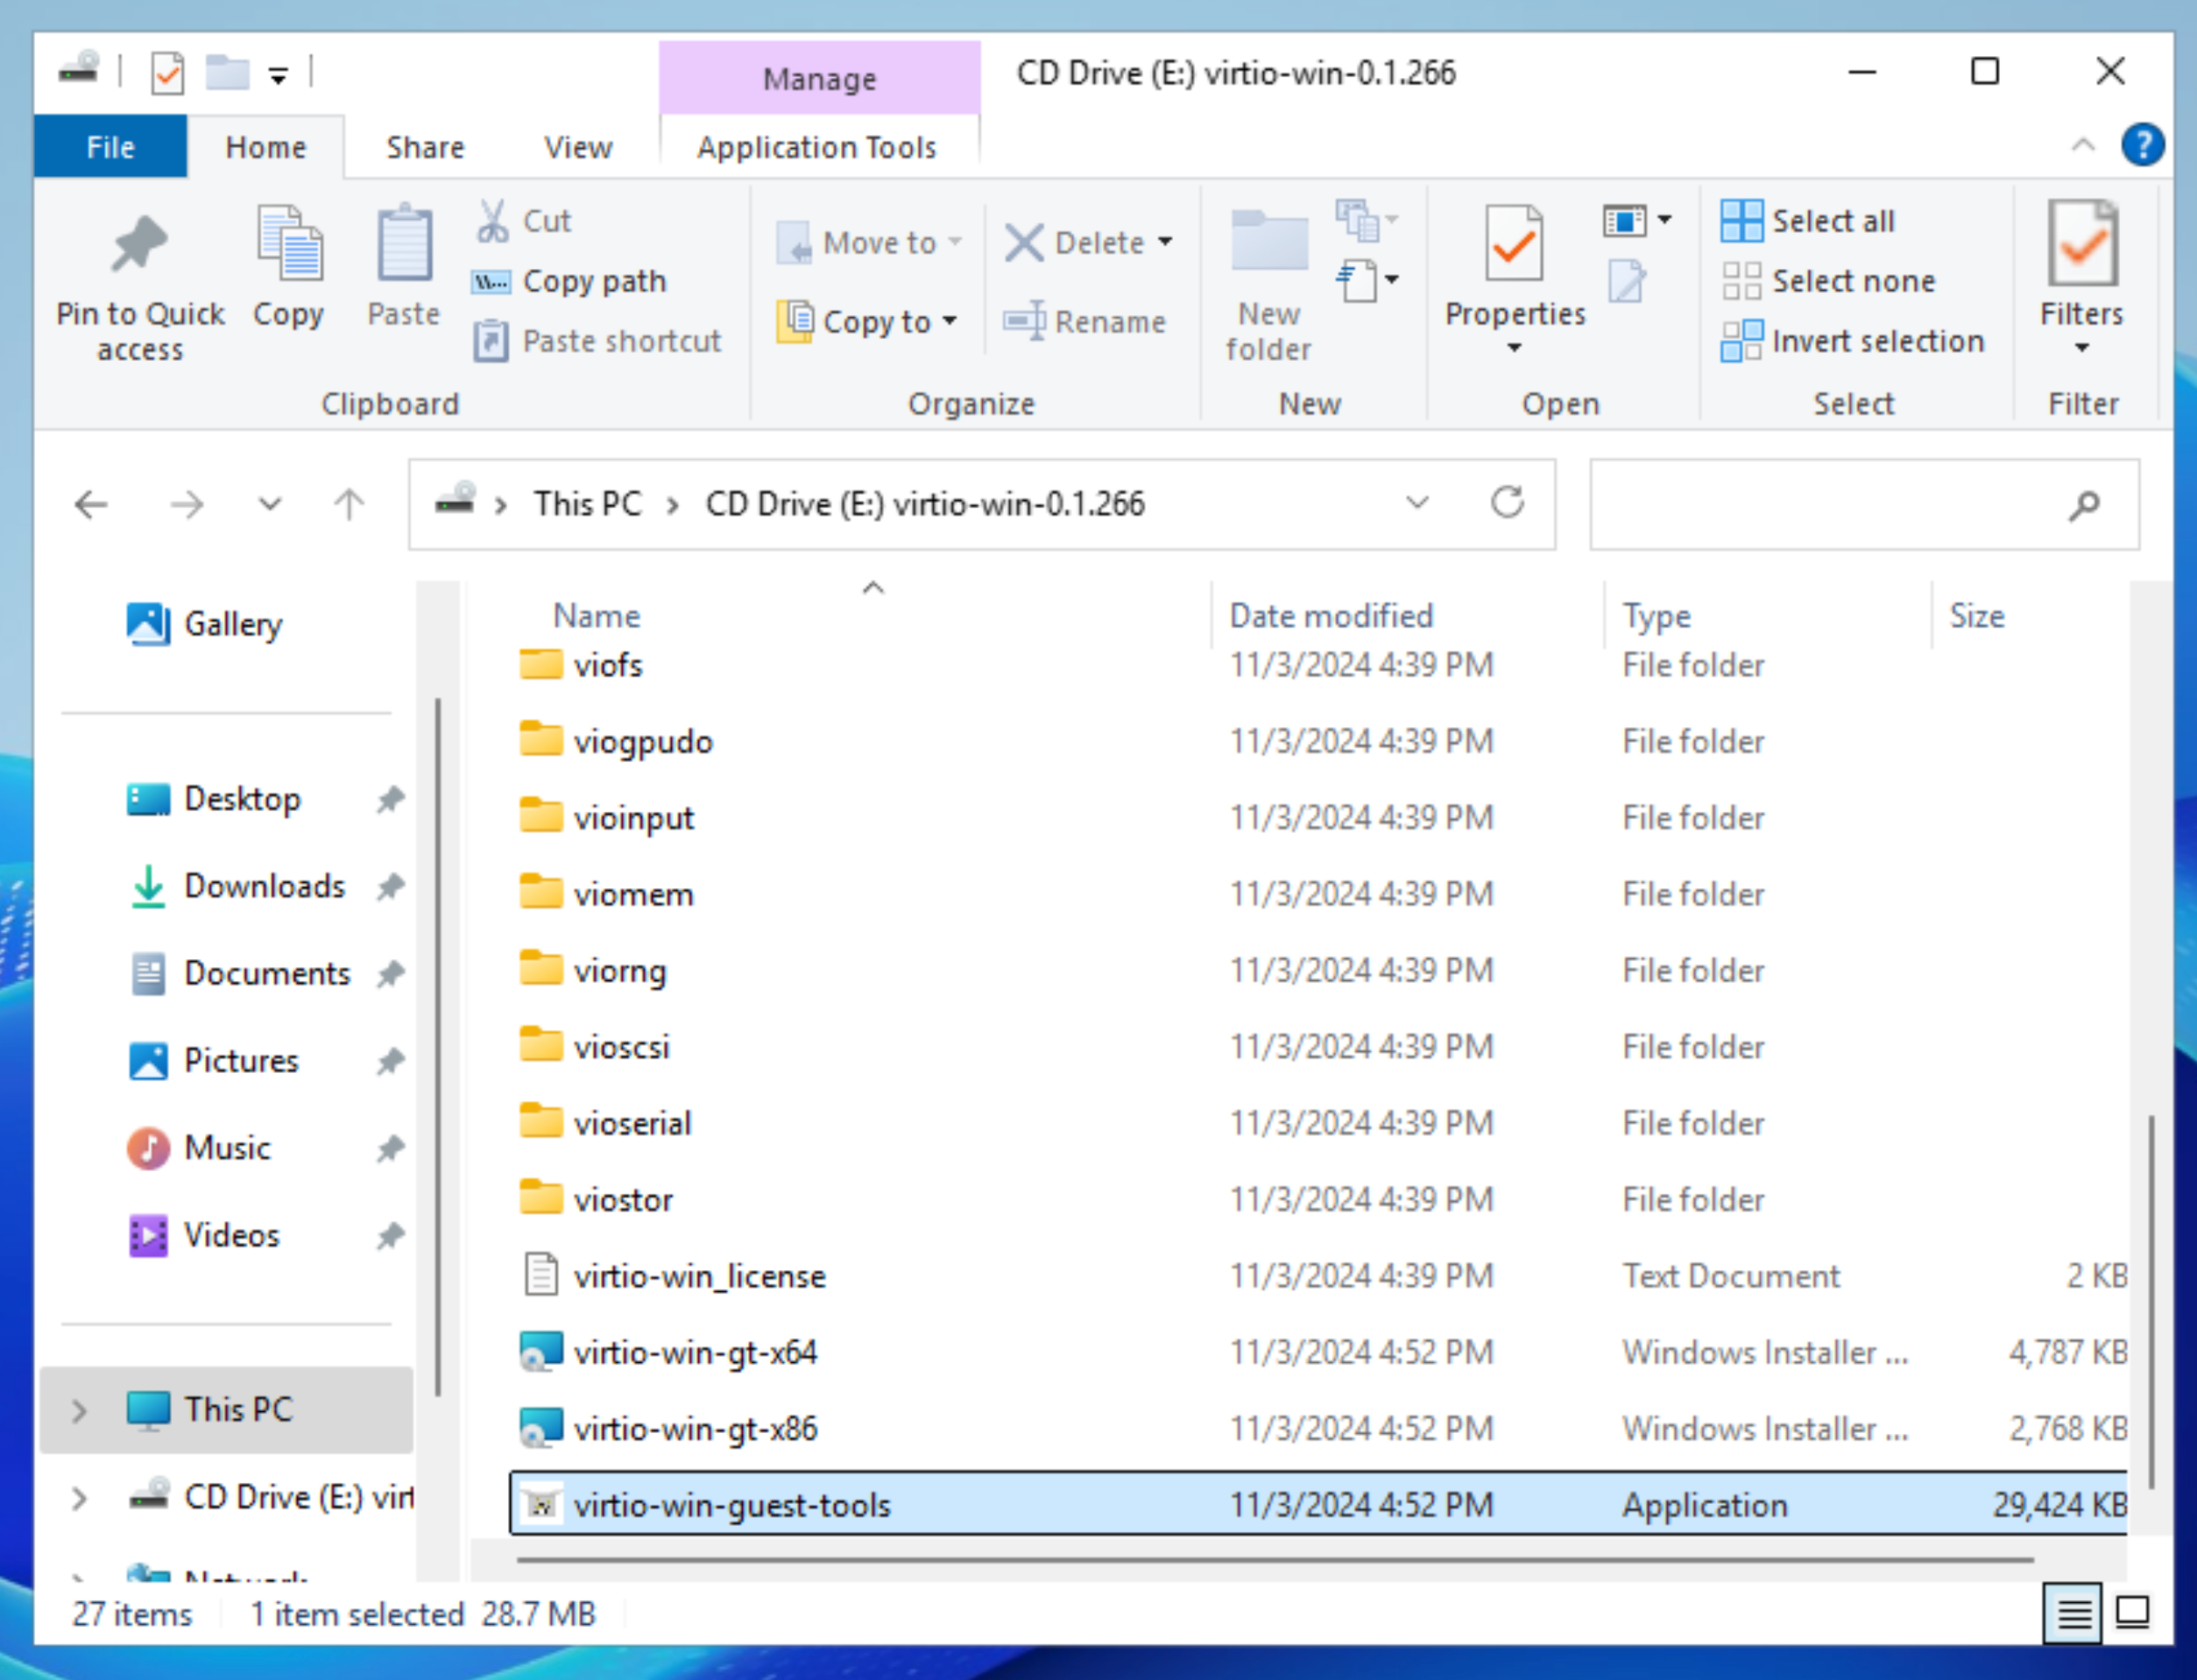
Windows VirtIO Guest Tools
Once the drivers are installed, to increase operability with the underlying cloud infrastructure, it is optionally recommended you install the Windows guest tools as well.
These tools can be located on the same CDROM and the installer is named virtio-win-guest-tools.exe.
Step 5: Enable Remote Desktop
At this point, you should transition to remote desktop. You can enable remote desktop using the following Powershell commands.
Set-ItemProperty -Path "HKLM:\SYSTEM\CurrentControlSet\Control\Terminal Server" -Name "fDenyTSConnections" -Value "0"
Set-NetFirewallRule -Name "RemoteDesktop-In-TCP-WS" -Enabled True
Get-NetFirewallRule | Where-Object Name -like 'RemoteDesktop*' | Set-NetFirewallRule -Enabled True
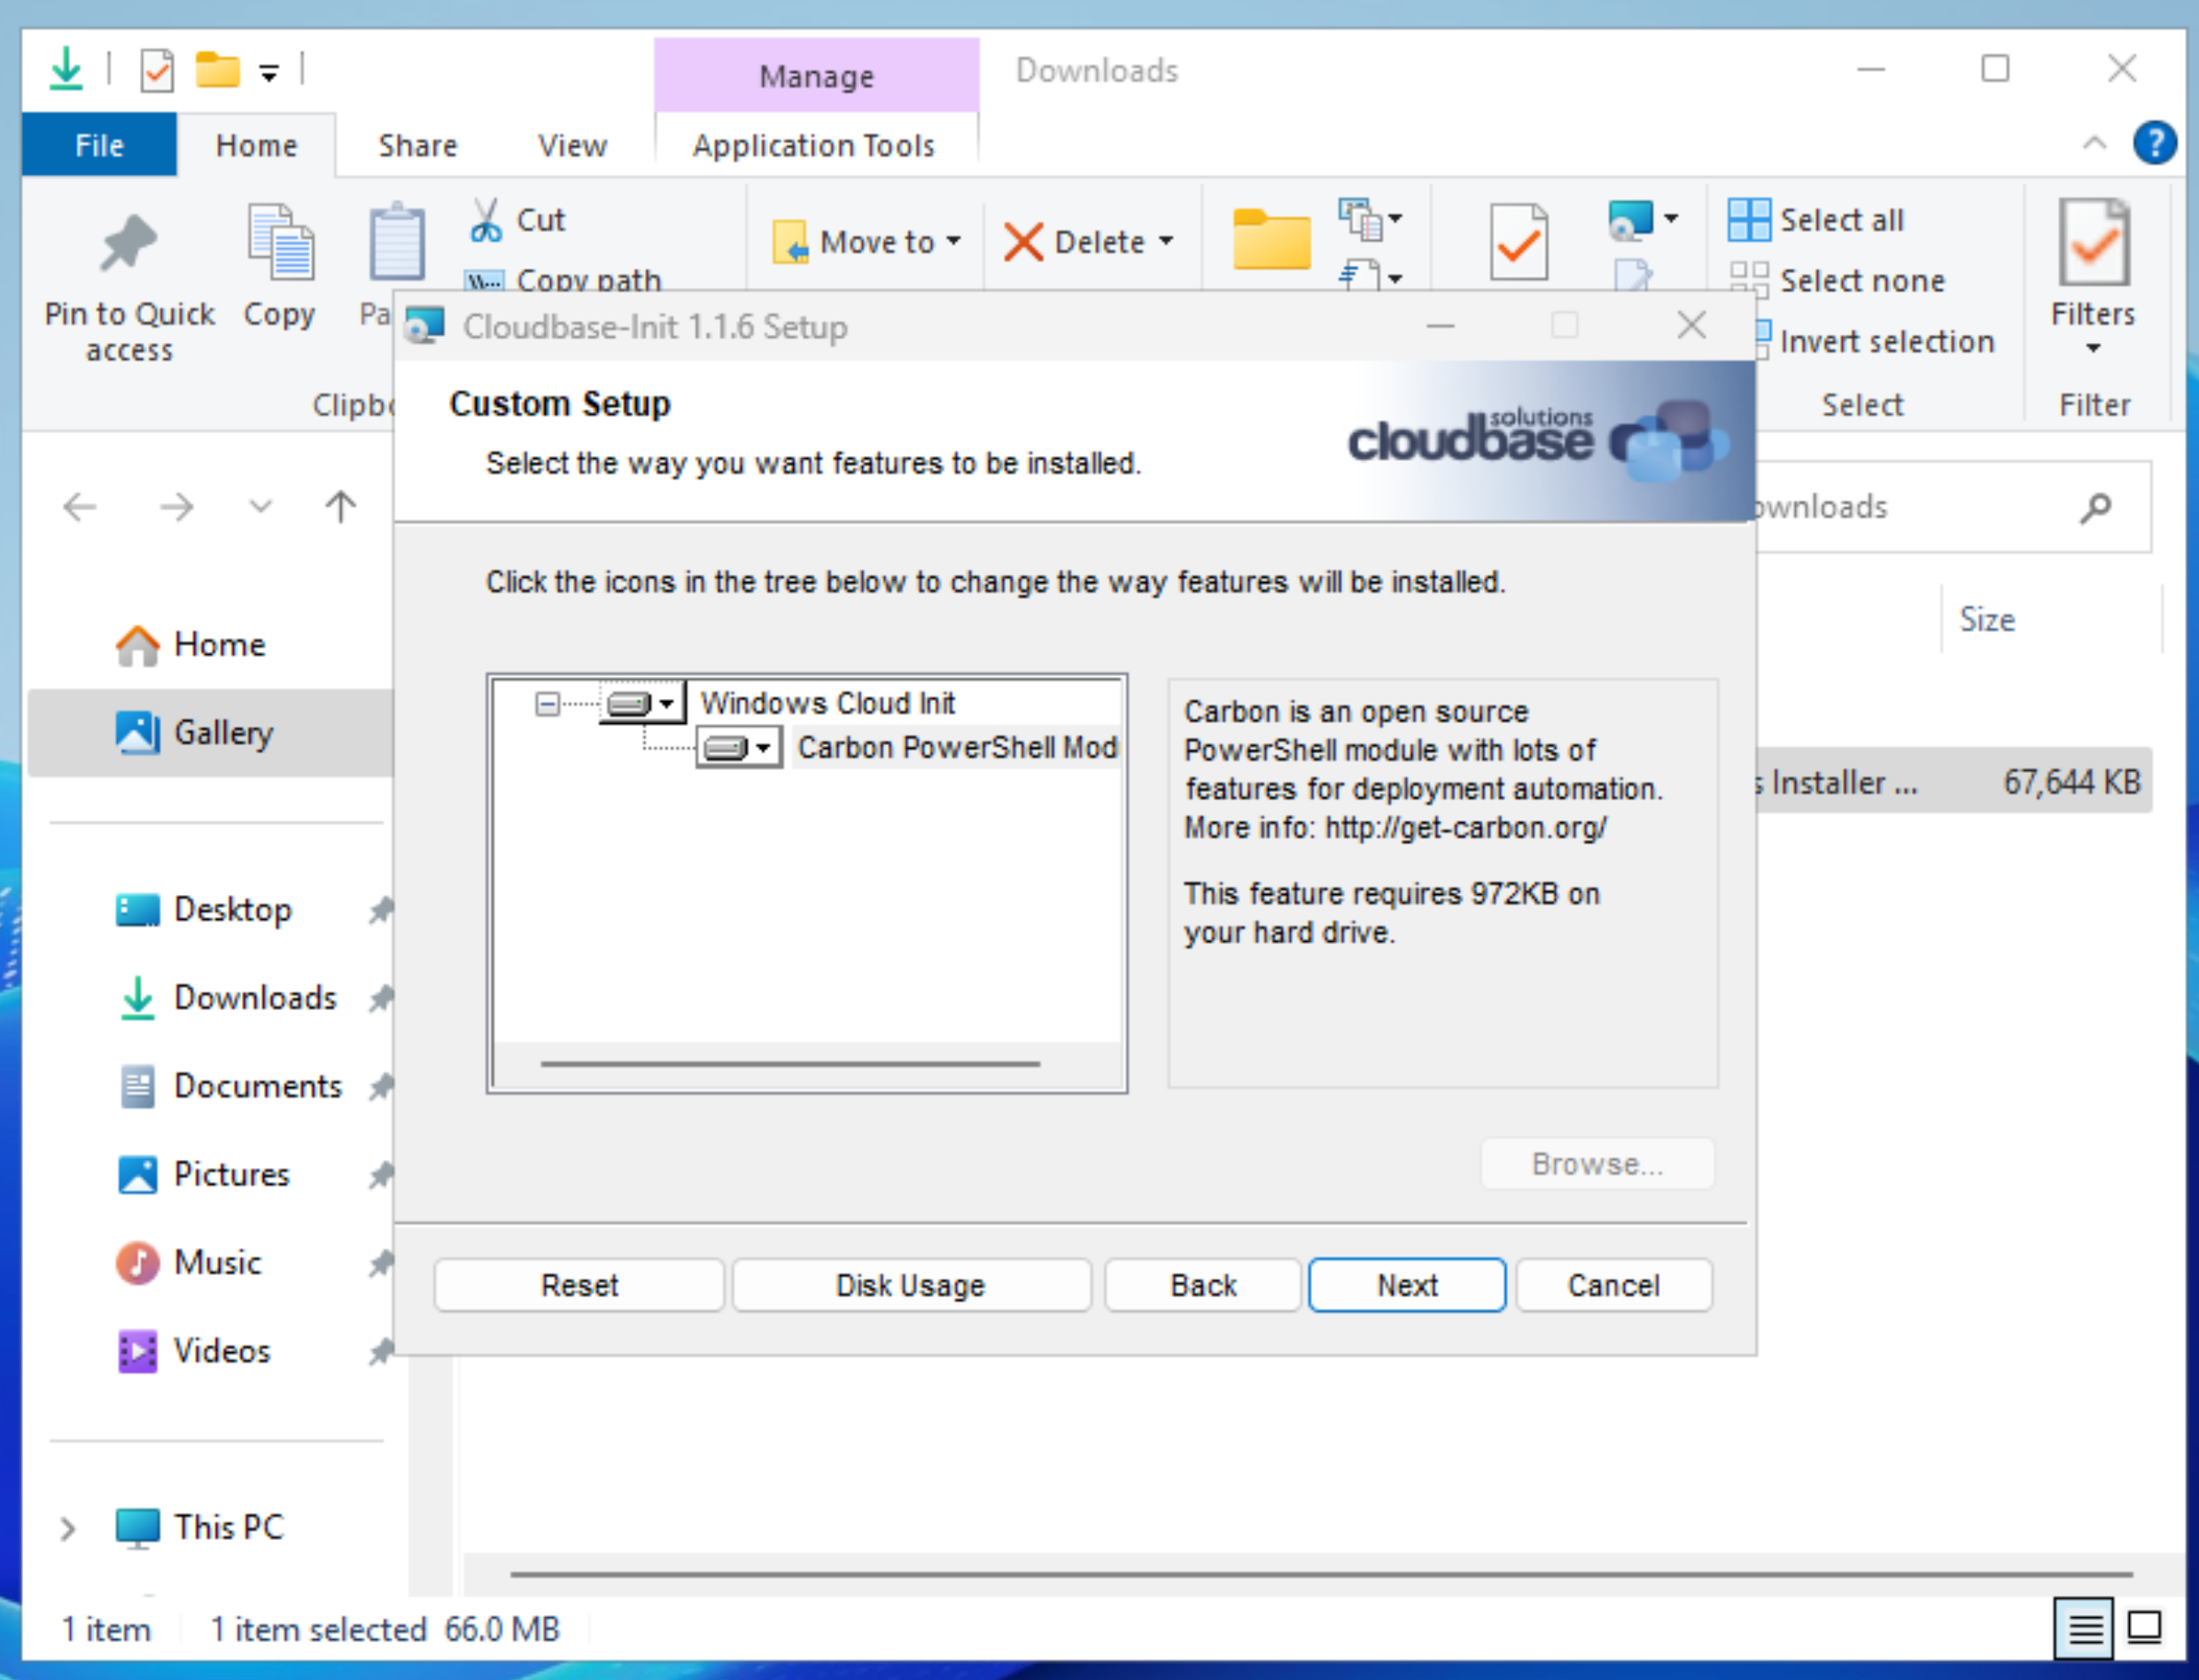
Step 6: Install Cloudbase-Init
Cloudbase-Init is the utility which will configure a Windows Server when launched in Rumble Cloud. This tool is critically important.
WARNING: Do not use Microsoft Edge to install this, it will cause issues with the sysprep at the end.
powershell -Command "(new-object net.webclient).DownloadString('https://www.cloudbase.it/downloads/CloudbaseInitSetup_Stable_x64.msi')"
Once you have the Cloudbase-Init tool downloaded, you should install all modules.
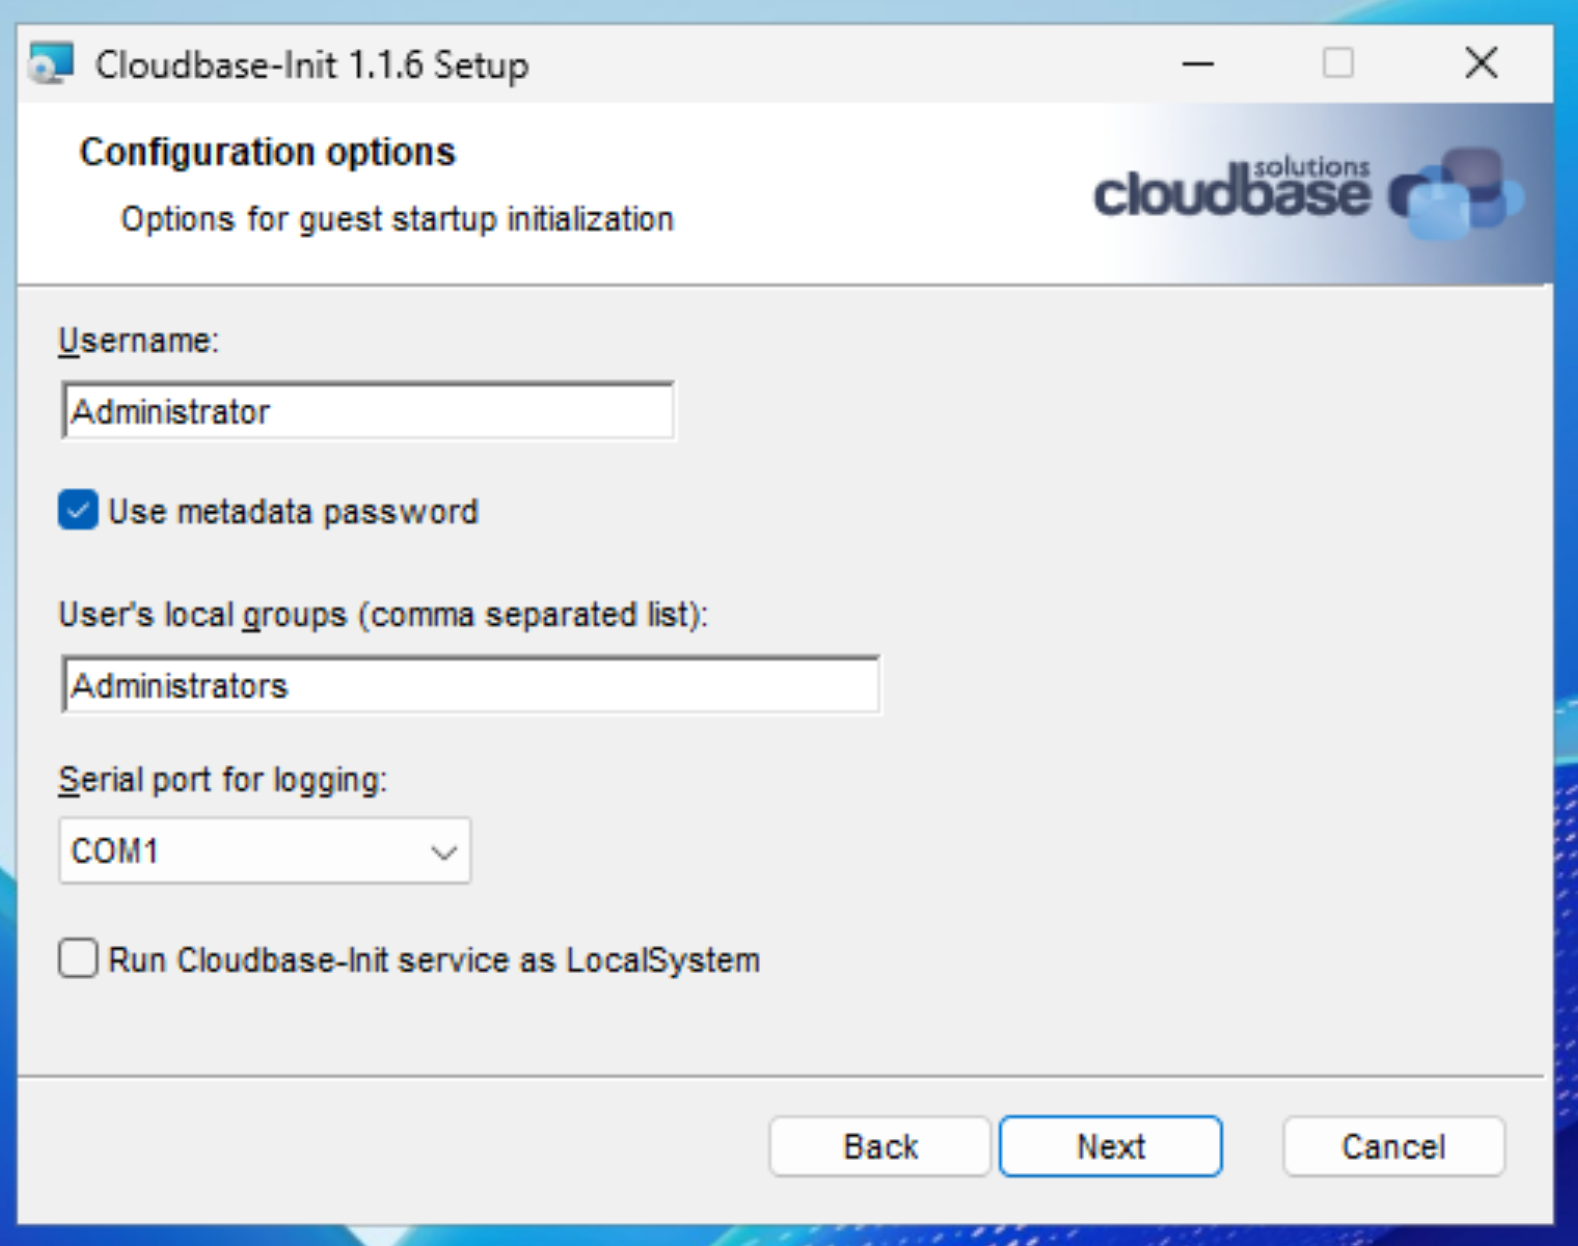
When configuring the Cloudbase-Init tool, you should use the “Administrator” username and COM1 for communication. Do not run Cloudbase-Init as a LocalSystem service. Also make sure to check the box “Use metadata password”.
After this installation has completed, you should now be presented with two checkboxes. You should perform the sysprep and shut down the virtual machine now.

Step 7: Create the Image
At this point you should now create an image of the operating system disk of this virtual machine, and you can now create virtual machines from this image and establish things like your Windows Cluster, Active Directory Domain or other useful Microsoft features within your OpenStack Project.