How to Set Up a Minecraft Server on a Rumble Cloud Virtual Machine (VM)
This article provides instructions for setting up a Minecraft Server on a Rumble Cloud VM. In this article, you'll learn how to:
- Create a VM instance running on a shared vCPU using the free Ubuntu operating system
- Create and apply rules that define access to ports for the server
- Download a Minecraft server and transfer the download to the VM instance using SFTP
- Set up the Minecraft server on the VM instance using SSH and the command line
- Validate the set up
- Connect to the server and start playing
Prerequisites
Before you get started, you'll need to:
- Sign up for a Rumble.cloud account or login using your existing account credentials
- Create a new project or choose an existing project in your organization
- Have SSH working in your terminal
- This works by default for MacOS and Linux users
- Windows users can choose from a variety of SSH tools, such as PuTTY
See Get Started for instructions on how to complete these steps.
Step 1. Create a security group
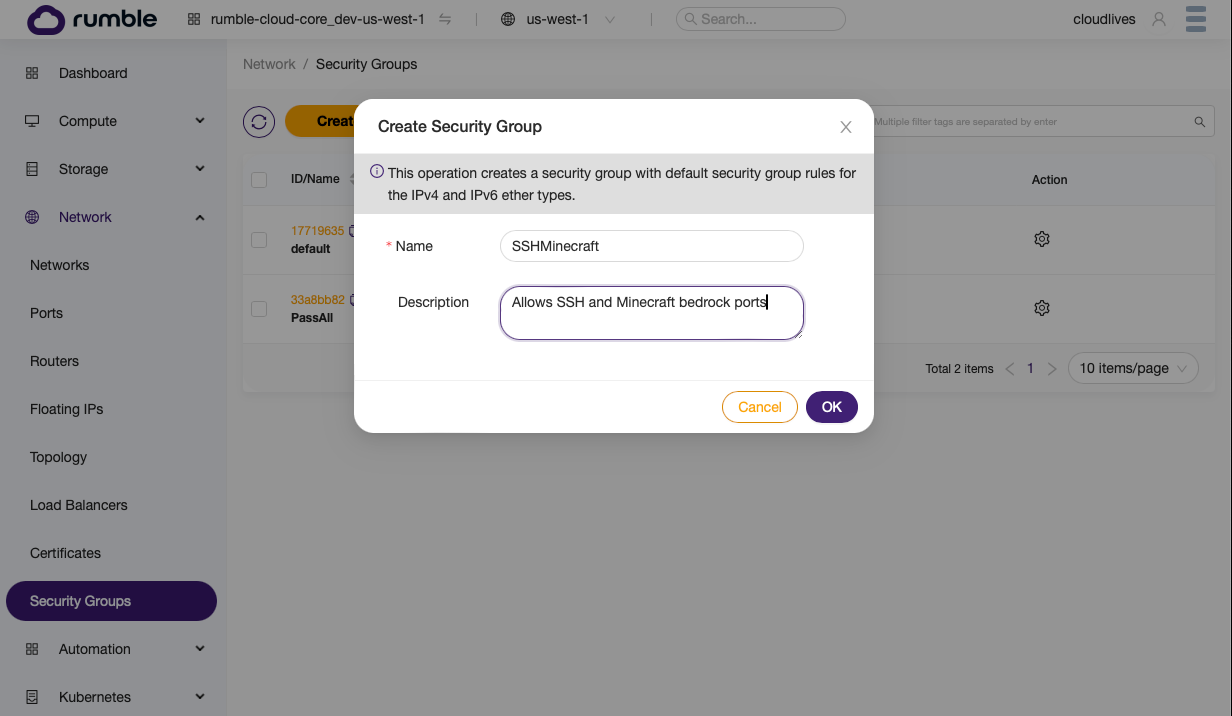
Create a set of rules for a virtual firewall (called a security group) for data into and out of your network.
- From the Cloud console, select Networks > Security Groups.
- Select Create Security Group. In this example, we'll create a security group named
SSHMinecraft.
Step 2. Add rules to the security group
Create and add the rules that allow data ingress and egress for the firewall.
From the Security Groups screen, you'll create rules to enable:
- SSH access to the VM instance
- access to ports on the VM instance for the Micecraft server
Step 2.1 Add SSH access

- Select Create Rule from the
SSHMinecraftsecurity group. - Fill in the following fields:
- Protocol:
SSH - Direction:
Ingress - Ether Type:
IPv4 - Source:
All Traffic
Step 2.2 Add 1st Minecraft Port
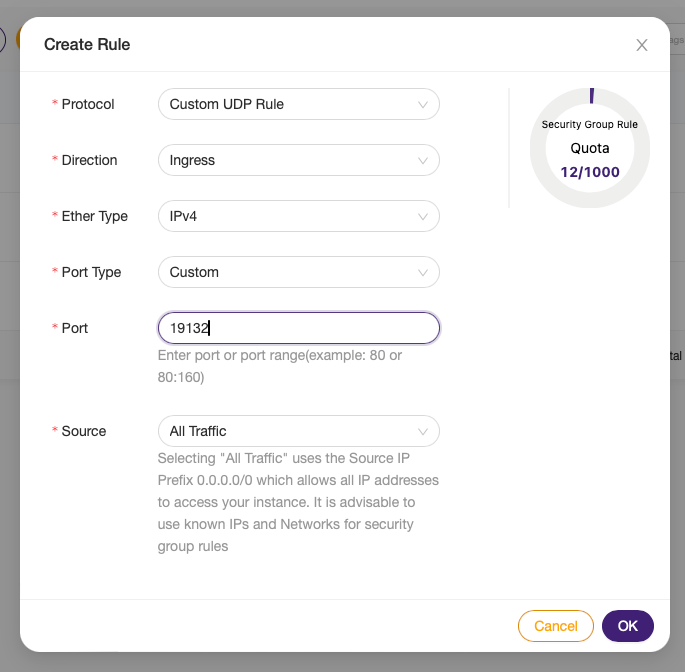
- Select Create Rule from the
SSHMinecraftsecurity group. - Fill in the following fields:
- Protocol:
Custom UDP Rule - Direction:
Ingress - Ether Type:
IPv4 - Port Type:
Custom - Port:
19132 - Source:
All Traffic
Step 2.3 Add 2nd Minecraft Port
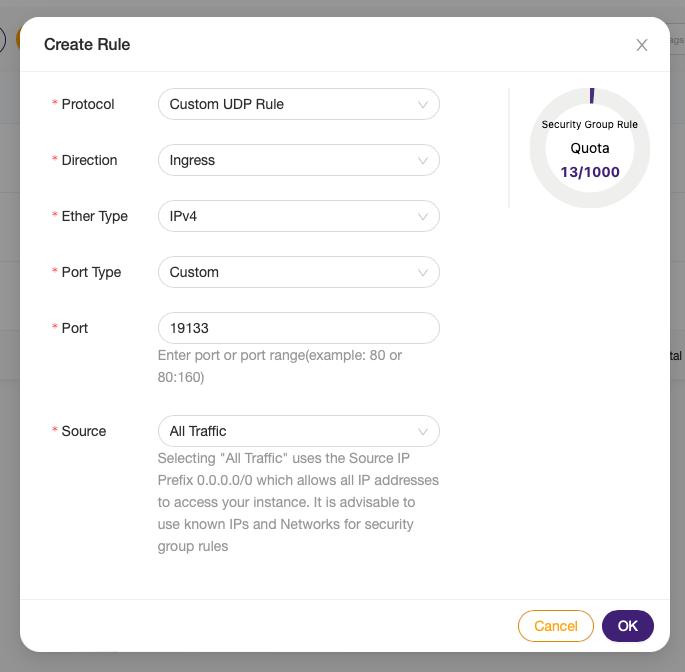
- Select Create Rule from the
SSHMinecraftsecurity group. - Fill in the following fields:
- Protocol:
Custom UDP Rule - Direction:
Ingress - Ether Type:
IPv4 - Port Type:
Custom - Port:
19133 - Source:
All Traffic
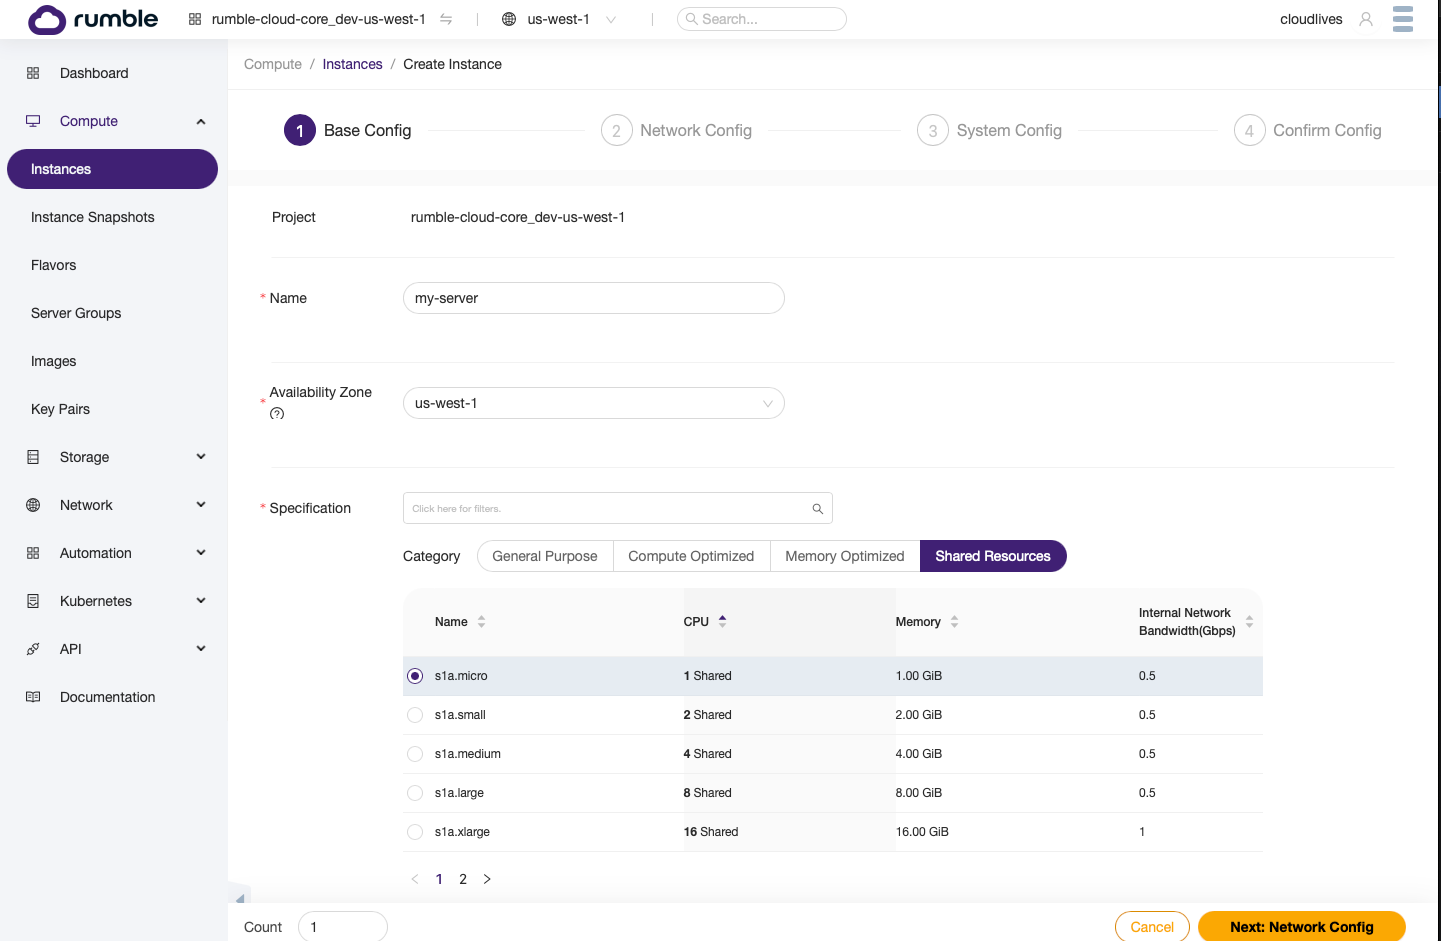
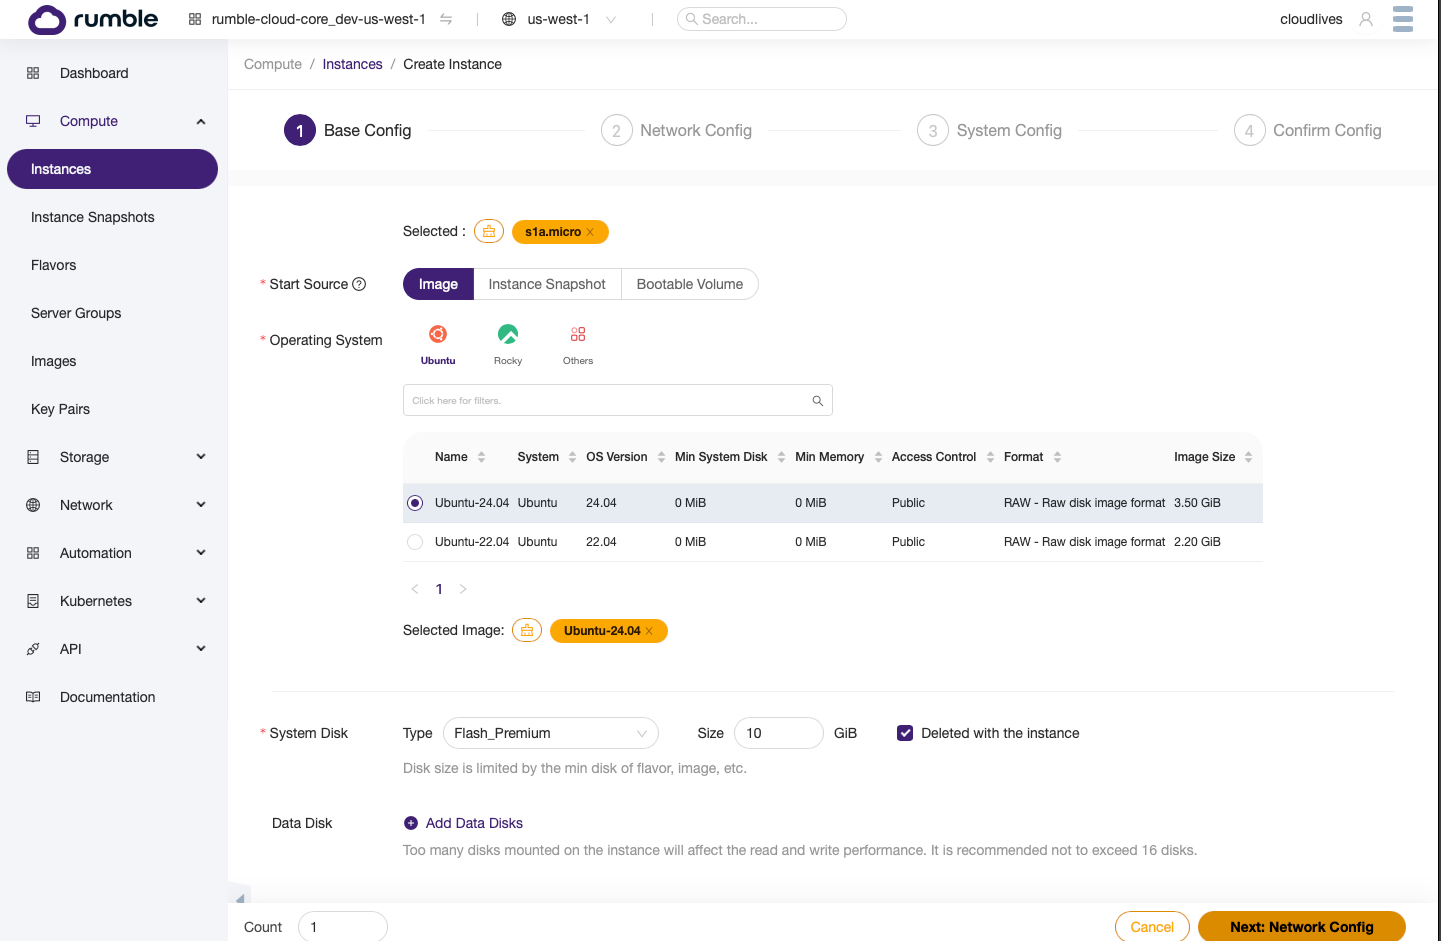
Step 3. Create VM instance
Create a virtual machine (VM) instance.
- Select Compute > Instances > Create Instance.
- Fill in the following fields using the example values given.
- Name:
my-server - Availability Zone: select the zone closest to your location
- For Specification, you'll pick the flavor or technical specification for your virtual machine instance. For this example, select the Shared Resources tab, then select
s1a.microfor the flavor. This is the smallest flavor available and a good pick to get started. If you decide you need to increase the performance of the VM, you can always change it later.
- Select
Ubuntu 24.04for the operating system. Select Next.
- Select
PublicEphemeralfrom the Public Networks tab. This option attaches your VM instance to a network that is accessible to the internet.
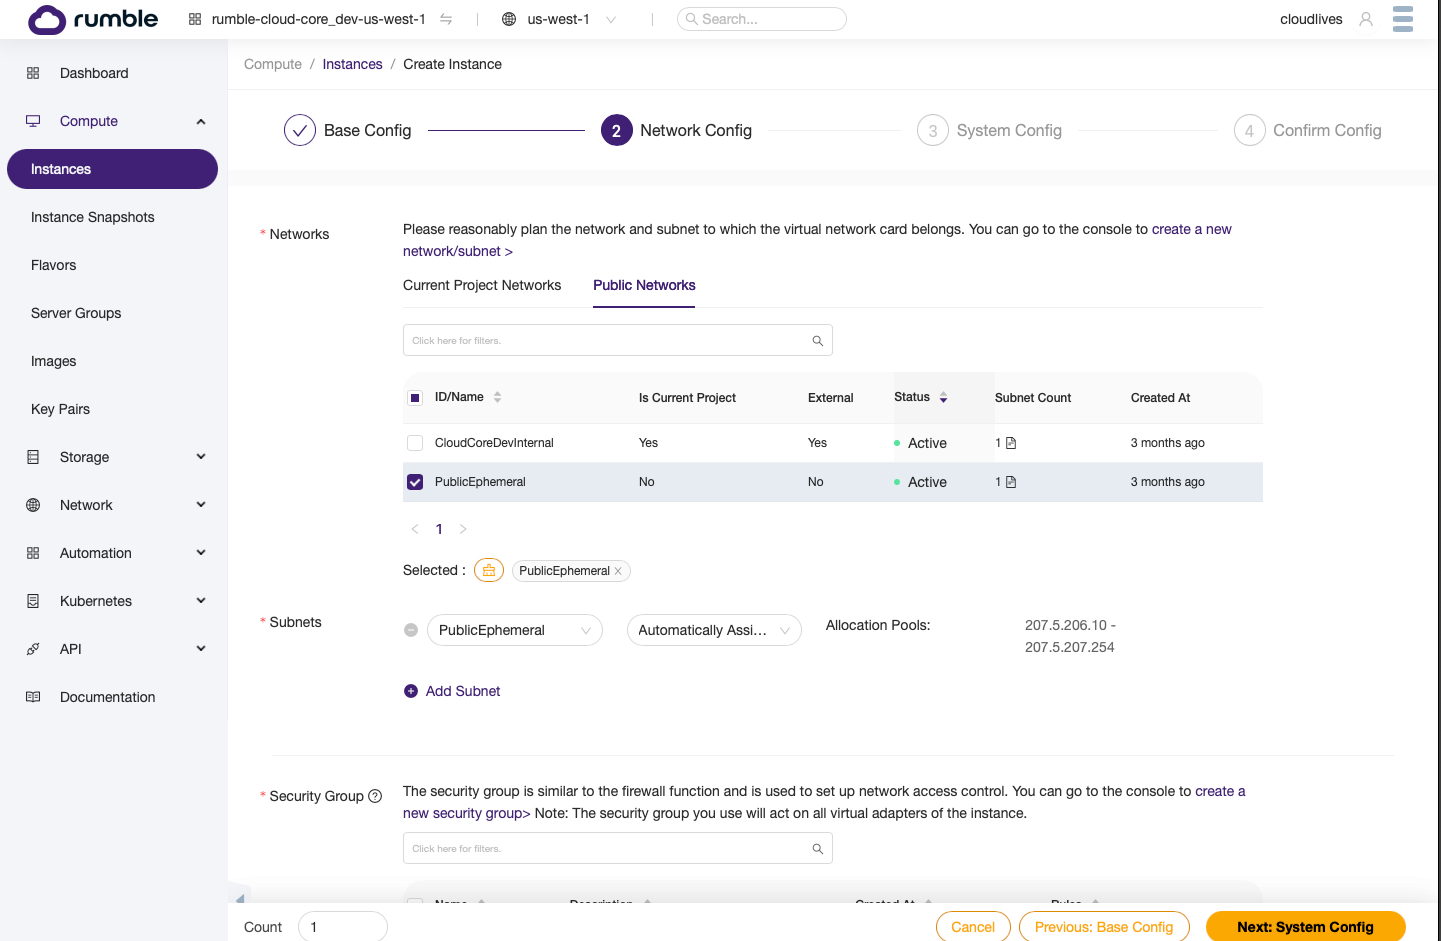
- Select the security group you previously created (
SSHMinecraft) to attach to the VM instance. - For login type, select Keypair. For Keypair (the SSH keypair you'll use to access the VM instance), you can either add an existing SSH key or create a new one by selecting Create Keypair. Learn more about creating and using SSH keypairs.
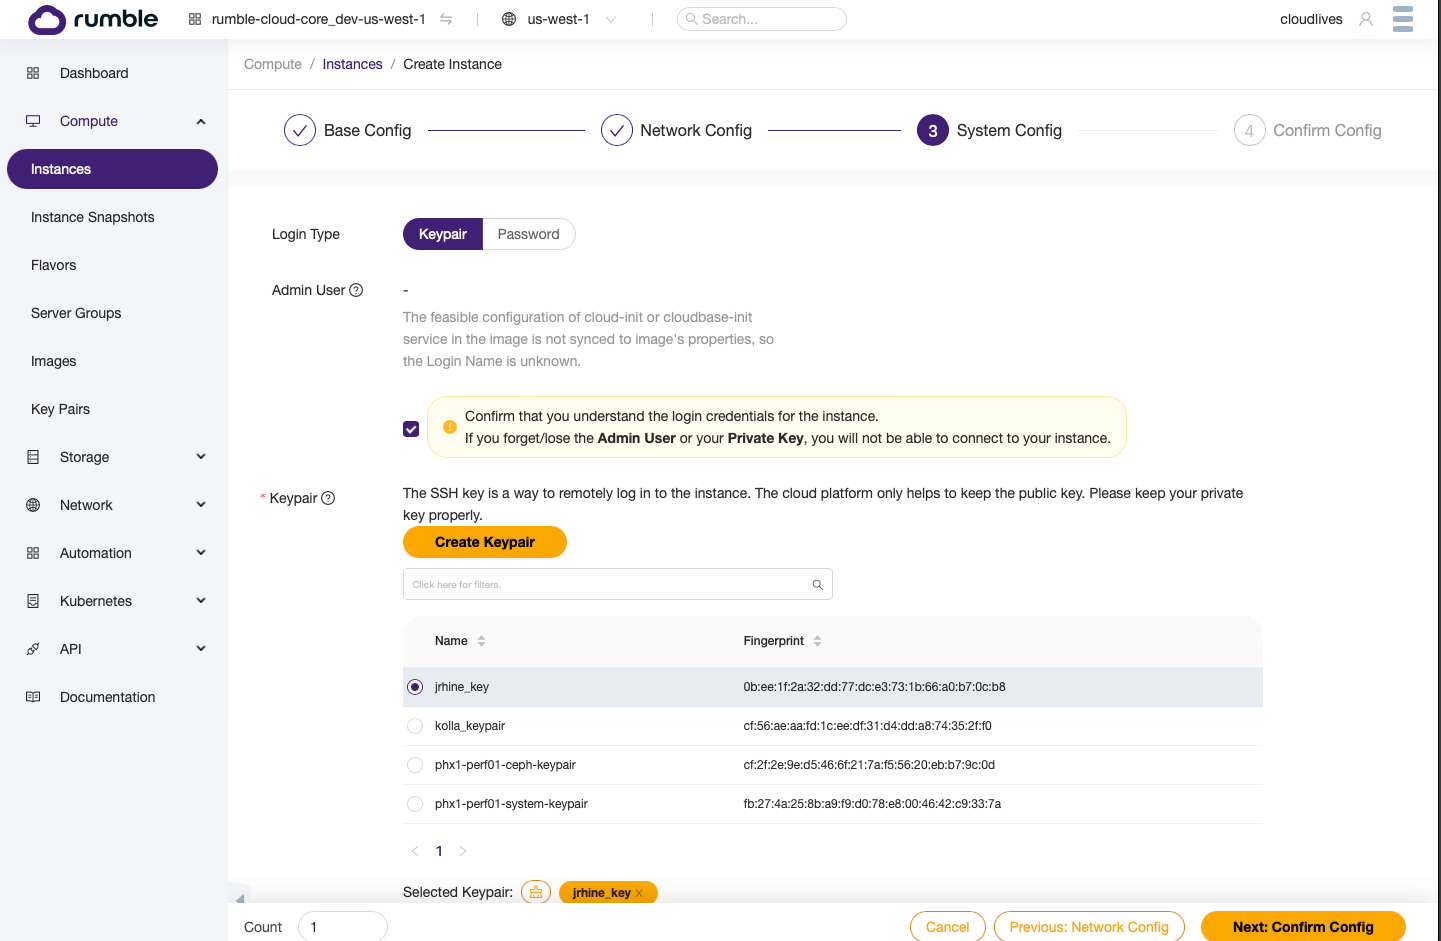
- Select Next to review your VM instance creation. Select Confirm.
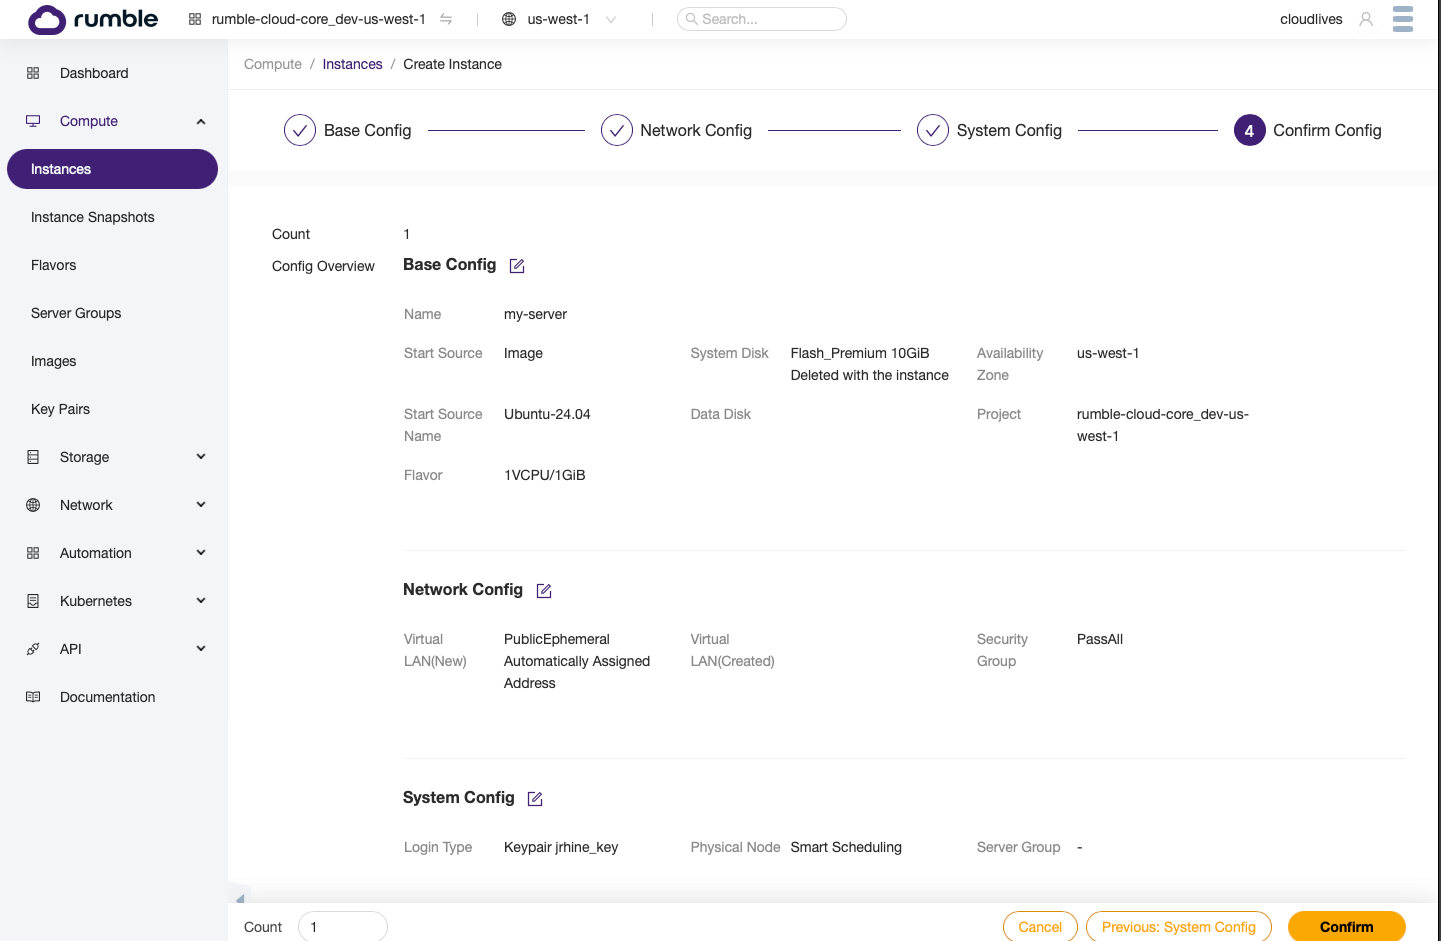
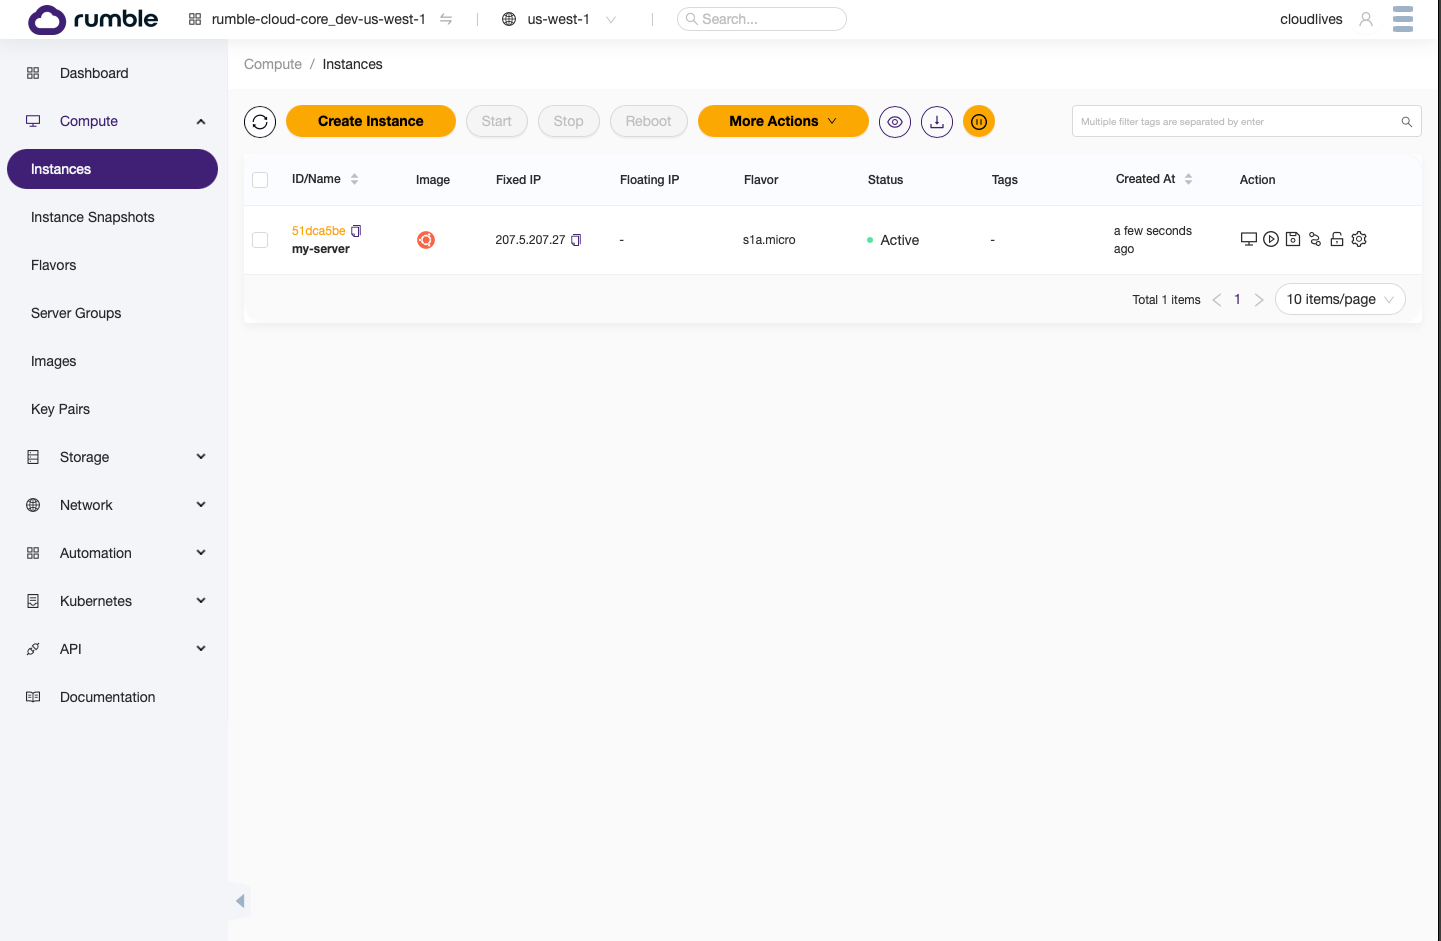
- Wait a few seconds until your VM instance changes to the
Activestate, and you see an IP address in the Fixed IP column. You will need to note this IP, as this will be the IP of your server that you use in Minecraft, and that you will SSH to in order to setup your server.
Step 4. Downlown Minecraft server
- Go to https://www.minecraft.net/en-us/download/server/bedrock.
- Choose the Ubuntu server option (select
Agree). - Select Download to download the .zip archive file that contains the Minecraft server.
Step 5. Transfer Minecraft server to the VM instance
Transfer the downloaded .zip file using SCP of SFTP.
- Open your terminal and type the following:
-
In this example, replace
YOUR_SERVER_IPwith the actual value of the VM instance IP address (found next to your VM instance under the Fixed IP column on the Instances page). -
Set up the Minecraft server on the VM instance using your terminal and the SSH command.
ssh ubuntu@YOUR_SERVER_IP
sudo apt -y update
sudo apt -y upgrade
sudo apt -y install unzip
mkdir minecraft
cd /home/ubuntu/minecraft
unzip /home/ubuntu/bedrock-server*.zip

sudo mkdir -p /opt/minecraft
sudo useradd minecraft
sudo unzip /home/ubuntu/bedrock-server*.zip -d /opt/minecraft
sudo chown -R minecraft:minecraft /opt/minecraft
- Run the following command from the terminal to create a custom startup script.
[Unit]
Description=MineCraft server
After=network.target

[Service]
ExecStart=/opt/minecraft/bedrock_server
Restart=always
User=minecraft
Environment=LD_LIBRARY_PATH=/opt/minecraft
WorkingDirectory=/opt/minecraft

[Install]
WantedBy=multi-user.target
- Run the following commands in terminal.
sudo systemctl daemon-reexec
sudo systemctl daemon-reload
sudo systemctl enable minecraft
sudo systemctl start minecraft
- Check the status of your server by running the following in the terminal.
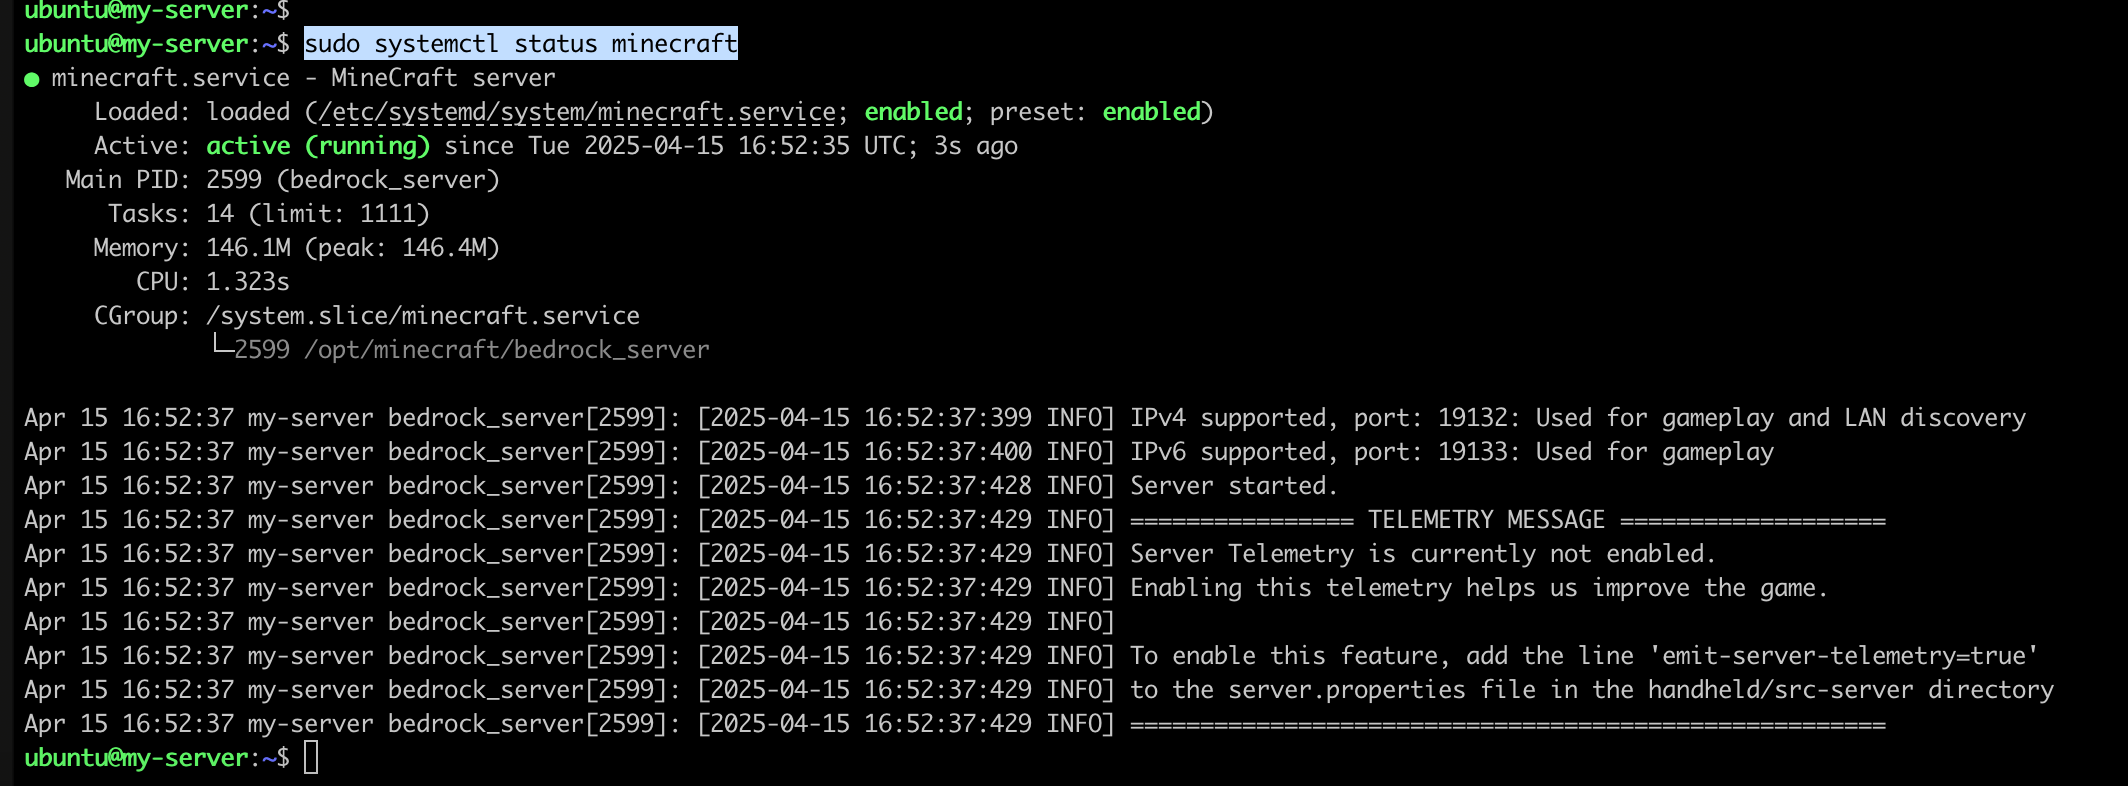
You'll see a message such as the one below, showing that the server is active.
ubuntu@my-server:~$ sudo systemctl status minecraft
● minecraft.service - MineCraft server
     Loaded: loaded (/etc/systemd/system/minecraft.service; enabled; preset: enabled)
     Active: active (running) since Tue 2025-04-15 16:52:35 UTC; 3s ago
   Main PID: 2599 (bedrock_server)
      Tasks: 14 (limit: 1111)
     Memory: 146.1M (peak: 146.4M)
        CPU: 1.323s
     CGroup: /system.slice/minecraft.service
             └─2599 /opt/minecraft/bedrock_server

Apr 15 16:52:37 my-server bedrock_server[2599]: [2025-04-15 16:52:37:399 INFO] IPv4 supported, port: 19132: Used for gameplay and LAN discovery
Apr 15 16:52:37 my-server bedrock_server[2599]: [2025-04-15 16:52:37:400 INFO] IPv6 supported, port: 19133: Used for gameplay
Apr 15 16:52:37 my-server bedrock_server[2599]: [2025-04-15 16:52:37:428 INFO] Server started.
Apr 15 16:52:37 my-server bedrock_server[2599]: [2025-04-15 16:52:37:429 INFO] ================ TELEMETRY MESSAGE ===================
Apr 15 16:52:37 my-server bedrock_server[2599]: [2025-04-15 16:52:37:429 INFO] Server Telemetry is currently not enabled.
Apr 15 16:52:37 my-server bedrock_server[2599]: [2025-04-15 16:52:37:429 INFO] Enabling this telemetry helps us improve the game.
Apr 15 16:52:37 my-server bedrock_server[2599]: [2025-04-15 16:52:37:429 INFO]
Apr 15 16:52:37 my-server bedrock_server[2599]: [2025-04-15 16:52:37:429 INFO] To enable this feature, add the line 'emit-server-telemetry=true'
Apr 15 16:52:37 my-server bedrock_server[2599]: [2025-04-15 16:52:37:429 INFO] to the server.properties file in the handheld/src-server directory
Apr 15 16:52:37 my-server bedrock_server[2599]: [2025-04-15 16:52:37:429 INFO] ======================================================
ubuntu@my-server:~$
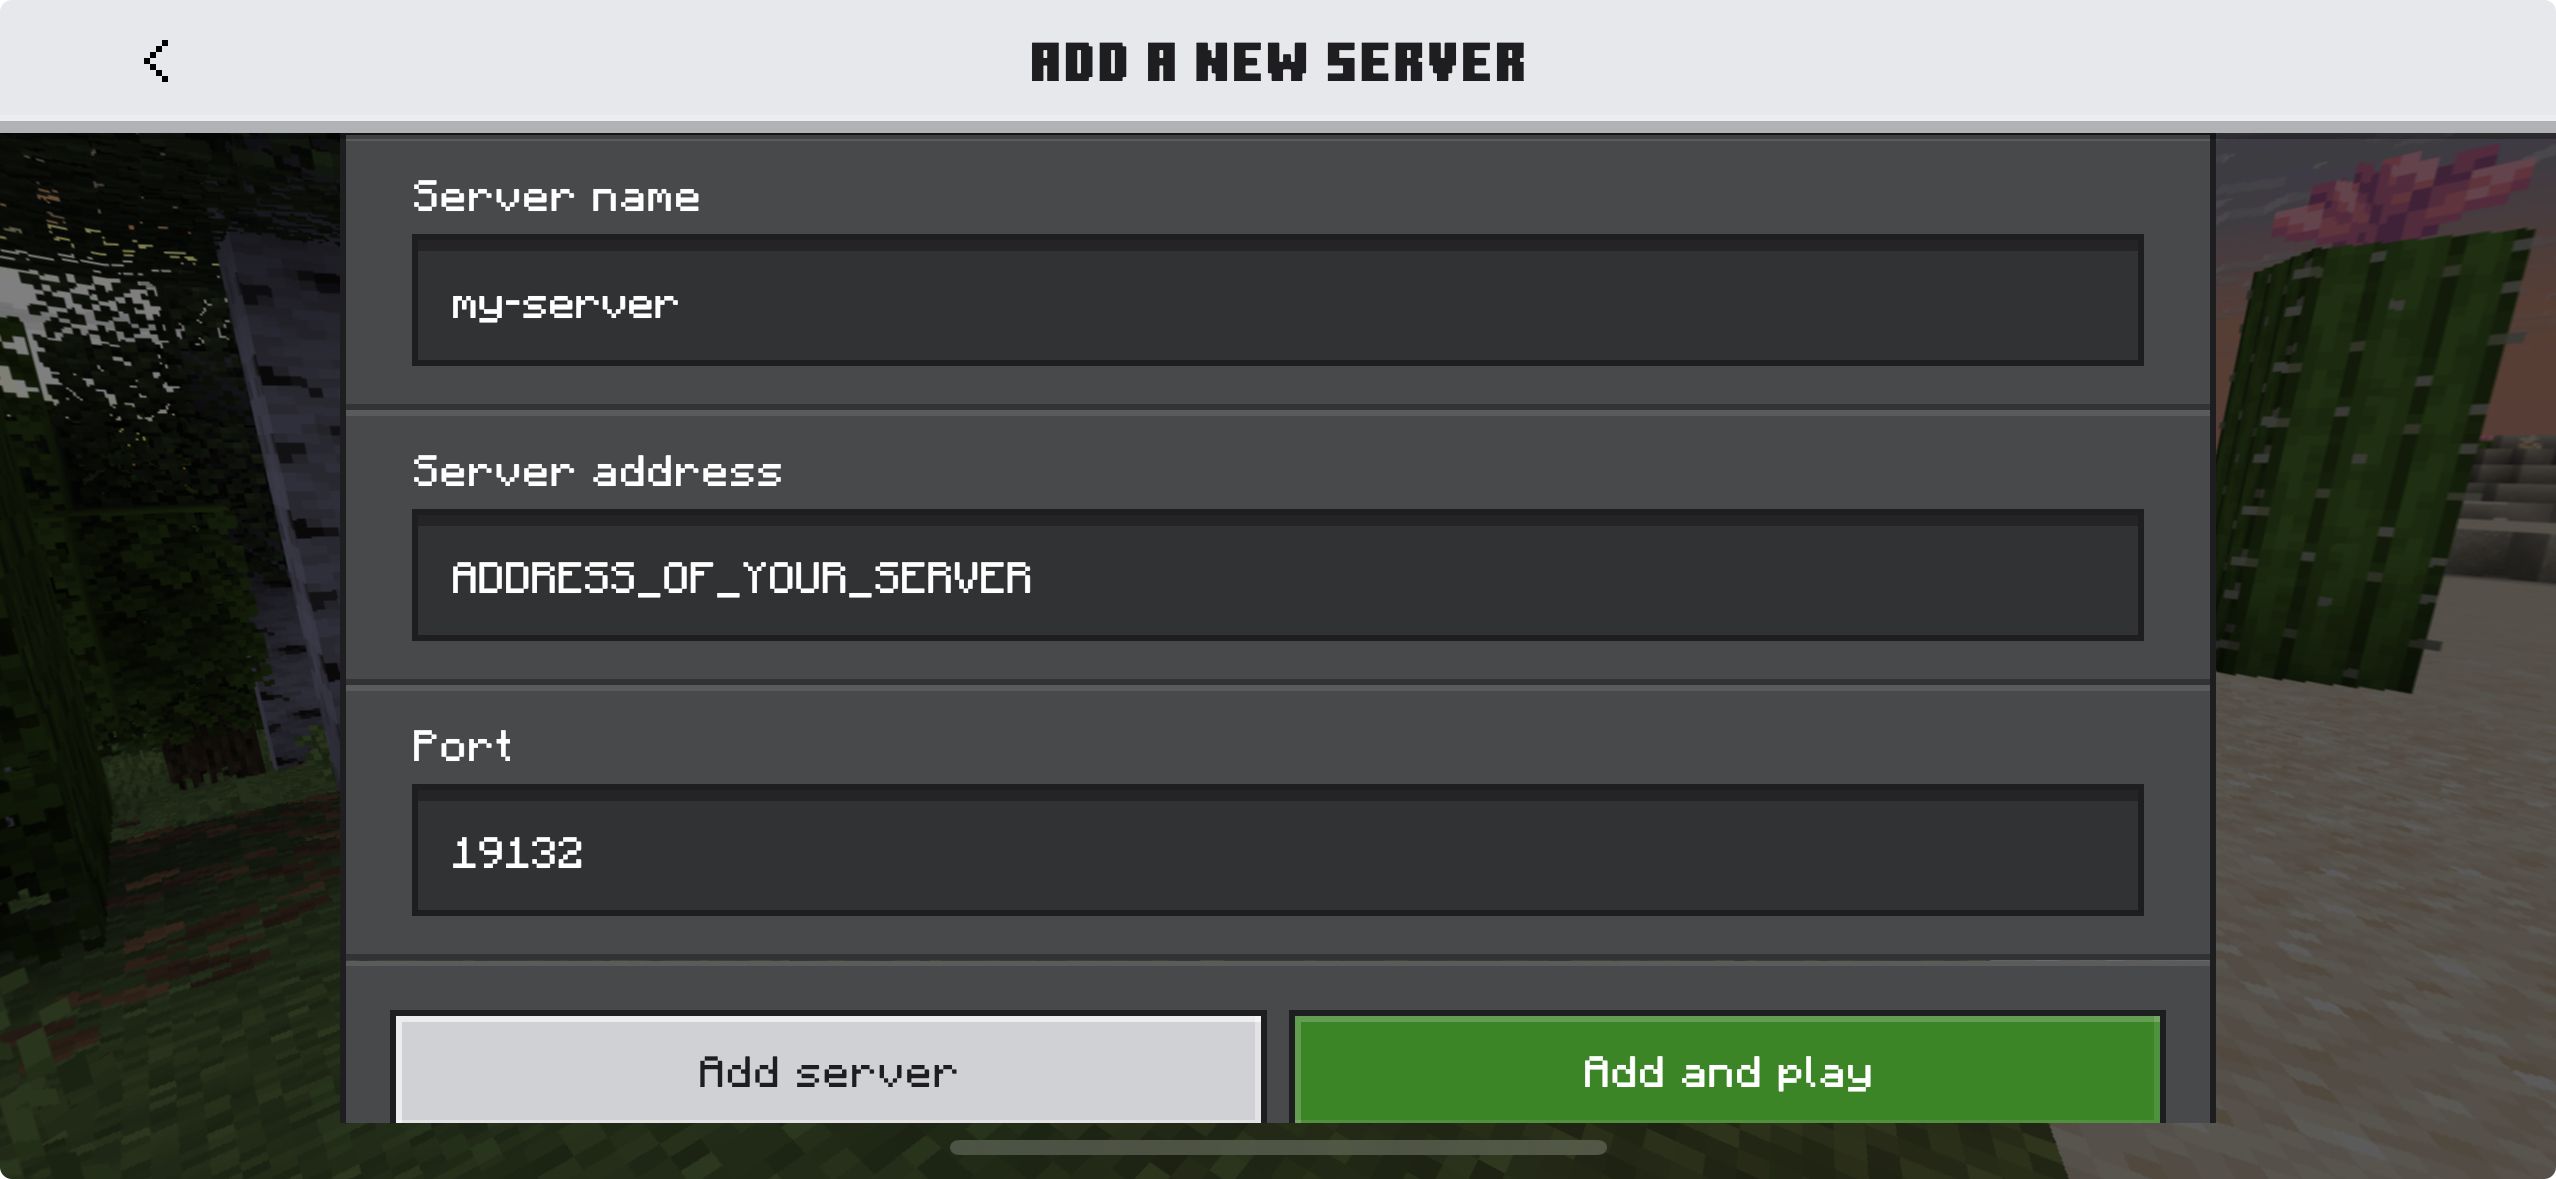
- Connect to your Minecraft server and start playing. For example, from the iPhone Minecraft edition, select Play, then Servers > Add Server. Give your server a name and add the IP address of your VM instance running your Minecraft server. Leave the default port of
19132. - Select Add Server.
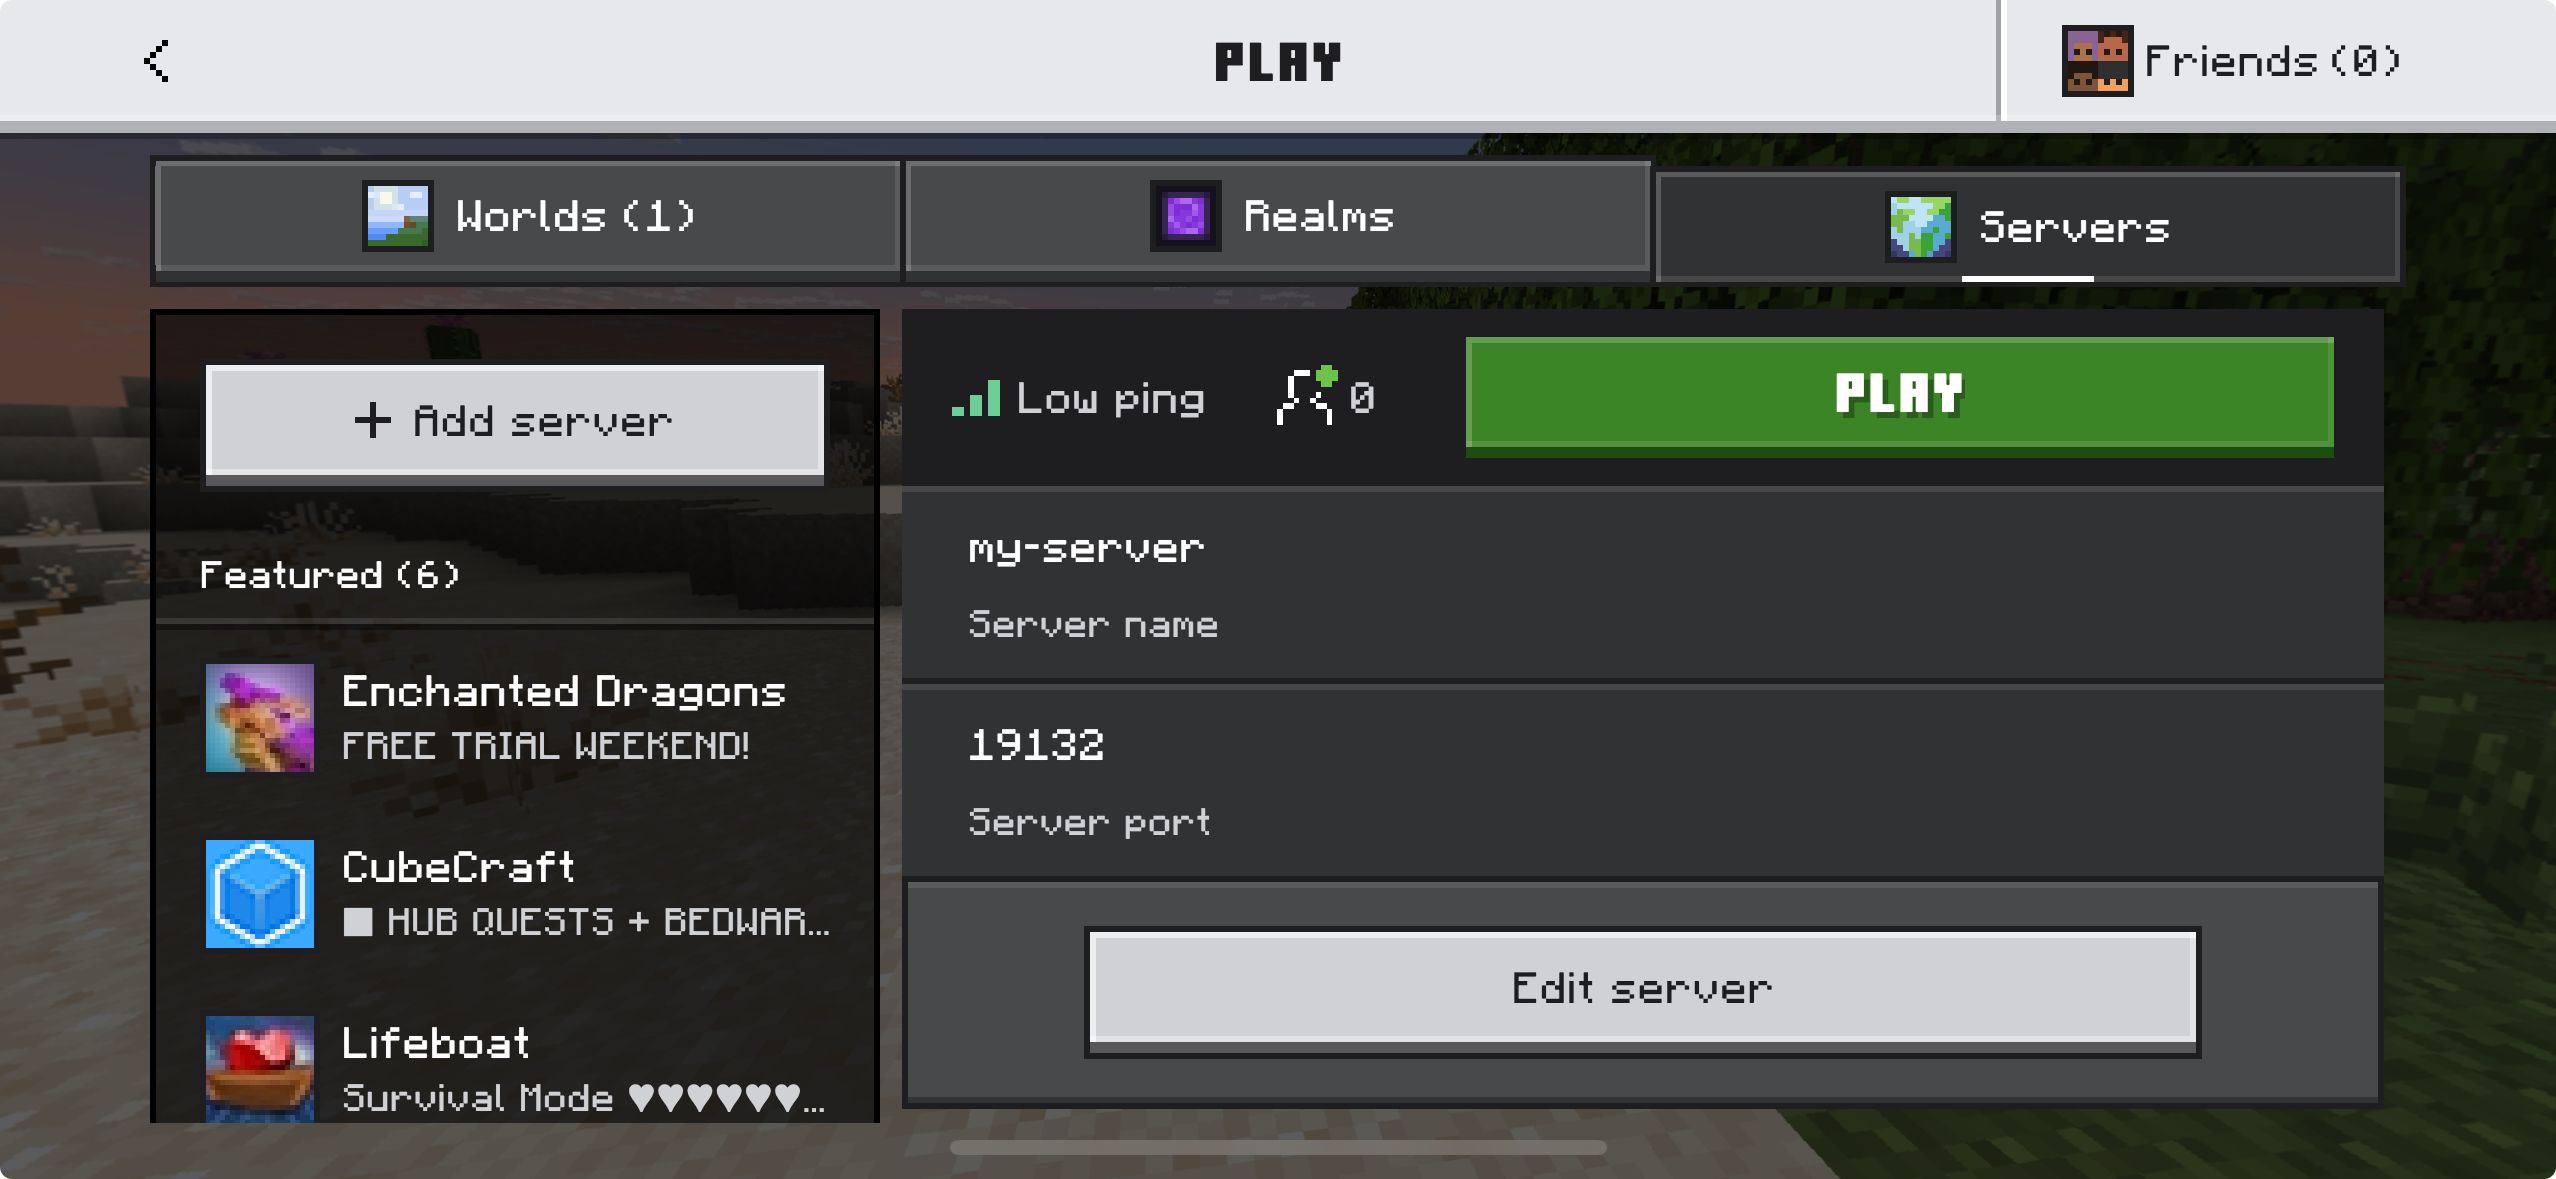
- Find your server from the list and select Play.
If you ever need to view your minecraft server logs, run the following command.