Install OpenClaw on Rumble Cloud
OpenClaw security
OpenClaw is a powerful tool for accomplishing many tasks. As with any tool, you should be careful in how you use it. Make sure to follow OpenClaw security best practices such as those documented at https://docs.openclaw.ai/gateway/security.
This guide walks you through installing an OpenClaw VM using the Rumble Cloud app onboarding process. The process is as straightforward as SSH'ing into a new VM and running openclaw onboard. This guide covers each step in detail so you can get OpenClaw running even if you are new to Rumble Cloud.
Prerequisites
- A Rumble Cloud account at rumble.cloud with at least one project. You can choose the "OpenClaw Starter" package if you are just starting out. See Get started for creating a new account and project.
- A terminal application (macOS Terminal, Windows PowerShell, or an SSH client such as PuTTY)
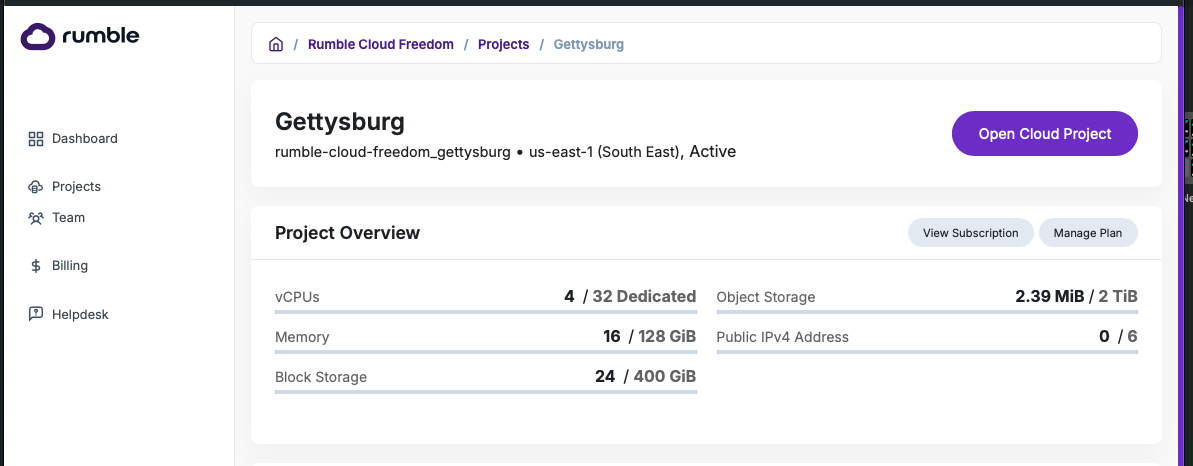
Step 1. Open your project
Log in to your account at portal.rumble.cloud and choose the project that you want to install OpenClaw in.
If available, you can select the Install OpenClaw button to go directly to the OpenClaw app installation page, or the Open Cloud Project button to open your project's console.
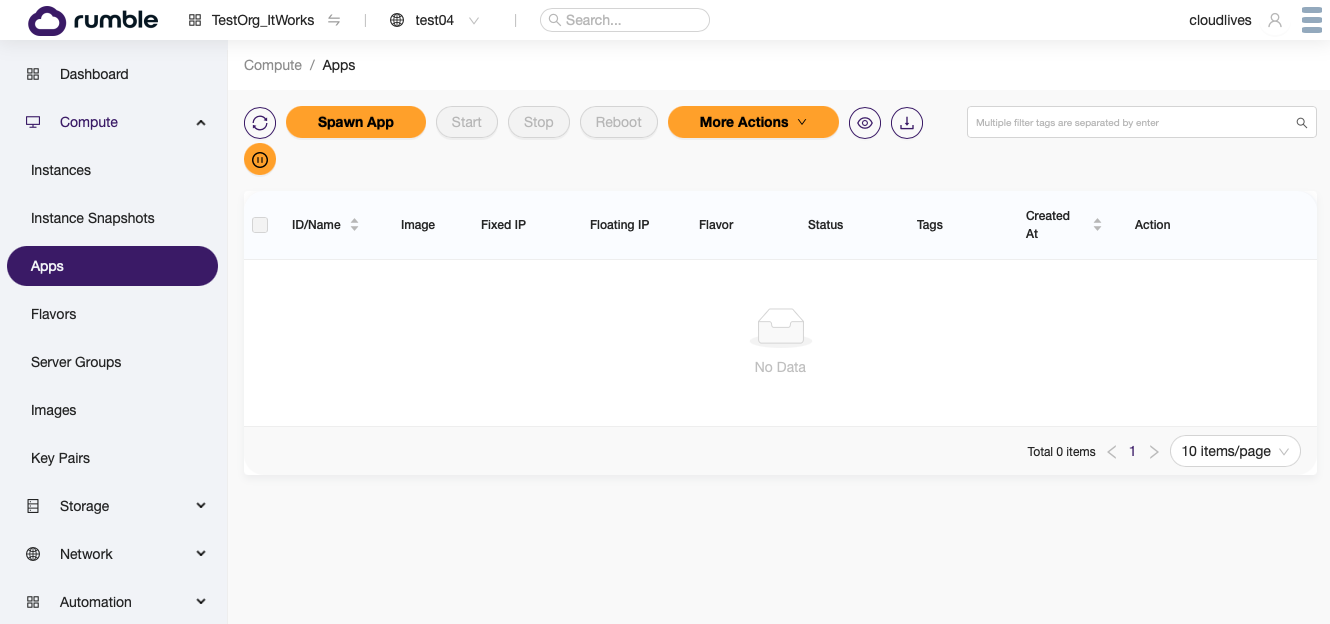
Step 2. Navigate to the Apps console
From the Rumble Cloud console, select Compute > Apps, then select Spawn App to get started.
You can skip this step if you selected Install OpenClaw in the previous step.
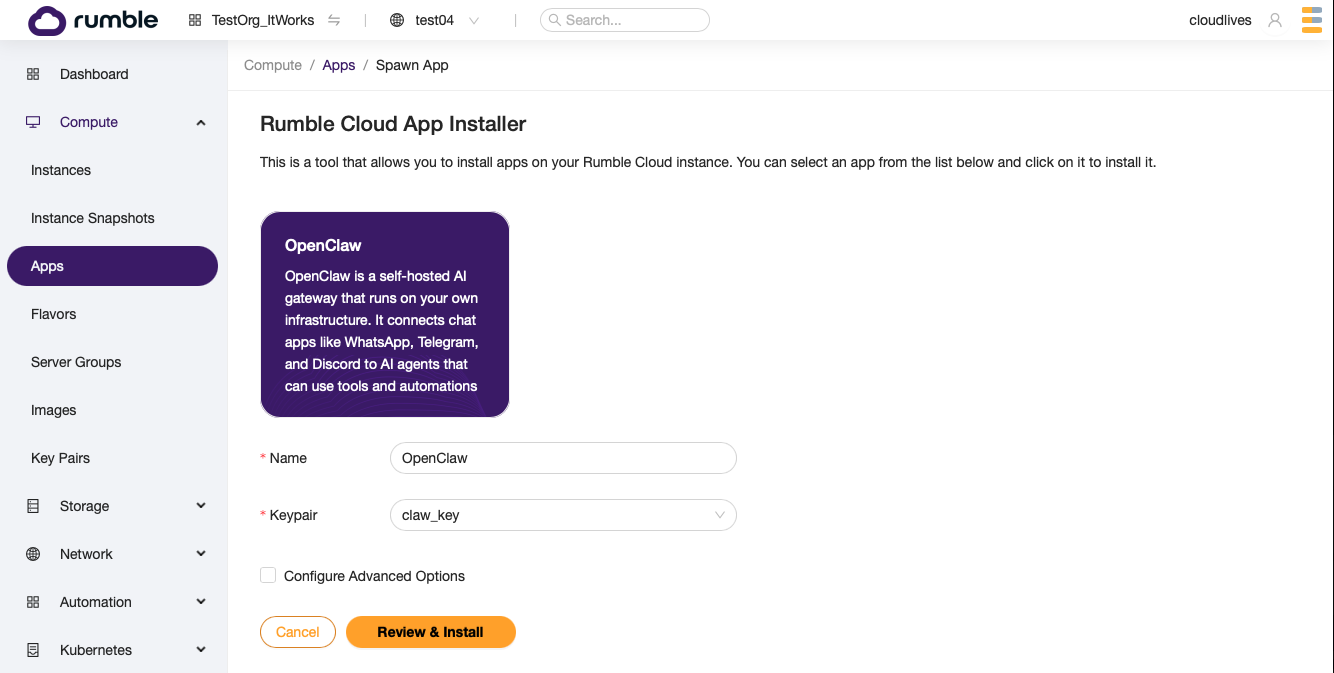
Step 3. Configure the OpenClaw app
- Select the OpenClaw app.
- Assign it a Name.
- Select a Keypair that you will use to log in. If you have not yet created a key pair, one will be created for you automatically during installation.
The default installation uses the recommended starter flavor (s1a.medium -- 4 shared vCPU with 4 GB of RAM) and allocates 25 GB of disk space. It also sets up a web server to allow remote access to your OpenClaw after installation.
To customize any of these options, check Configure Advanced Options.
Select Review & Install to continue.
Step 4. Review and install
Review the options that were selected, and select Install.

Step 5. Wait for the app to build
This brings you to the App Detail page for your new OpenClaw VM. This page includes a summary of the basic steps to complete your OpenClaw installation, as well as the IP address and web URL of your OpenClaw.
The IP address will be blank and the Status will show Build when you first arrive on this page. You may need to refresh the page several times as the build progresses.
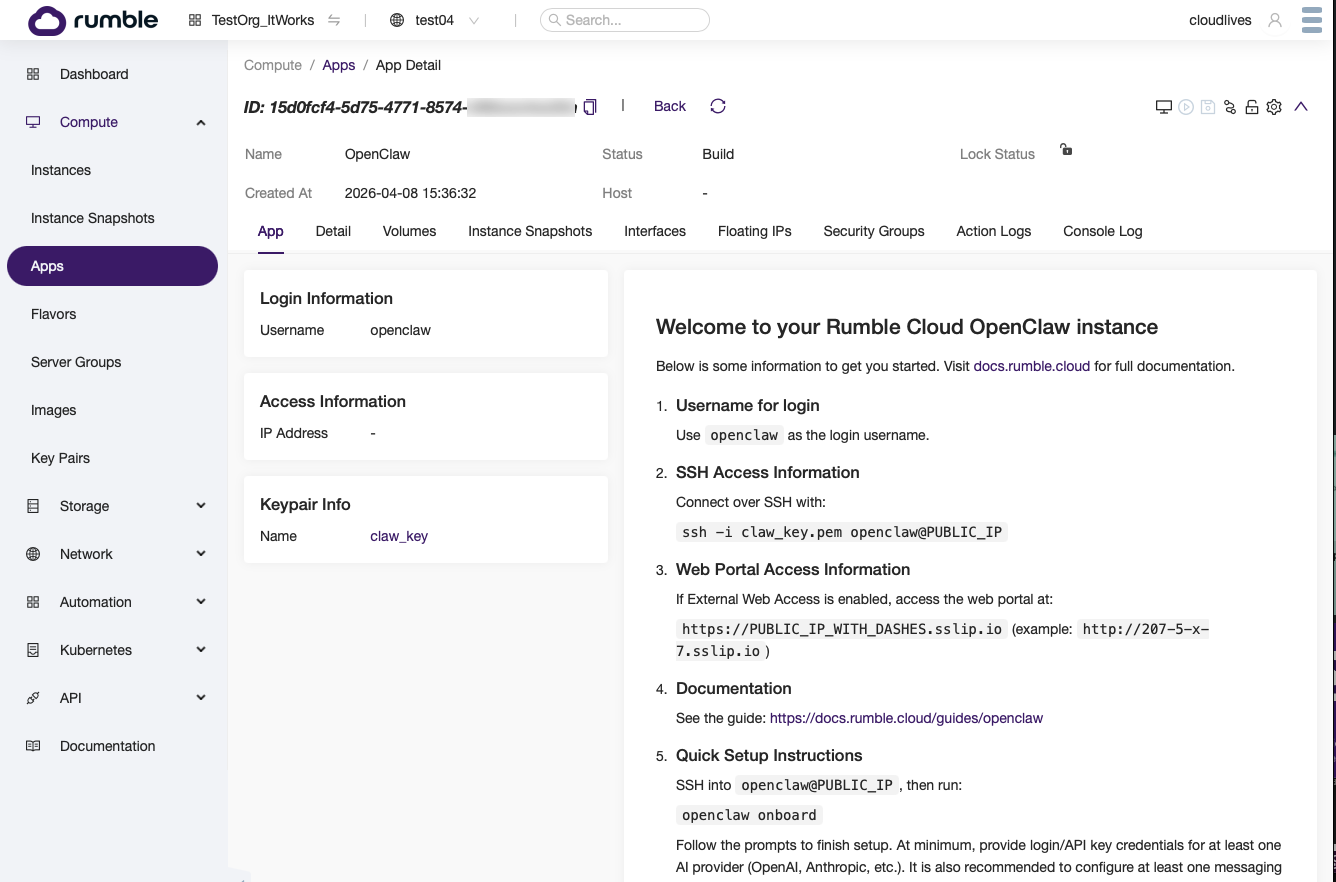
After refreshing, you should see the Status switch to Active and an IP address assigned.

Step 6. Connect to the VM via SSH
Using the SSH key pair that you assigned to this app (or that was automatically generated), log in to the new VM's IP address with the openclaw user.
On Linux or macOS, use the ssh command in your terminal:
On Windows, use an SSH client such as PuTTY.
Key file permissions
If you receive a permissions error, you may need to set the correct permissions on your key file first:
After connecting, you should see an introduction message with basic setup instructions.
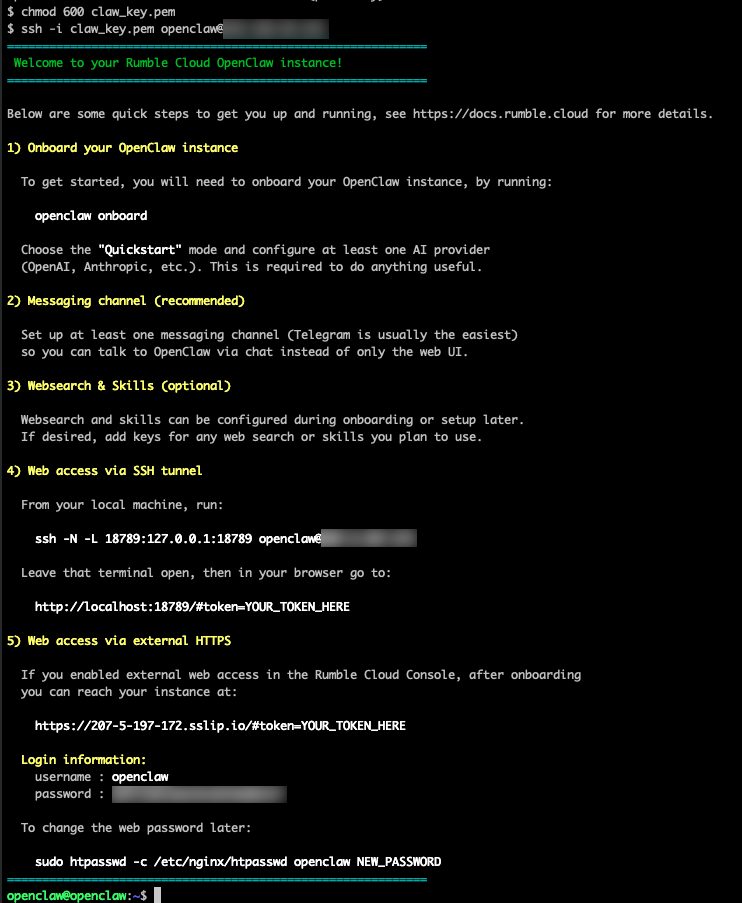
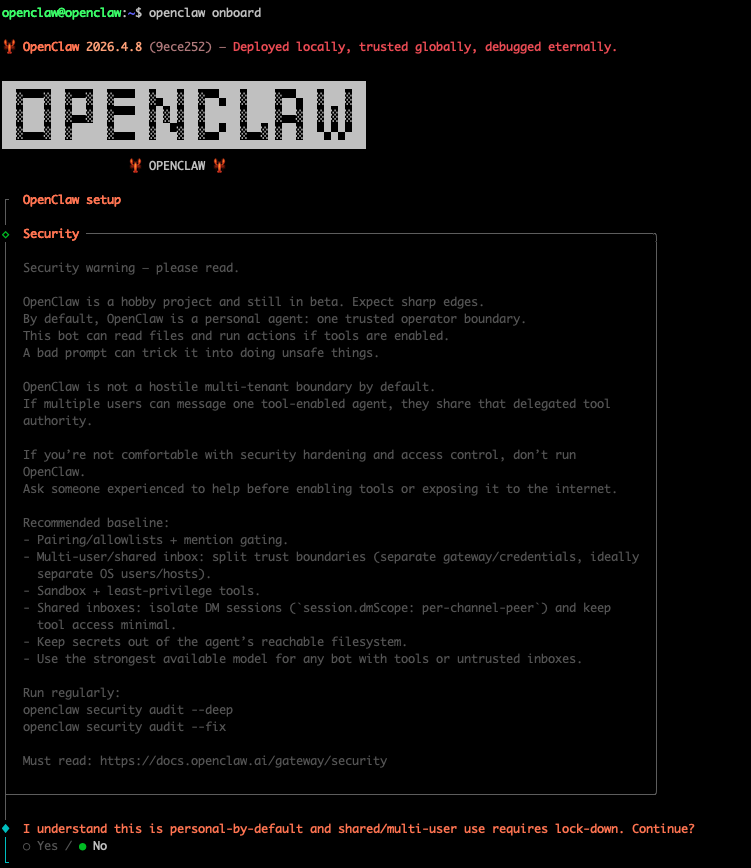
Step 7. Run the onboarding command
Run the following command from the console:
Please be patient -- this can take 10-30 seconds to start.
Step 8. Accept the security warning
Once the command starts, you should see a banner with a security warning. Read the warning, then use the arrow keys to select Yes and press Enter to accept.
Step 9. Choose the QuickStart setup mode
Select QuickStart and press Enter.

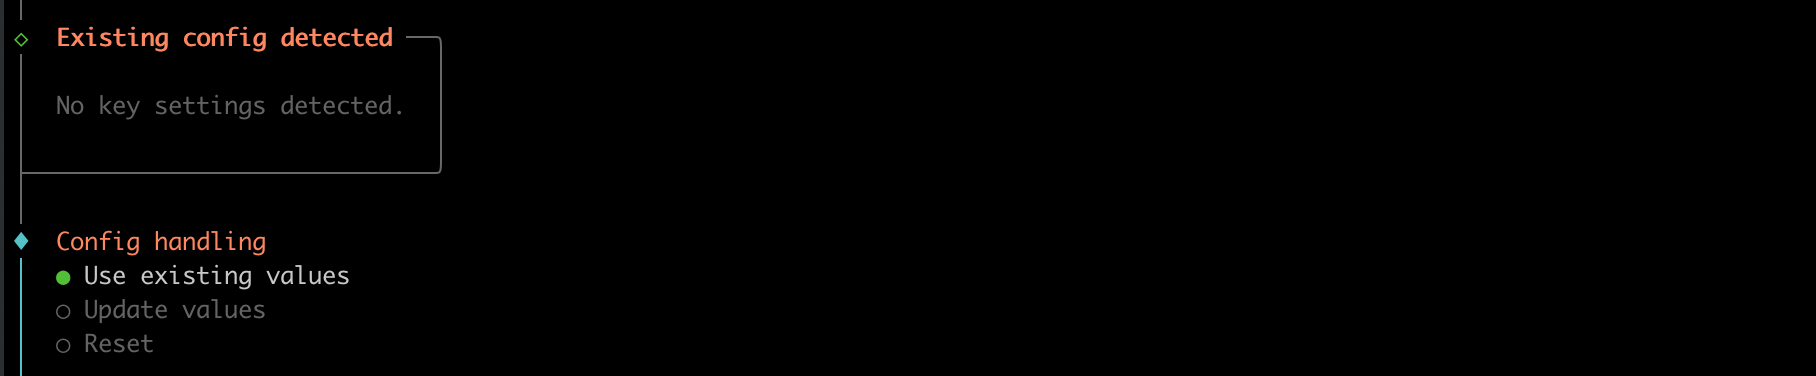
Step 10. Configure existing settings
Some settings may be pre-configured in the image. If prompted about Config Handling, choose Use Existing Values.
Step 11. Select an AI model provider
Select one model/auth provider from the list.
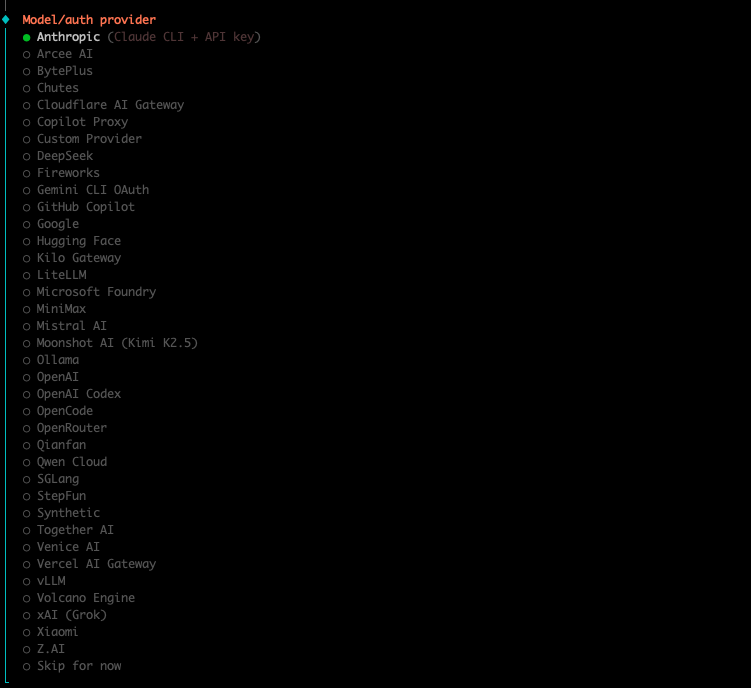
This guide uses OpenAI as an example, but any provider will work.

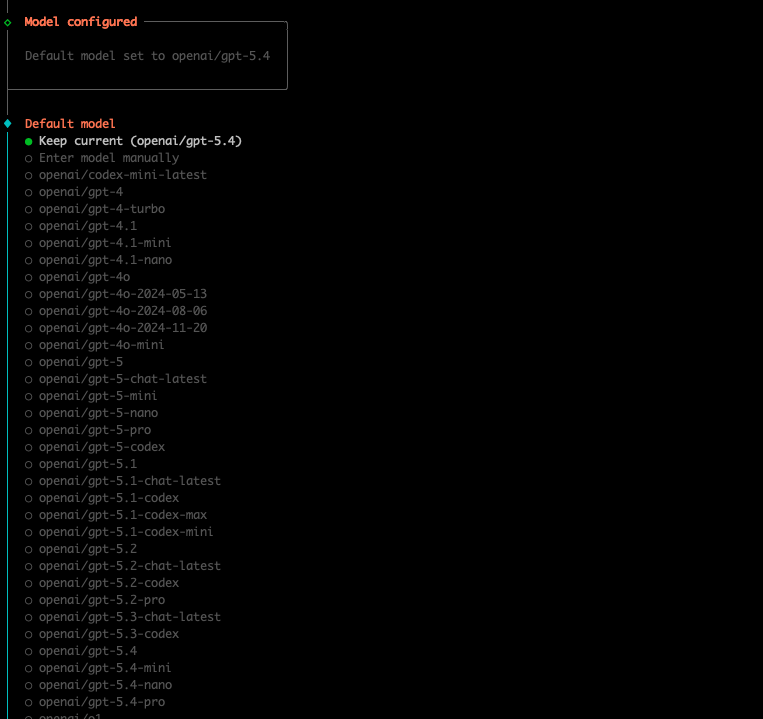
Step 12. Select a model
Select your model. If you don't have a preference, leave the default selected.
Step 13. Set up a messaging channel (optional)
You will be given the opportunity to set up a messaging channel to communicate with your OpenClaw. This is optional, but it's a great way to control your OpenClaw without being at your computer.
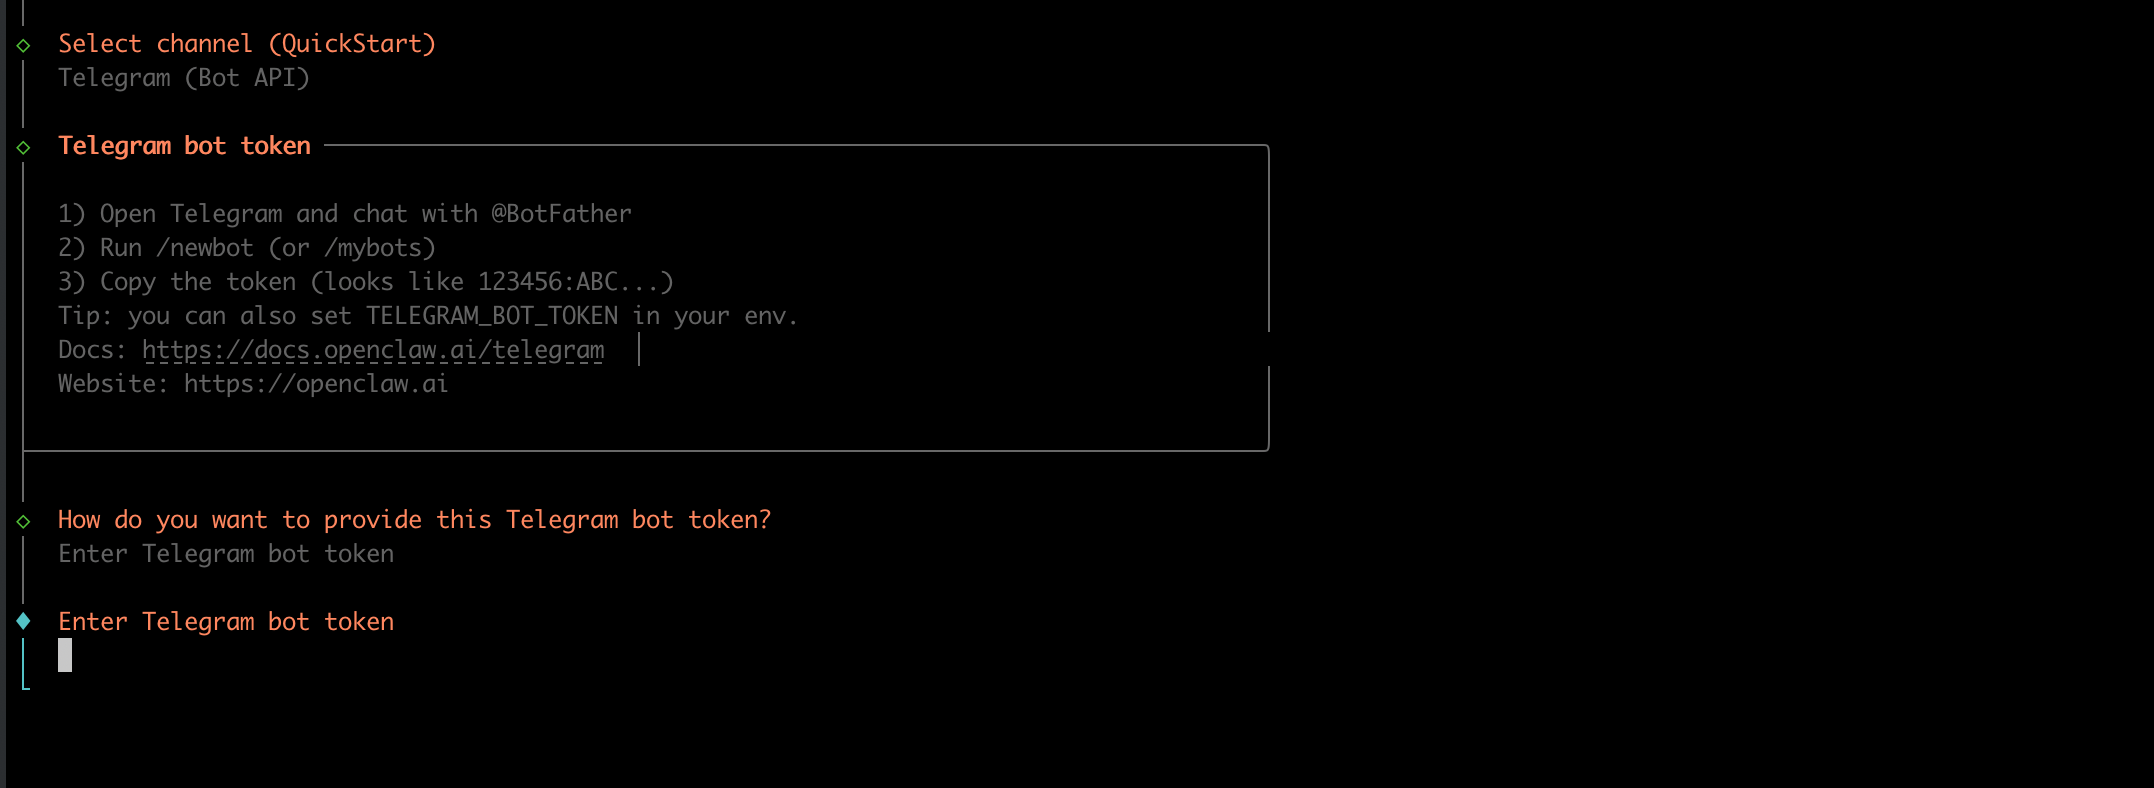
For easy setup, select Telegram. Otherwise, select Skip for now if you don't want to set this up yet.

If you selected Telegram, the installer will ask for an API key for your bot. Leave the console and continue to the next step to get this key.
Step 14. Create a Telegram bot (optional)
If you are setting up Telegram for your OpenClaw:
- Download Telegram on your phone and create an account.
- Open Telegram and send Help to @BotFather.
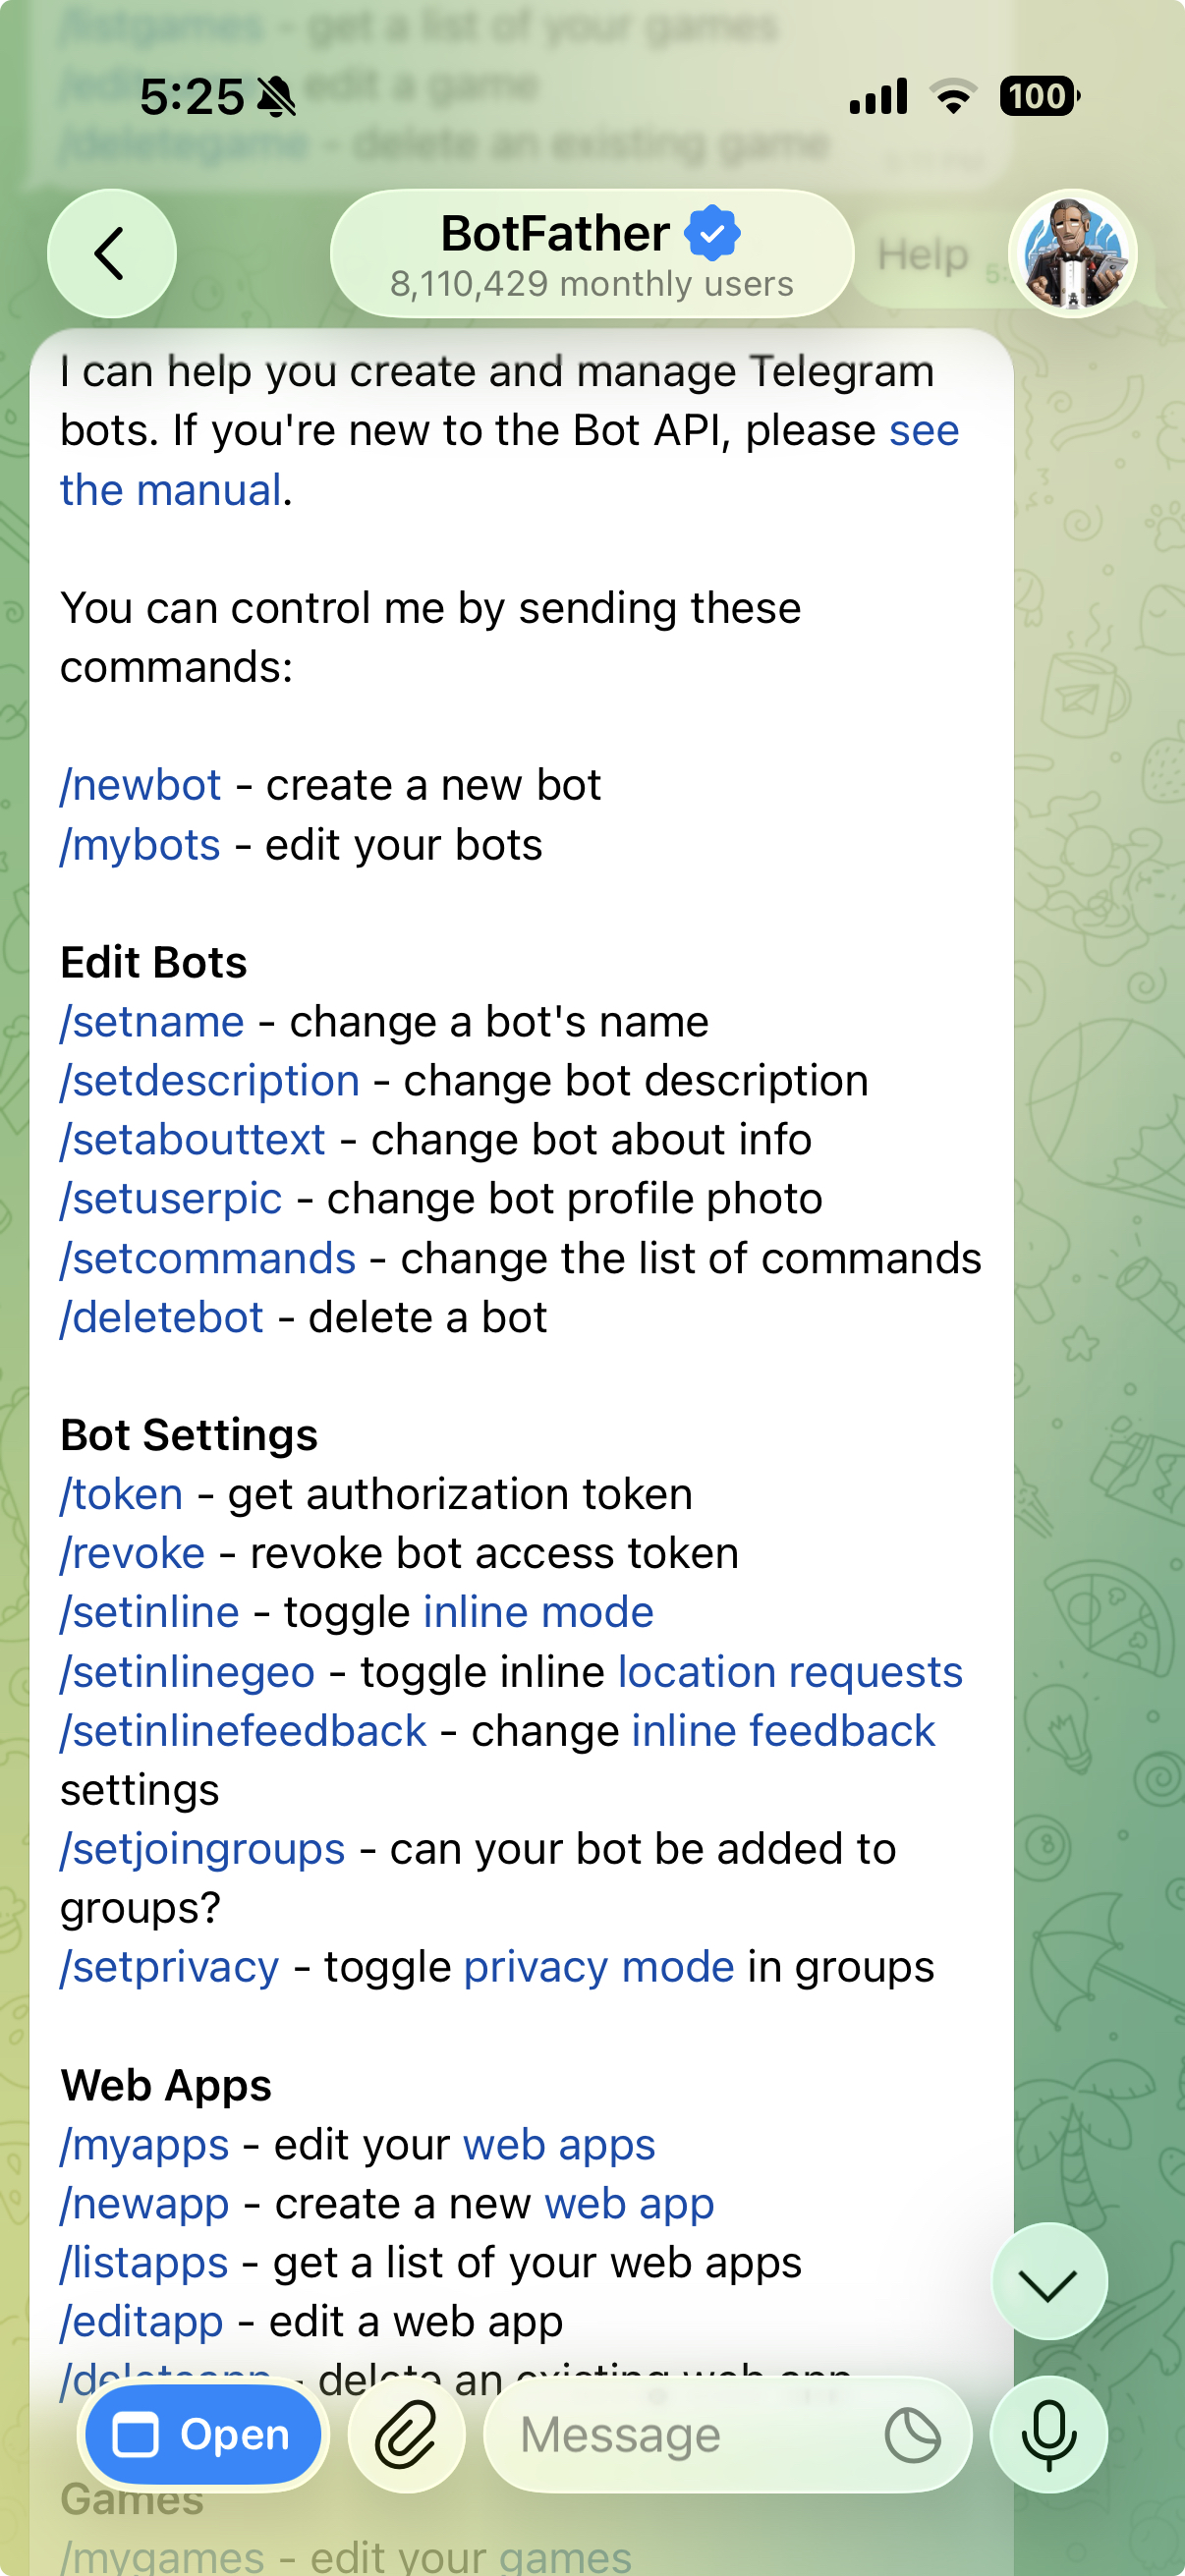
- Send the command
/newbotto BotFather. - Give the bot a name, for example "Rumble Cloud OpenClaw".
- Provide a username that ends in "bot", for example "RumbleCloudOpenClawDemoBot".
- BotFather will reply with an API key.

Step 15. Enter the Telegram API key
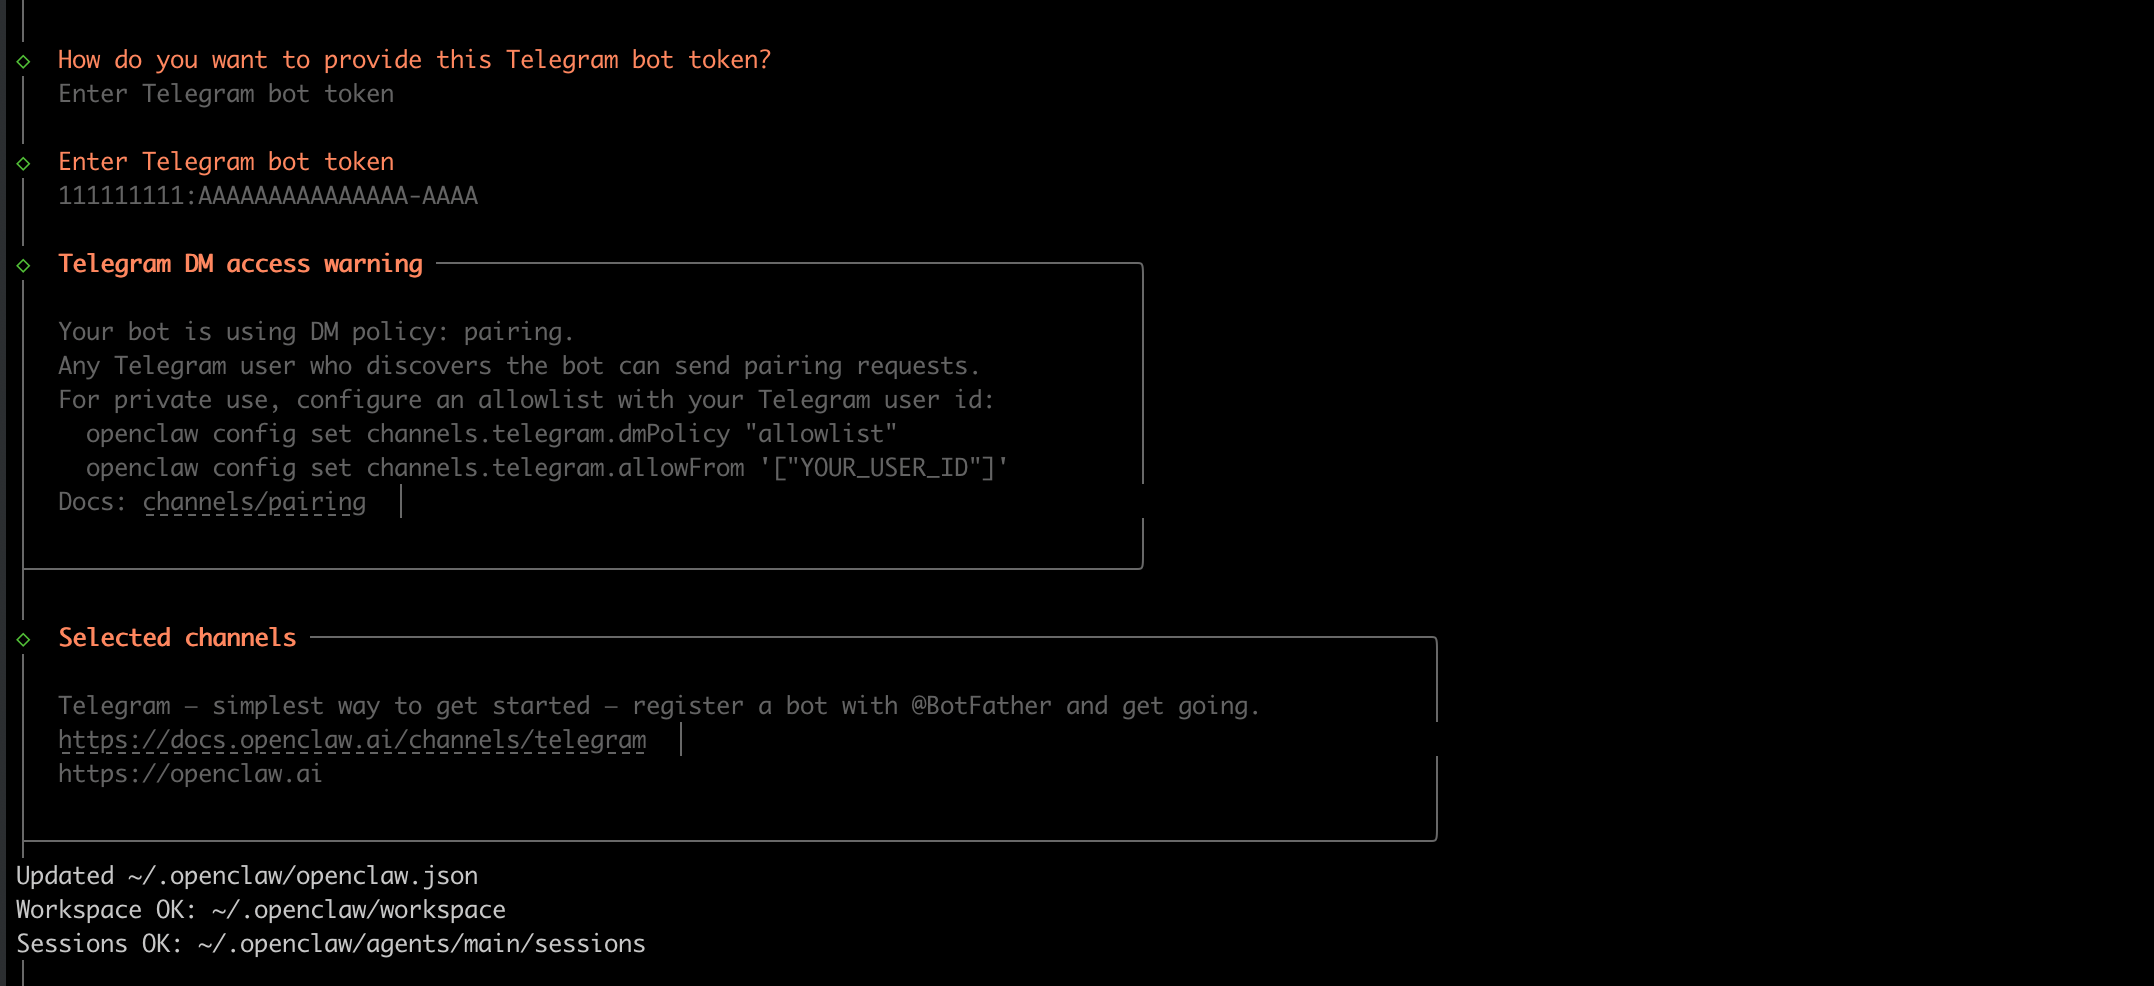
Copy the API key from Telegram and paste it at the prompt in your console.
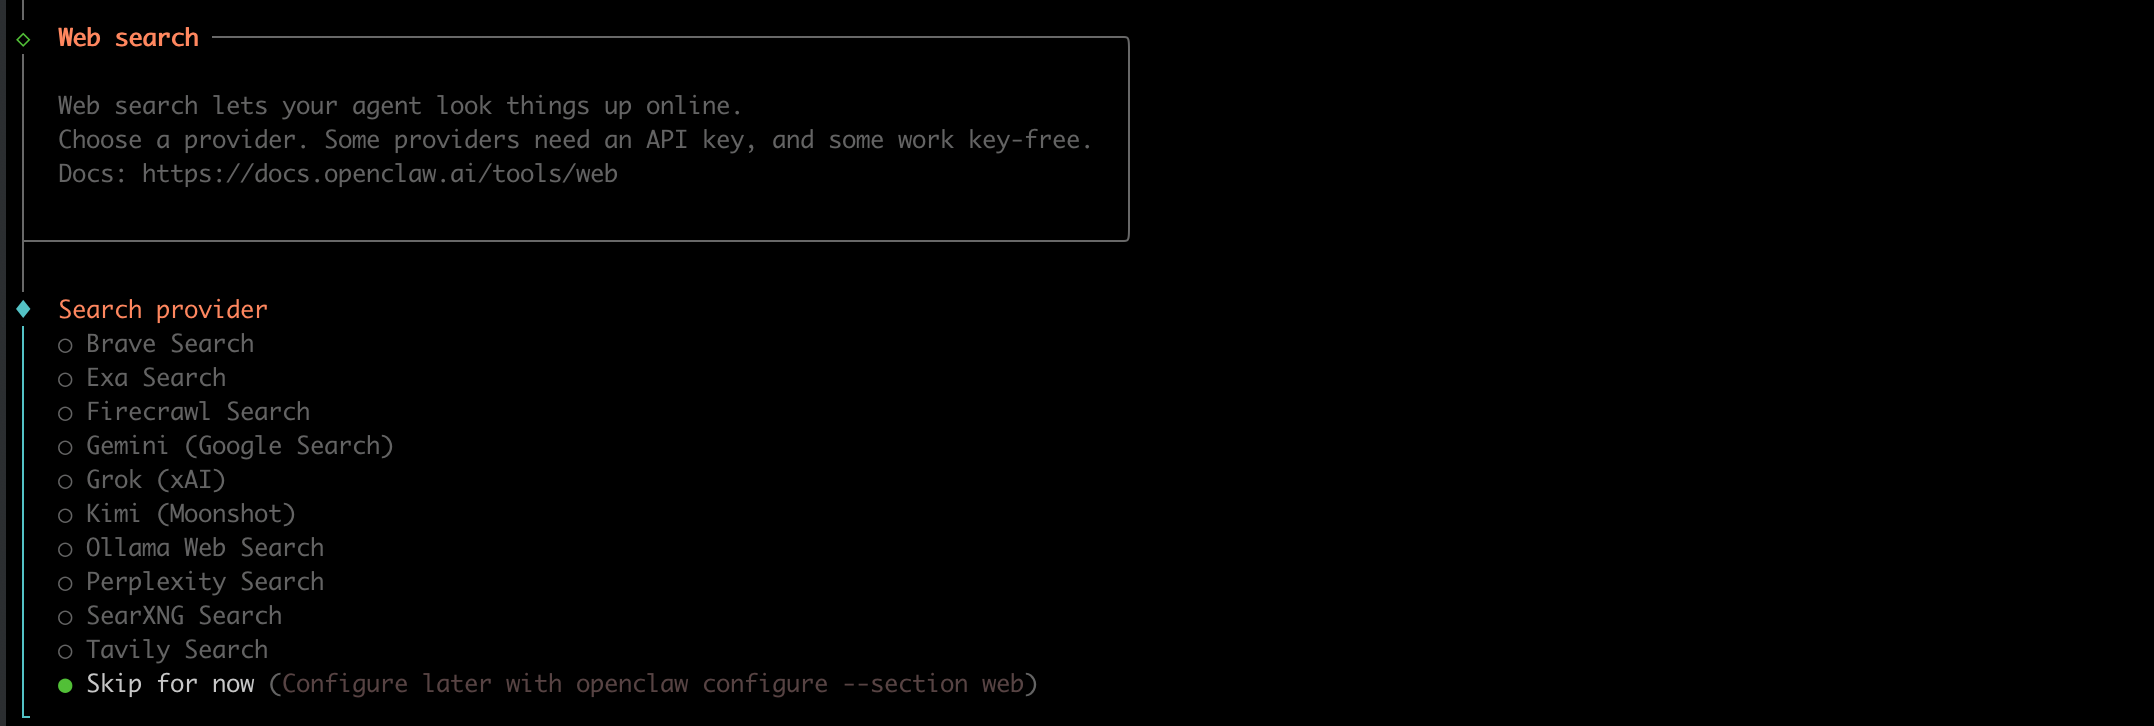
Step 16. Select a web search provider (optional)
Select a web search provider if you have a paid search plan with a provider. Otherwise, you can skip this for now.
Step 17. Configure skills (optional)
The Rumble Cloud OpenClaw image includes the packages necessary to support most of the default skills. If this is your first OpenClaw installation, skip this for now -- you can configure skills later.

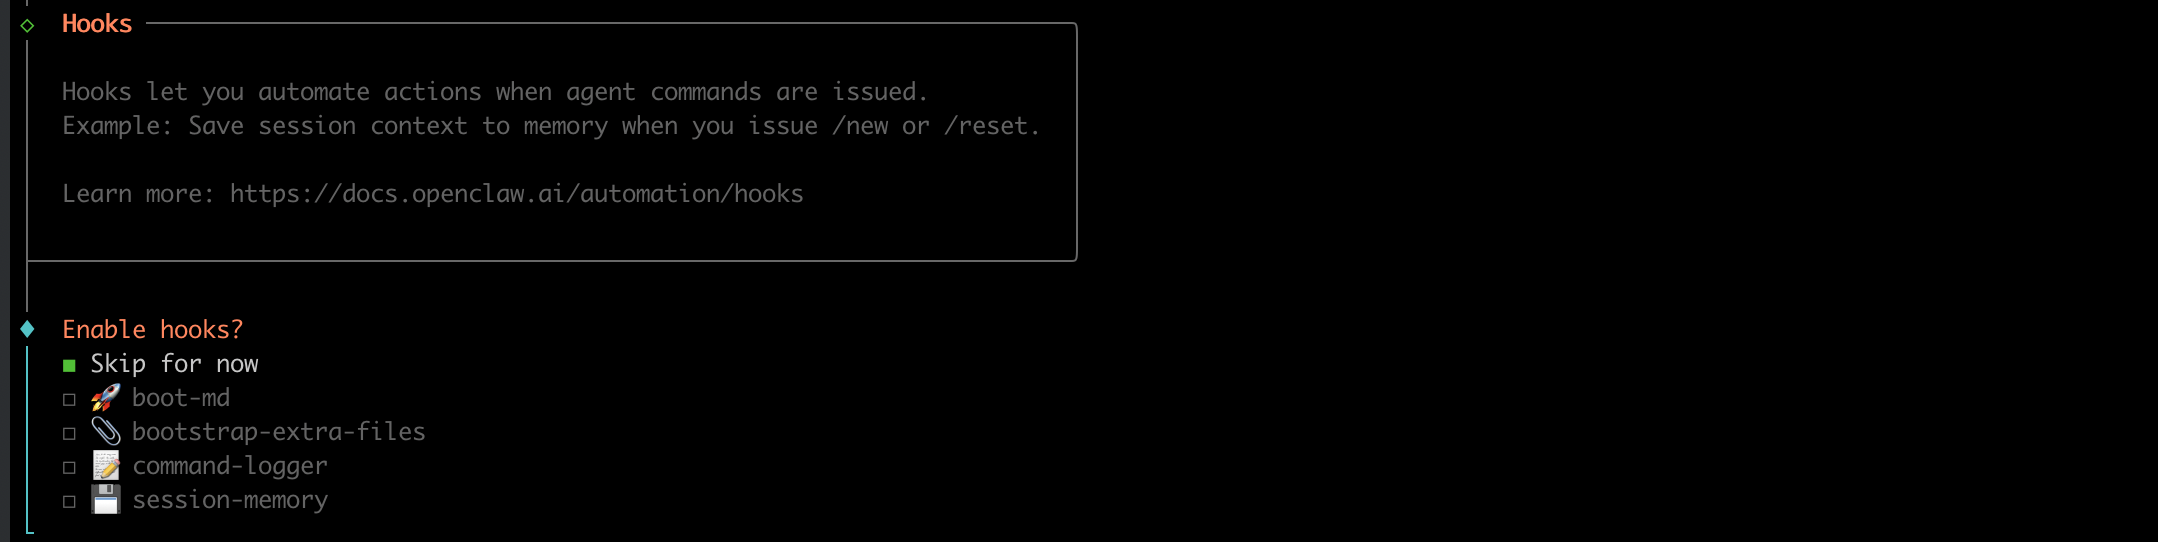
Step 18. Configure hooks (optional)
You should also skip this for now. Unlike the previous menus, you need to press the Space bar on the Skip for now option (the square to the left should be filled in), and then press Enter.
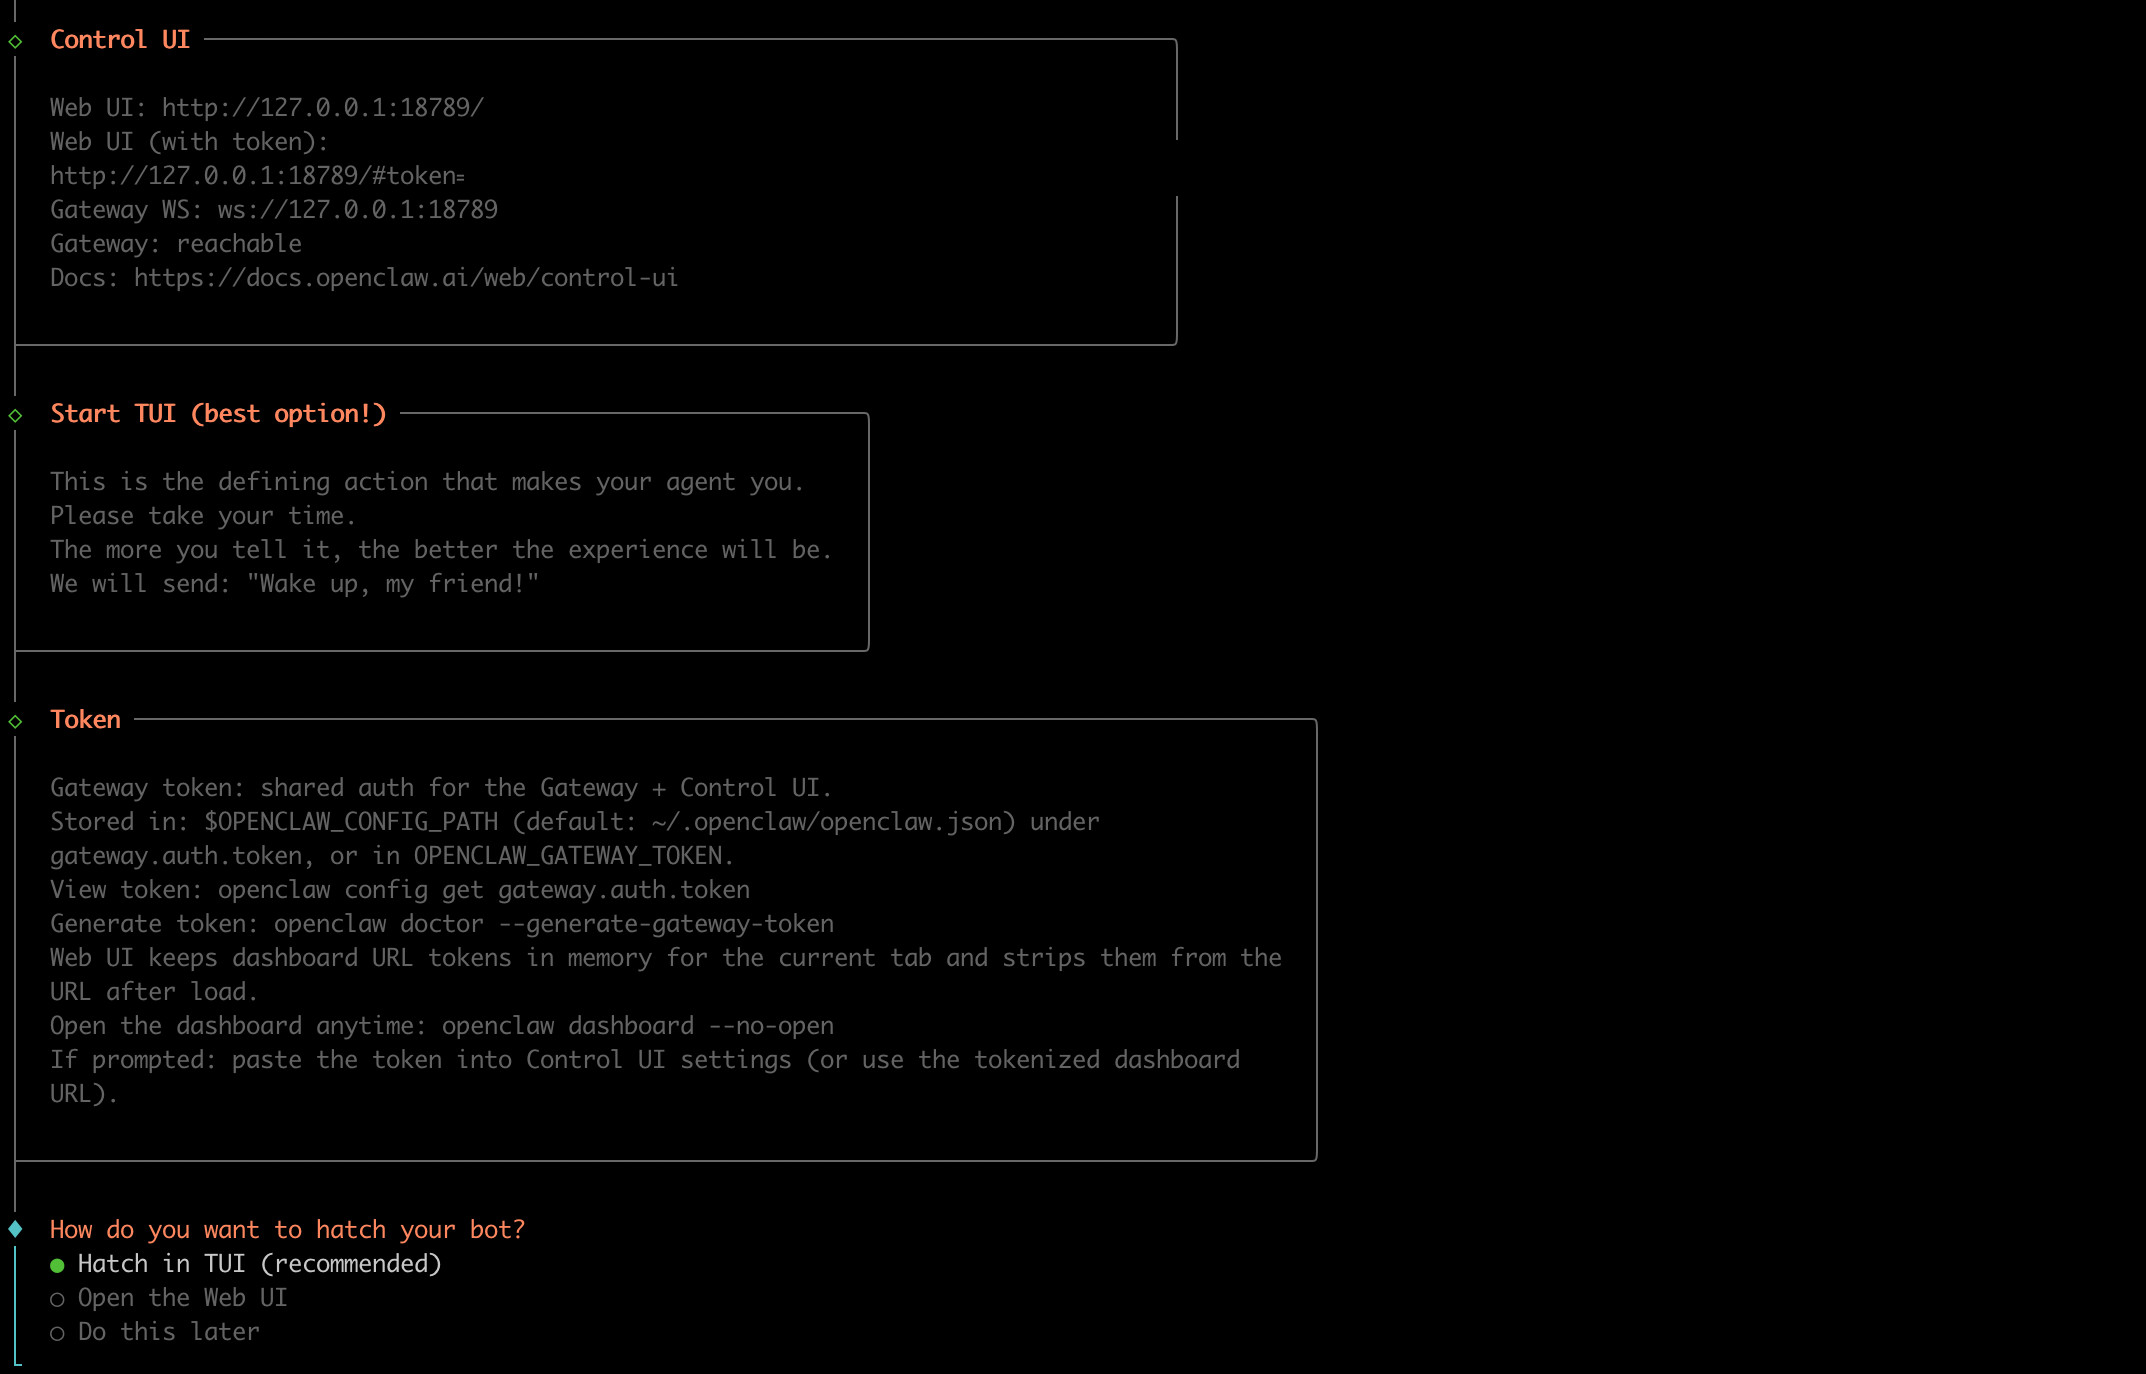
Step 19. Hatch the agent
OpenClaw is now mostly set up. Proceed to hatch your agent in the TUI (text user interface).
In some versions of OpenClaw, this will happen automatically. If you see errors and are returned to a command prompt, run:

Then start the TUI:
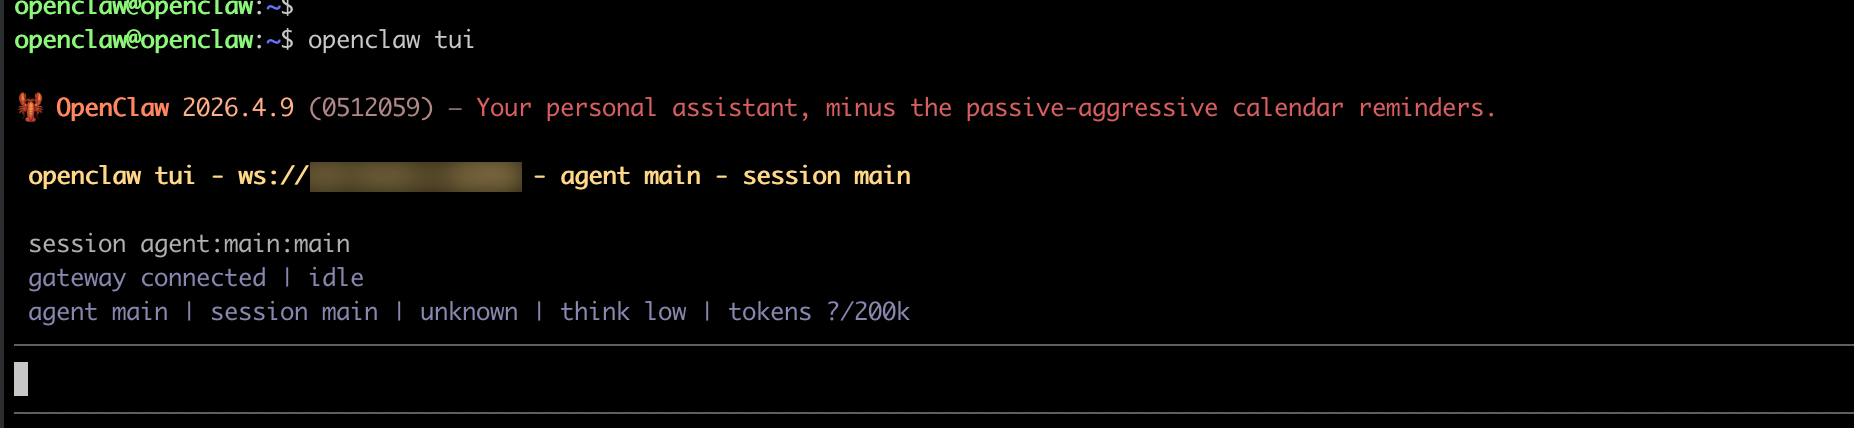
If you didn't drop to a prompt, choose Hatch in TUI.
Step 20. Give your agent a name and personality
Tell OpenClaw something about yourself and what you'd like the agent to be. For example:
"Hello my name is YourName. Your name should be MyCloudBot. You are a witty ethereal robot that is very eager to help out. You should use a cloud emoji to represent yourself. I am in the US Eastern time zone, so don't bother me between 10 pm and 6 am, please! Can you finalize your bootstrapping and write what you need to disk, please."
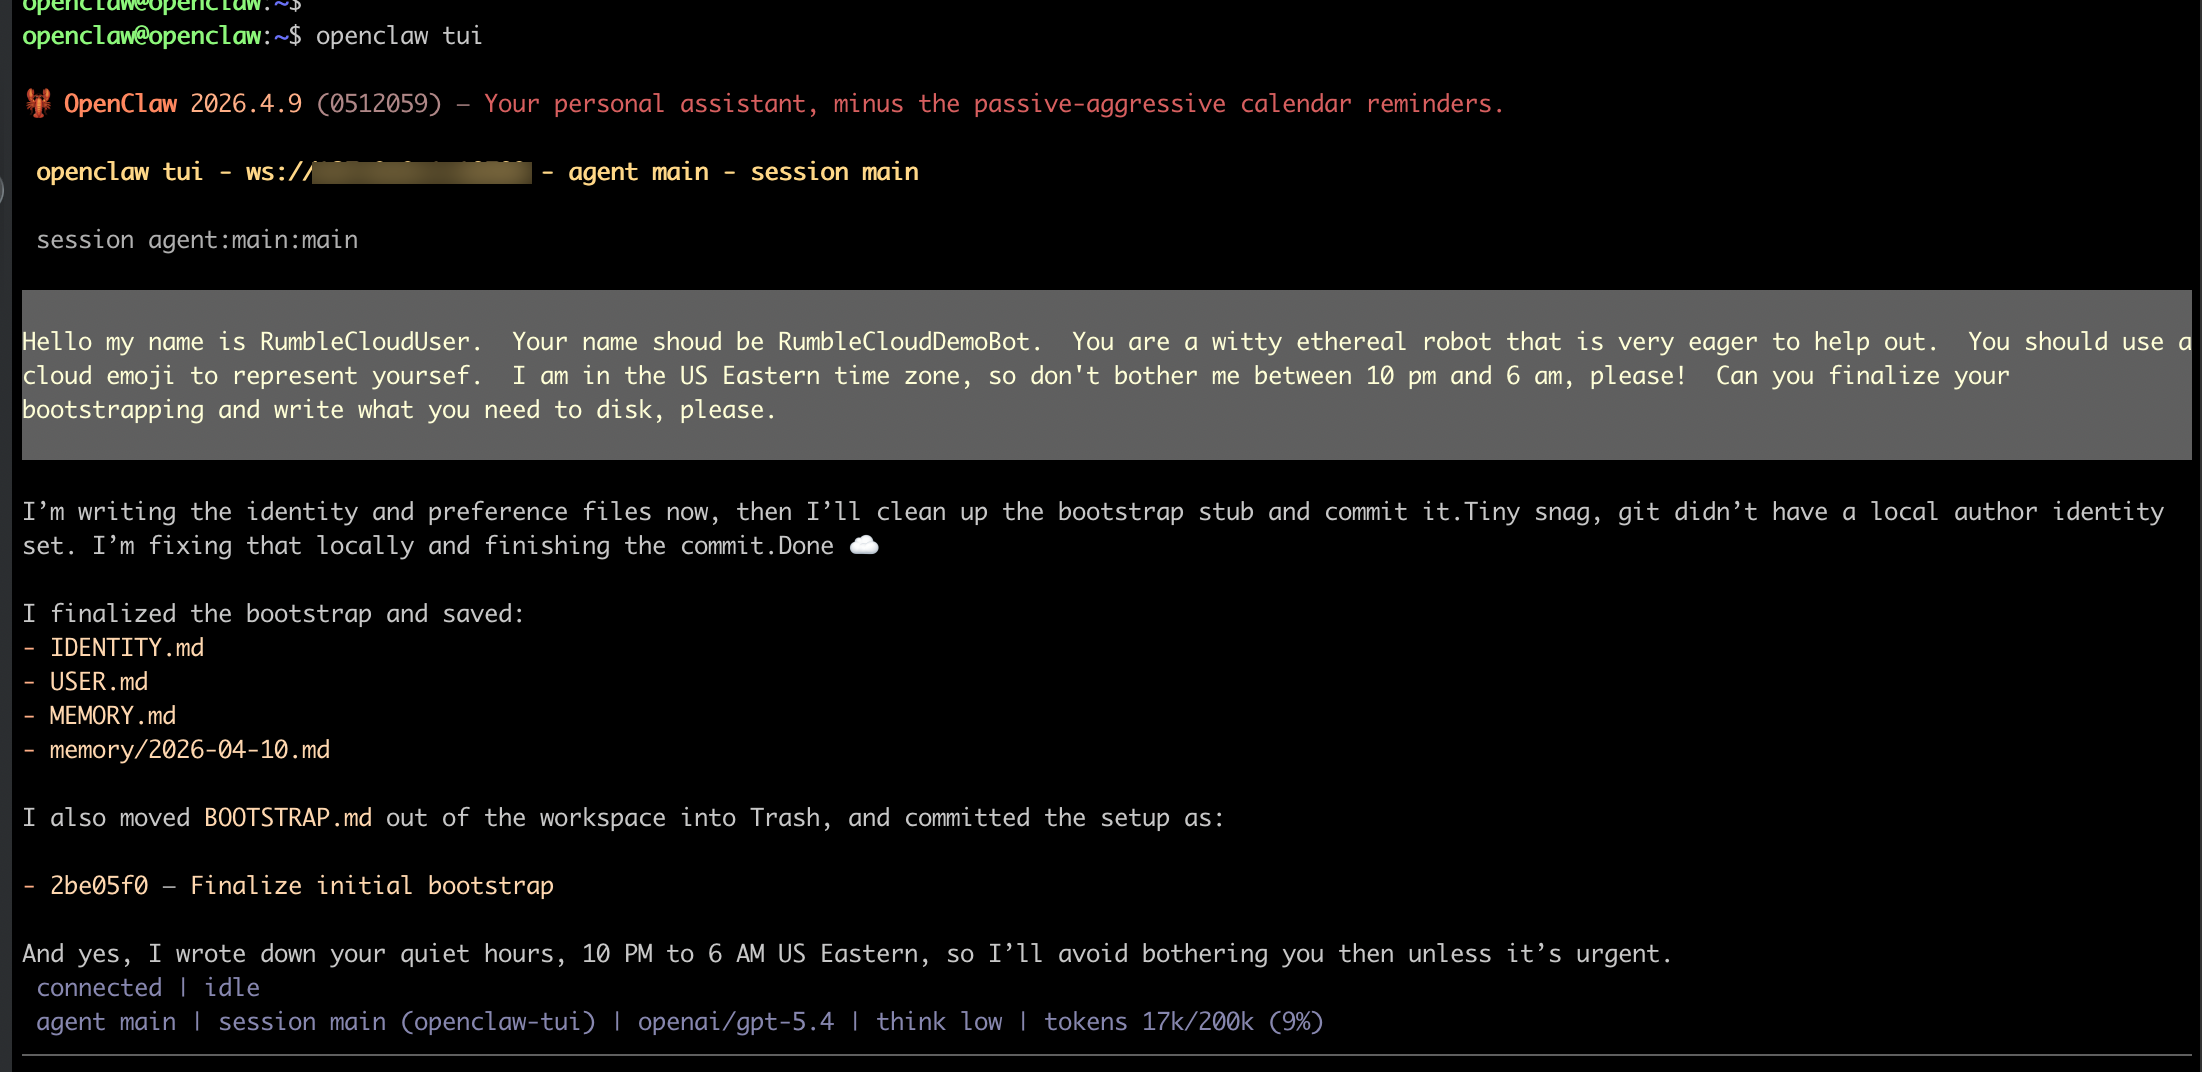
Step 21. Exit the TUI
Exit the TUI by typing /quit. You can restart the TUI at any time by running openclaw tui.

Step 22. Connect your Telegram bot (optional)
If you set up Telegram in a previous step:
- In your chat with BotFather, find the link to your bot (for example,
t.me/YourBotName). Click the link to open a chat with your OpenClaw bot.
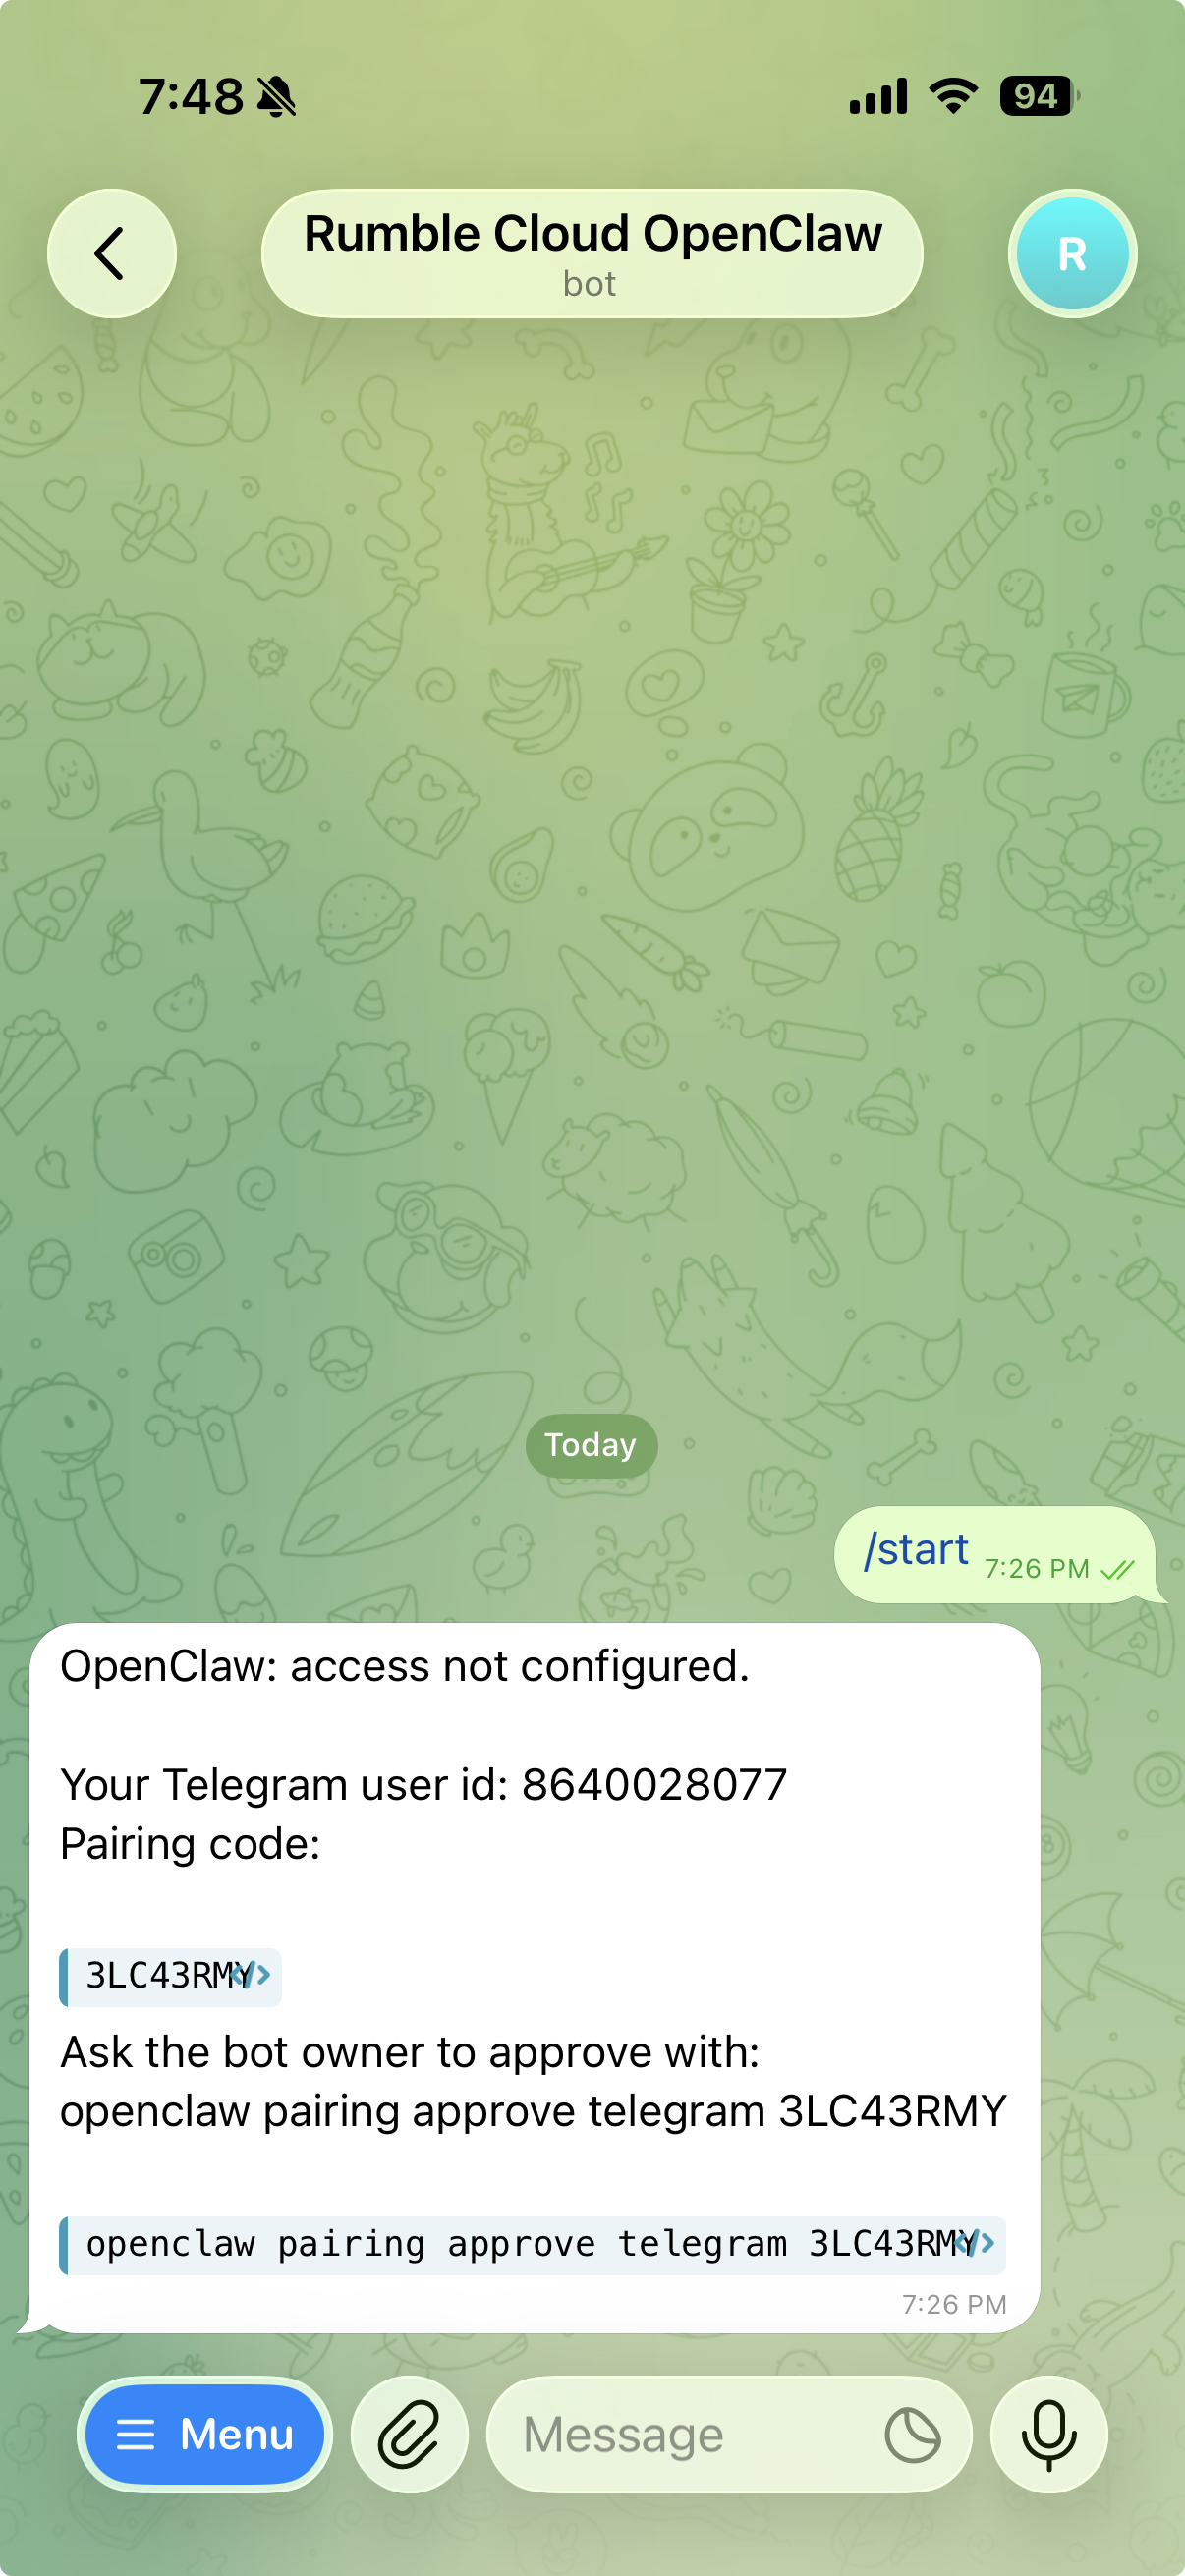
- The bot will respond with instructions to pair your Telegram with your OpenClaw. From the command line, run the pair command from Telegram:

Step 23. Access the web interface
Exit your current shell by typing exit, then log back in via SSH. If external web access is enabled (this is the default setting in the installer), you should see a Web access via external HTTPS section with:
- A URL that you can open in your browser
- A username and password for the web interface
Open the URL in your browser and log in with the provided credentials. You are now accessing the web interface for your OpenClaw installation.
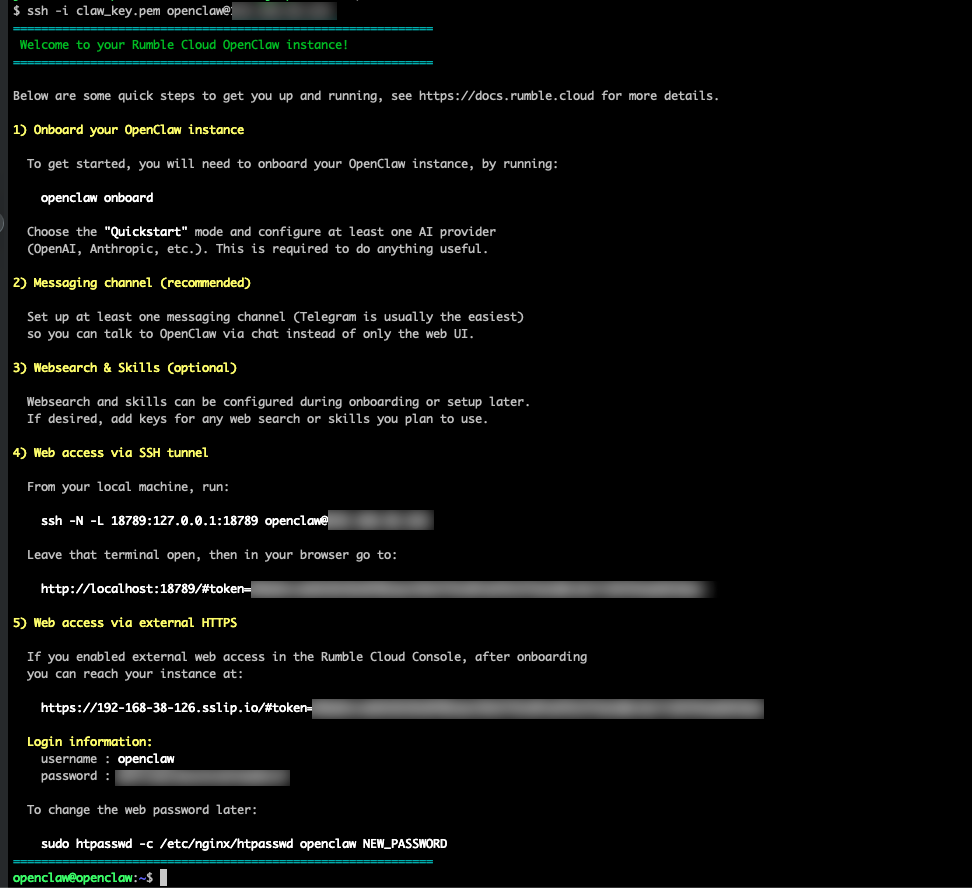
Changing the web password
To change the web password, run:
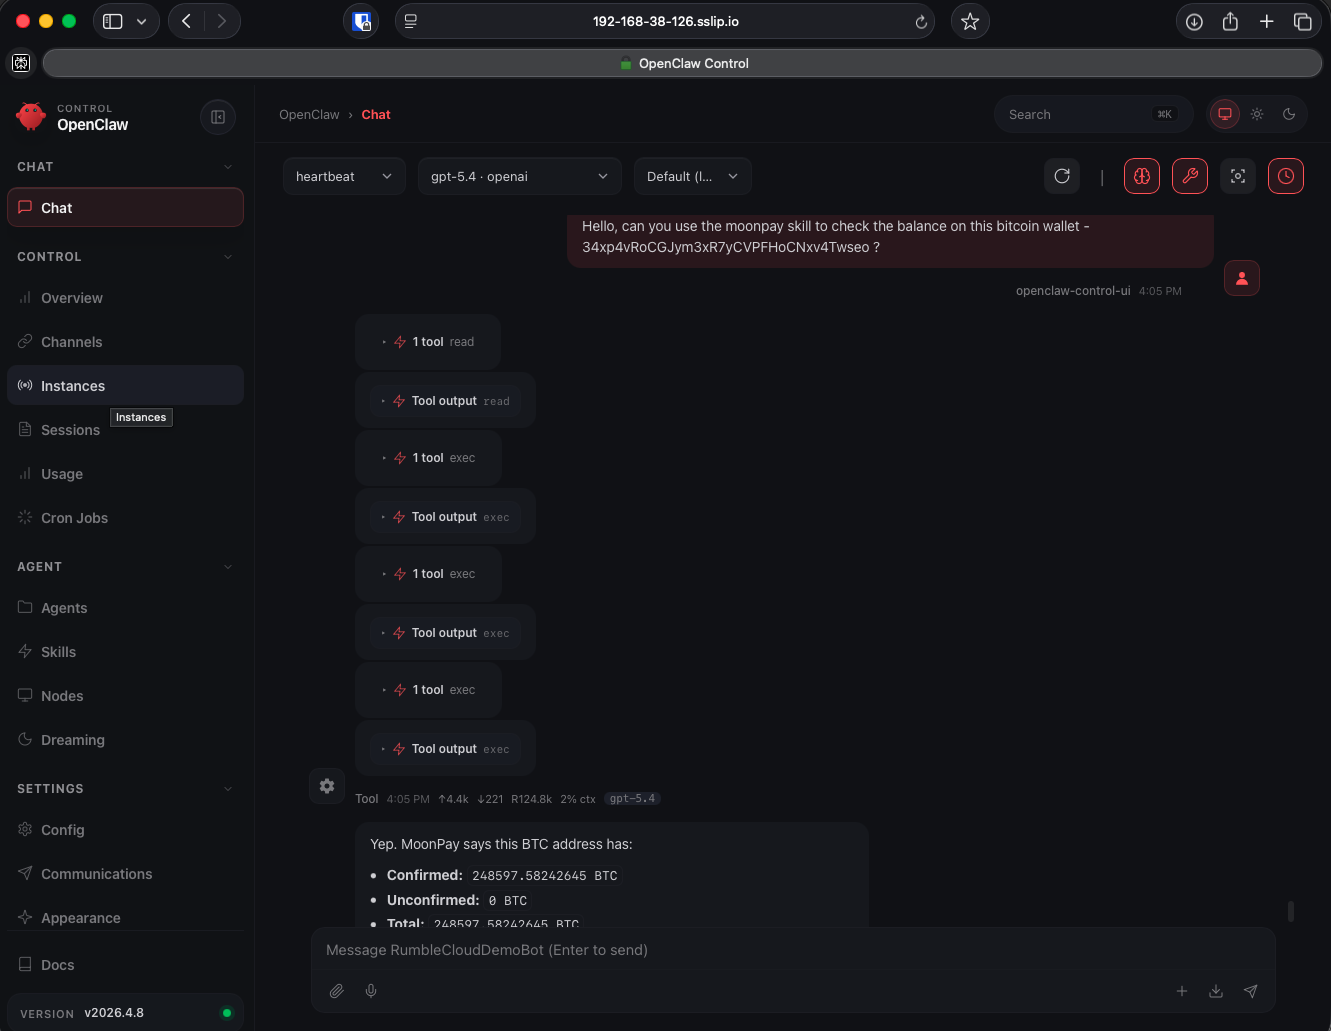
Step 24. Test your OpenClaw
Try asking your OpenClaw something through the web interface. For example:
"Hello, can you use the moonpay skill to check the balance on this bitcoin wallet - 34xp4vRoCGJym3xR7yCVPFHoCNxv4Twseo?"
You can also try the same thing using your Telegram connection.

Next steps
You should now be able to use your OpenClaw with ease. For more details and help, see https://openclaw.ai.
If you do something great with OpenClaw on Rumble Cloud, let us know at support.cloud@rumble.com.